
I had a lot to do today before even touching pondcam. First I wanted to go to first Friday Mass then have a lunch meeting with a friend of mine. While at lunch I was talking to him about Pondcam. He had all sorts of really great ideas. I mean really good ones. While we were casually talking about it something came to my mind. I said, “I just realized I never really got to see what the camera looks like under water.” He looked at me very plainly and said, “Oh.. You need to do that next”. He was totally right. I don’t know how that slipped out of the top priority. I did put it in the water, but it never showed anything because it wasn’t connecting. Then I got all distracted with the washout thing, then the dock idea came up and the coyotes were all on my mind during post 10. It was too much going on and that very important test slipped my mind. As soon as lunch is over I speed home to sink pondcam!
Now today is Friday and my family goes to my parents house for dinner. I really like to get there by 5PM or before so I hurry up and start getting to testing. I grab two landscaping pavers and place them in the pond in about 1 1/2 feet of water. I place them out into the pond a little (on the beach so I don’t have to step into gross clay). I tell Hannah (my six year old) to dig two holes for the back legs of our table. I needed to do these two things to make each somewhat level, so it doesn’t look stupid. I setup the camera and make sure it is sitting as deep into the water as it will go. Here is what it looks like.
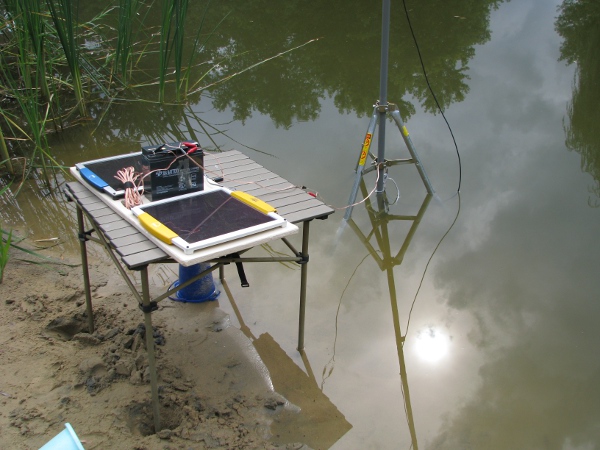
The water is pretty cloudy, but I don’t care. I need to see what it looks like from a computer, I run upstairs to look and I can’t see it on my computer (I found out later that I typed the wrong address for the camera when I was trying to ping it). I couldn’t so I grabbed the netbook and powered it up. I then connected to the camera and this is what I saw.

That is with the light on. I don’t know what to make of it. Why can’t I see anything? I must mess with the video settings, but I can’t. My wife and kids are already in the car waiting for me to hop in and go to grandma’s house. So I just anxiously leave everything the way it is.
While I was at my parents house I brought them all up to speed on where we are with pondcam and mentioned the fact that I can’t see anything in the water. My dad brought up a good point. He said that if there is nothing to see then it is likely that there will be no picture in front of the camera and it will be grey because there really is nothing there. He said you need something for the camera to focus on like a ruler or some sort of measurement in the distance a bit so there is something to focus on. Now that sounded good to me so at least it got it off my mind (We left as soon as we could from my parent’s house because I had to get home before there wasn’t anymore light).
When I get home it is a little bit light out. It it is 8PM or so. My wife Rosie takes the girls inside and I check out our camera.
As soon as I connect to it, it is the exact same thing. Just grey. I remember what my dad said and thought, “Well… I don’t really want a ruler out there, I want to see fish.” So I grab some fish food and throw it in the water all around the camera. I run upstairs to my office. I can see fish swimming around, but it is really messy. I can make them out, but it is terribly fleeting. I am more excited at this point than I have ever been during this whole project. I just love seeing those fish in the pond from my desk! I don’t care if the water is murky! I grab as many screen shots as I can and here is one of them after I turned on the light.
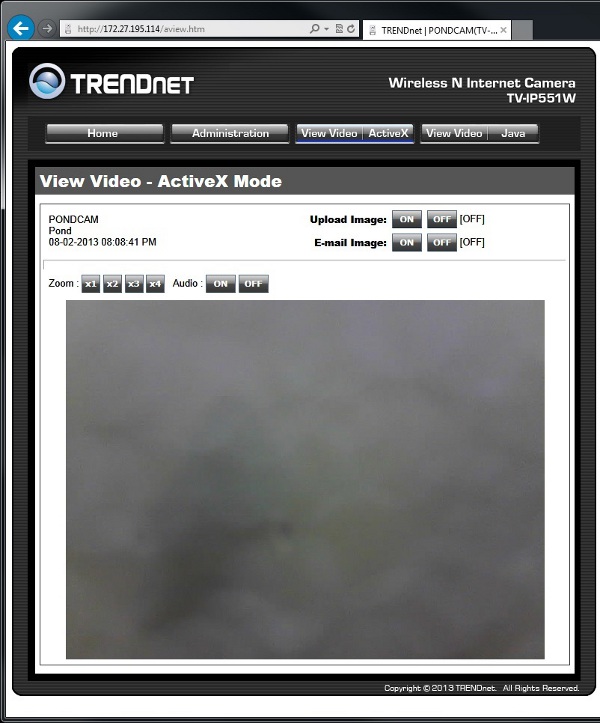
That picture is really crappy. But it is something. Here is what I really like; that is the face of a fish that was looking at the light. When I turned on the light and the sound was going I could tell the fish, every once in a while, we trying to take a bite out of the camera, I could hear them pounding on it. I could see them too. Sometimes pretty clearly, but always very fleeting I couldn’t get a good capture of it so the picture above is all that we have.
Another thing to notice about that picture is the weird bubbly mess all over. It is hard to make out from this picture, but as I watched the video it was a little clearer, it looks as if tiny bubbles formed right over the lens as I sunk it. I have to figure out what that is about because it looks terrible.
I run outside with a paper towel, take off my shoes and march out into the pond (I discovered there was a leak in my pond sloshing boots, so I have to get new ones). I wipe down the Plexiglas on the front of the camera, and literally run back to my desk to see if I can grab a screen shot of what I see (Yes I am back to running all the way back up to my office, I know I am nuts). I see fish swimming past the camera. It isn’t is as clear as I want it, I try to capture the picture, but I got all screwed up messing around with video settings to get something clear, but it was too late… It got dark. Even with the light on I can’t see anything in front of the camera. I can say the weird bubbles are gone, but the picture just wasn’t clear like I was hoping. I really need to do some better underwater tests.
I think that I really need to start recording or getting better pictures instead of my screen captures. There are some more features on this little camera. It came with some recording software. I played with it a little bit but not enough to really know what it does, let’s look at that.
The software is “SecurView Pro” and it came with the camera. When I first installed it and attached it to the camera it looked pointless, but then after I dove into it tonight, I can see it really is perfect for what I want. Here is what I want and it matches nicely to its features:
1) I want to record only motion in front of the camera so I can see what is going on. If there is nothing going on and all it sees is grey, then don’t bother recording because that is boring. Well the software does that.
2) I want to record sound because if a big fish tries to eat the camera even if I can’t see it I would like to hear it.
Those features are well within the software’s capabilities so I start it up and also start my normal web browser connection to the camera. Currently it looks like this (I turned the light off, it wasn’t doing anything anyway and I hope to capture something big moving past the camera in the morning).

If I can figure out a way, I will get some recording of what is going on and figure out how to embed the video into my blog. All I have to do is wait for something interesting to happen. I really hope I setup the motion recoding properly. I have no way to test it. I also hope the camera doesn’t have a small leak and will be filled with water by tomorrow as I am leaving it in the pond overnight!
A little while later I see the camera go down then come back up again. I fuss with it a bit, then a little while later it just goes down and doesn’t come back up. I figure, well it is nighttime and the battery is probably dead. I thought to myself, “I did fully charge it so it should really be good until morning. Maybe that battery is no good too, or maybe we sprang a leak”. I will wait until tomorrow when the solar panels get some sun and see what the story is.
—- Next day —-
I have to work in the morning for a customer so I don’t have a lot of time. Before I leave the Sun is just about to shine over the oak trees on our solar panels which should turn the camera on. It may be a little while. I did check to see if could at least ping the camera and I couldn’t. I don’t have time to mess with anything so I just take off to the customer’s site.
I worked until about 2:30 and didn’t get home until 3:30PM. I still had stuff to do. I don’t bother messing with the recording software because that obviously wouldn’t have anything on it. I check our camera. I don’t want to pull it out of the water. I want it to stay, this will be a good underwater test if I can get it back up.
I run over to the camera and I disconnect and reconnect the battery to see if it will come up… Nothing. I mess with the direction of our cantenna and try to reboot the camera again, still nothing. I then notice I never plugged it into the solar panels. I thought, “Oh… that is it duh!” I plug them in and figure there will totally be enough power because of all of the tests we did in earlier posts. Still nothing. I can’t ping the camera, I can’t connect to the camera. It is down.
I even pulled out some “known to be good batteries” out of a UPS that is sitting in my basement (a UPS is a power supply for a computer that will keep it on when the power goes out). The batteries are brand new, but I have to break them apart because they are stuck together with really sticky double sided tape. I bring one of them out and connect it. Still nothing!
I am convinced. The camera might be dead.
I go to the beach and drag it out of the water and set it upright on my patio. I see something right away that looks really bad.
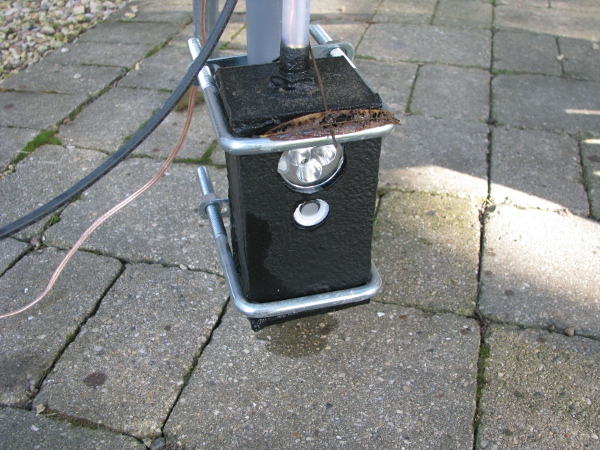
Just look at the lens. It has got fog on it. I don’t think it was that humid when I put the top on it. I pull it off the mount and turn it upside down so I can see if there is water in it.
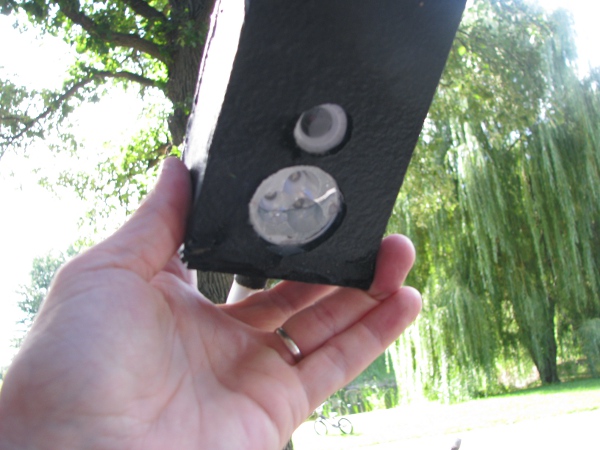
Oh… That is pretty much the worst thing that could happen to our camera (Aside from lightning). There is water in it. My waterproofing job didn’t work at all. I dry the outside as good as I can and take advantage of the water that is still in it. I want to see where the leak is. I stand it back on the table and just look around for water leaking out.
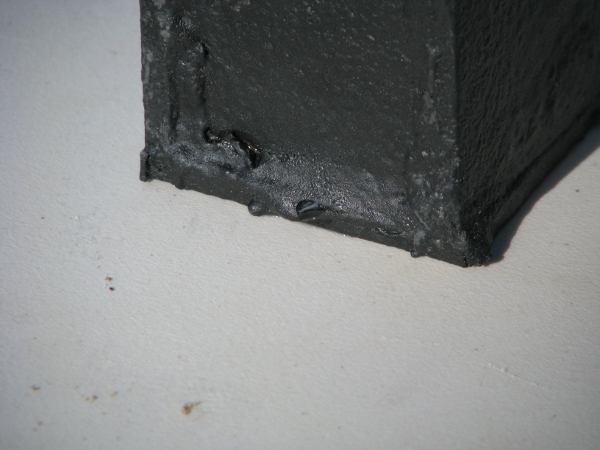
I can see two leaks there. There may be more on the top and sides. That is a really really bad water proofing job. I thought we tested this and it was going to just work. We aren’t going that deep. I have old empty Clorox bottles with just their caps on floating beneath the surface of our pond for over two years to allow me to pull up the diffusers that are attached to my windmill pump. They don’t sink. It is late summer and they are still fine, but our epoxied, gooped, rubberized paint sealed camera didn’t last overnight. That is bad bad bad. The camera might be toast.
Now you may think this makes me sad. But it really doesn’t. Not even a little bit. It is the punches that you don’t see coming that knock you out. I always thought waterproofing was going to be the hardest part. I am familiar with the techniques to get every part of our pondcam working before we started, so I at least knew I had a shot at it. The one part that I never did before in my whole life was actually waterproof an electronic device so you can put it under water. More than ever I want to figure that part out.
Another thing. I really am a Pollyanna by nature. Like the ugly burnt power supply there may be a chance that we can get this sucker to come back to life. It is a small chance, but definitely there is a chance.
Now I know what you are thinking, “What are you talking about? You are crazy, that sucker is dead just like the battery charger your sister and wife connected to the car the wrong way. It has water in it you DUMB DUMB! This Pollyanna crap has got to stop, you are wasting all of our time. Just tell us what you are going to do now.” Now that is what you are thinking, let me tell you what I am thinking:
– Granted there is water in that camera. And I did all sorts of bad things when that happened. Instead of quickly pulling it out of the water and drying it off, I let it sit in the pond overnight. That was really bad. Another thing I did was to keep trying to power it up. I connected solar power to it, when that didn’t work I connected brand new batteries to it. Oh… That is really really bad. I did notice a spark when I connected the new battery to it too… That probably fried a bunch of stuff, but… maybe it didn’t.
– I have seen all sorts of devices come back to life after they dry. Twenty years ago I dropped a pager into a cup of coffee when I was driving. I pulled it out and dried it off. It smelled like coffee forever (I think I still have it somewhere), but it worked.
– My buddy was canoeing in my pond last spring and fell in. His cell phone got all wet and he put it in rice for a month. He turned it on and it was broken. He left it in the rice for a few more weeks and then it worked. As far as I know that phone is still working.
– I jumped into my ornamental pond with a brand new phone to get my niece out of there when she fell in. It was dead when I got out, but I stuck it in rice and in the morning it worked.
– My nephew took a digital camera and put it in water. I took it apart and dried it all off and it worked again too.
OK.. Granted we cant do the “rice trick” to dry out our camera. It will be 50 years before we can finish. So I have to think of something else.
There is a LOT of water in it. It isn’t filled to the top, but there still is a bunch. I clip our antenna connector off and pull off the clear tubing that is connected to the brass fitting. I empty out whatever water I can.
I don’t want to take the camera apart (Remember the pegs I drilled holes for to push the camera and light? I would have to destroy the whole case and start over). I haven’t even figured out how to cut Plexiglas properly so the next case I make wont leak. I am hoping I can save this one… somehow. I have to figure out how to dry this sucker out without opening it and my only opening is the unplanned holes that are at the bottom and the brass fitting at the top.
I look around for a way to dry it out. I do have a lot of canned air. It isn’t warm dry air that would really help dry the camera, but it will do something, so I stick it in the brass fitting and just blow the remaining contents of the can into it.

Water is coming out all over the place. This is getting some of the remaining water out, but I know to make it totally dry inside I am going to need to do something different. I want to do the “rice trick” on steroids.
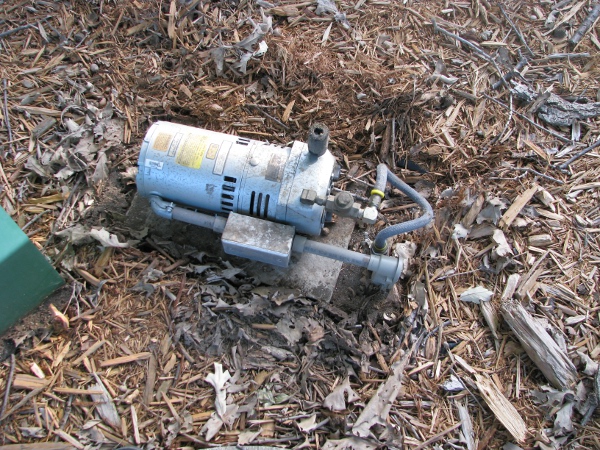
I am pretty desperate for ideas where I can get air. Now I have lots of things that can blow air into this camera to dry it out. I have blow dryers (Like for hair), I have electric air pumps for bikes and car tires, but I really want something that will run for a long time. Like overnight. Blow dryers and tire pumps are not designed to do that at all. I am getting so desperate I am even asking my wife, who doesn’t care about pondcam in the least, if we have a bubbler for our fish tank. I ask her, ” Do we have to have a bubbler for a fish tank”. She says, “No”. I believe her because I don’t remember ever seeing one and if I did have one I would have set it up this year when I cleaned out the ornamental pond and put my biggest fathead minnows in the fish tank overnight. They died from lack of oxygen. So the bubbler idea is out. Too bad because it would have been perfect. A constant stream of air pumping into our camera overnight to dry it out completely. Then it hit me… I have one of these!
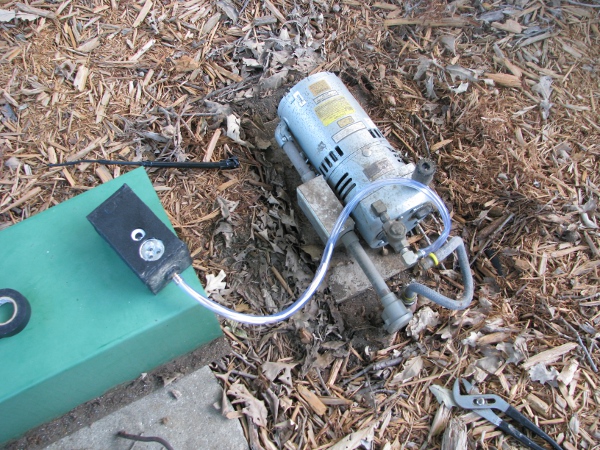
That is a septic tank aerator. And I know a hell-of-a-lot more about these than I ever wanted to. When I bought this house I noticed an big jewel light attached to a power junction box against the basement cement wall toward the back of the house. During the first year we lived here I didn’t have much going on in the basement at the time so I almost never went down there. One day I was getting something downstairs and I notice this light flashing and this kind of quiet alarm noise. Not loud enough to be heard upstairs, but definitely loud enough to be really annoying in the basement. Well, I figured out what it was. The motor/aerator for the septic was dead. I bought a mantenence kit which required me to pull it all apart and replace what looked like graphite blades that run in a housing to pump out the air. When I was rebuilding and testing it I did notice three things. 1) It was warm air. 2) I was probably about 15 PSI. I could easily hold the pressure back with my hand against the air outlet. 3) And this is the most important. This air pump is meant to pump air 24x7x365. It runs all of the time.
Now I know what you are thinking, “You have got to be kidding me Joe. Don’t hook your pondcam up to that, just leave that alone. That is an important functioning device that is part of your home. If you disconnect that it may ruin you septic and then you will have a whole mess on your hands”. Yes… And you are exactly right, I would have thought the exact same thing. But when it broke and I ordered the repair parts I talked to the lady on the phone and she said, “Oh.. Those go out for people all of the time, as long as you get them up and running in a week or so you will be fine”. Good enough I thought. Last year (during the drought, when the wind wasn’t blowing at all to aerate my pond) I hooked up water hoses all the way up to the outputs of my windmill aerator to pump air into the pond for a few days (That was like 300 feet or more away). I may actually do that again this year if I want to clear up the water for pondcam.
Now we have to figure out how to use that warm dry air coming out of our septic aerator to dry out our pondcam. Let’s pull the cover off as I forgot what those connections look like.
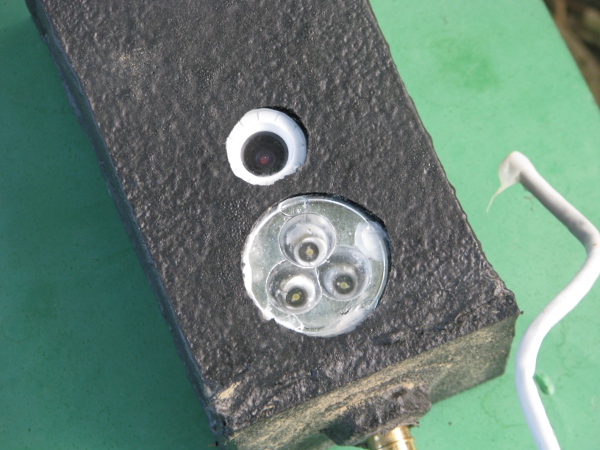
OK… We can do something with that. I take our camera and drill some holes across the bottom where we know the leaks are.
It doesn’t look like holes are there but there are. They are really small and I drilled like six right across the bottom (On the other side of the camera where the air will be coming in). You can also see I cut a nice long length of the clear tubing to push our wires through to allow us to pump air right into the camera. Here is what it looked like after I got the wires through (I had to give the three sets of wires a thin coating of motor oil so I could get them through that tubing and attach the it to the brass fitting).
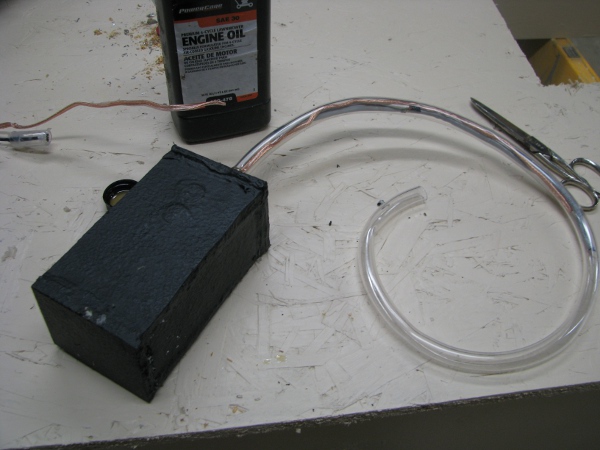
The rest is easy. I just take that, disconnect the output to the aerator and connect our pondcam. Here is what it looks like.
Now I really learned a lot when I did this. Little bits of water were coming out from all over. Top and bottom the sides, everywhere. My seals on this case were just terrible. I am happy though. I found a really good way to test the pondcam for leaks that won’t risk its life (If it ever works again). I can hook it up to this thing and stick it in water. If I don’t see bubbles we could sink the enclosure to the bottom of the pond and it would be fine.
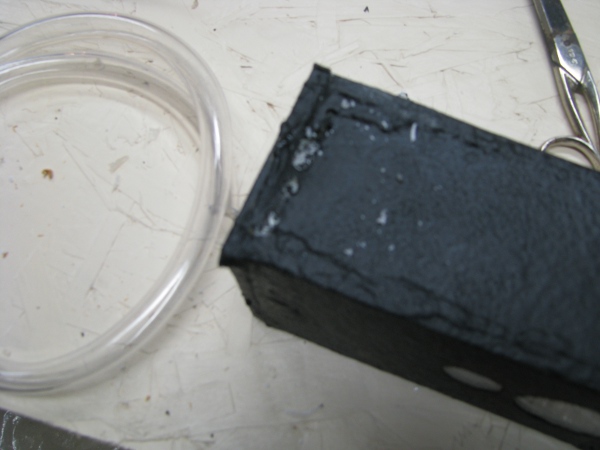
I want to leave it there until it is completely dry. I look for evidence of water that I can watch for to dry up so I can test it. I do see this.
There is some water that I can see (not glue) that if it is dried up I can test.
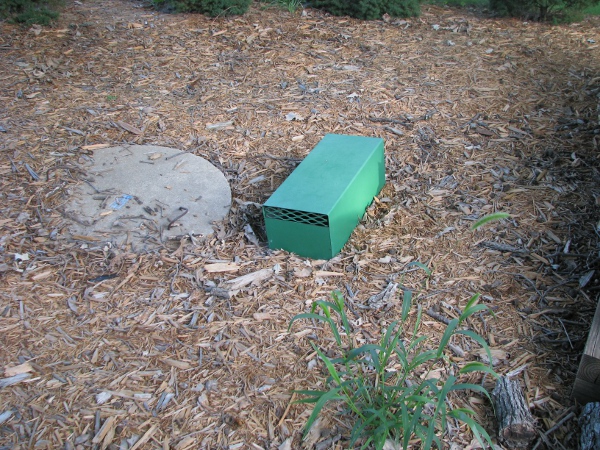
After a couple of hours it really looks dry. I pull it off of the pump and see if it works.
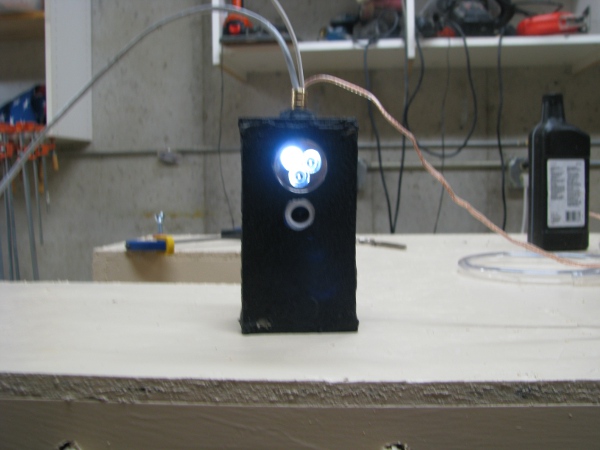
Now I can see right away that is not right. Two of the LEDs are not as bright as the other. That tells me something is wrong. They were always the same and very bright. Water must still be in the camera. I test it anyway, but it still doesn’t look like it is working. It does act like it is turning on, but I get nervous while trying to connect to it and just give up for the night. I re-attach it to the aerator and put it under that green cover over night. After Mass tomorrow it will be dry. If it doesn’t work then, it will be garbage time for that camera.
I am very intersested in what everyone thinks at this point because I have no idea if the camera will work or not. I would love to see some comments on this. If you think the camera is dead or not. I have some hope, but again… It may be over for the camera and I will have to find another.

I don’t know… it’s hard to believe that it would be dry by today… but I would like to see it resurrect itself. I’m rooting for pondcam!
Should have used the glass tupperware idea