
So we are getting pretty close to turning this thing on. I do have to mount the power supply. As I am looking at it I see this.
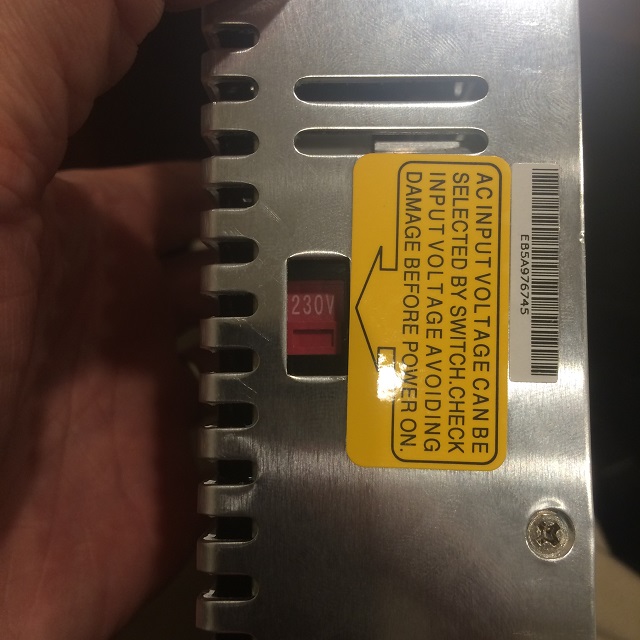
I need to set that to 120 volts or it won’t work. I am glad I caught that. It would have probably taken me a while to figure out and it would been some frustrating troubleshooting.
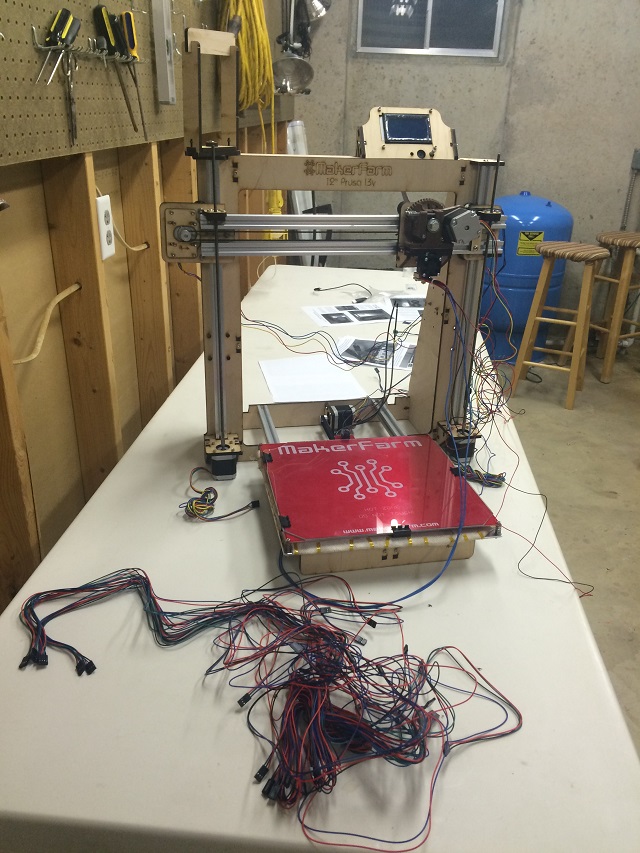
The workshop is still a mess and I am a little upset at the lack of progress. I need to be more aggressive finishing it up. I am super intimidated by all the cables that came with the thing. I also have a lot of nuts and bolts left over and don’t think I will need all of them.
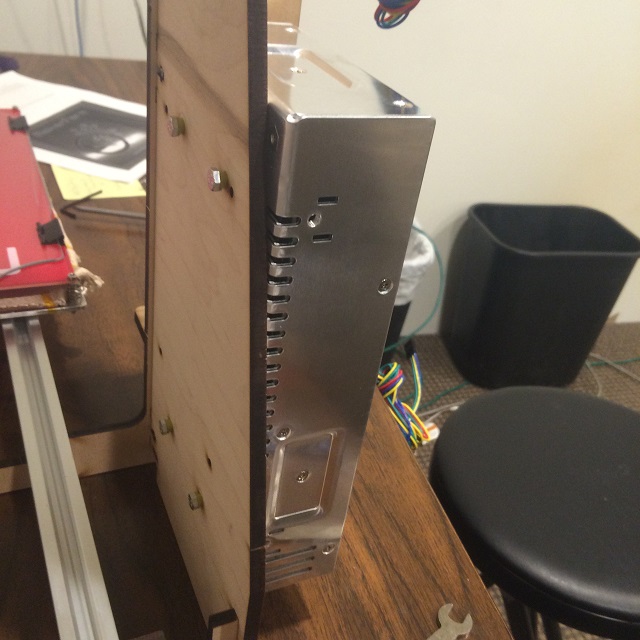
Anyway… I had to go to the hardware store to get some bolts to attach the power supply. I forgot to get washers, but made some out of some plastic anchors for drywall. Here is what the power supply looks like.
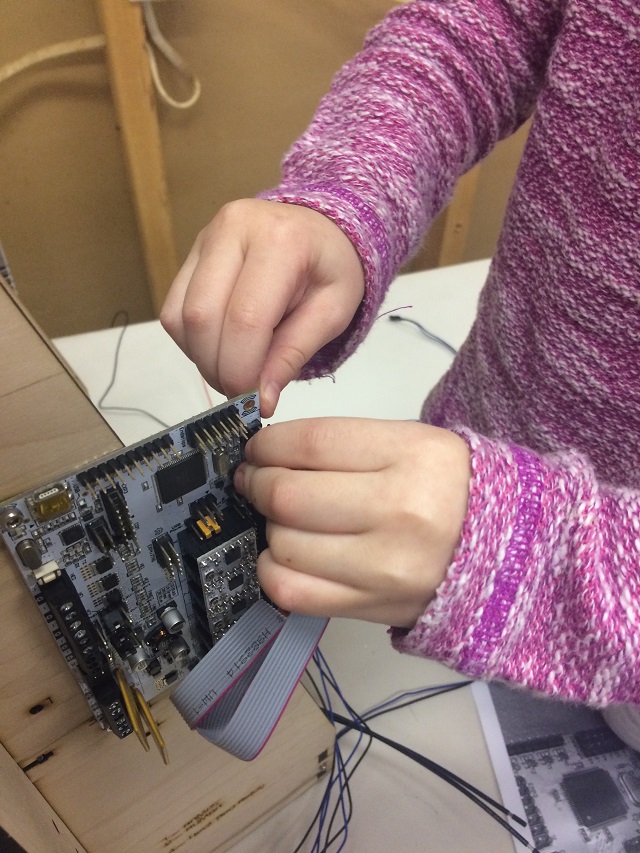
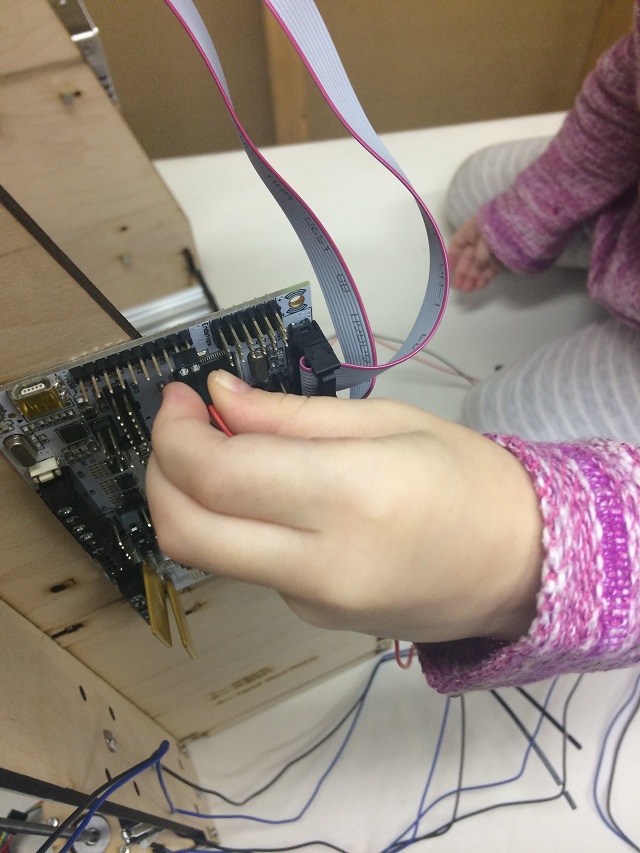
I mount the brains of the device, the Rumba board and have Hannah help me cable it.
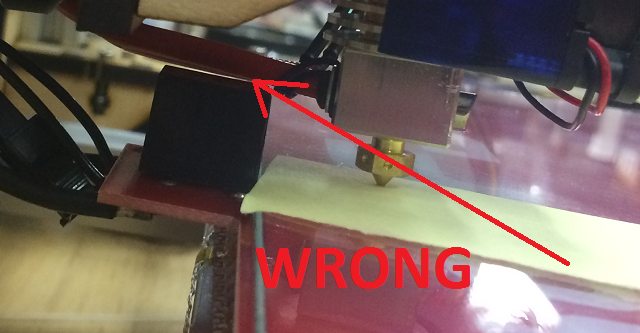
Now I hit a pretty intimidating looking part. Setting up the thermistor for the hot end. I didn’t notice when I took this picture, but it is wrong. I basically put insulation around both wires and not one. This is an example of the wrong way to do it.
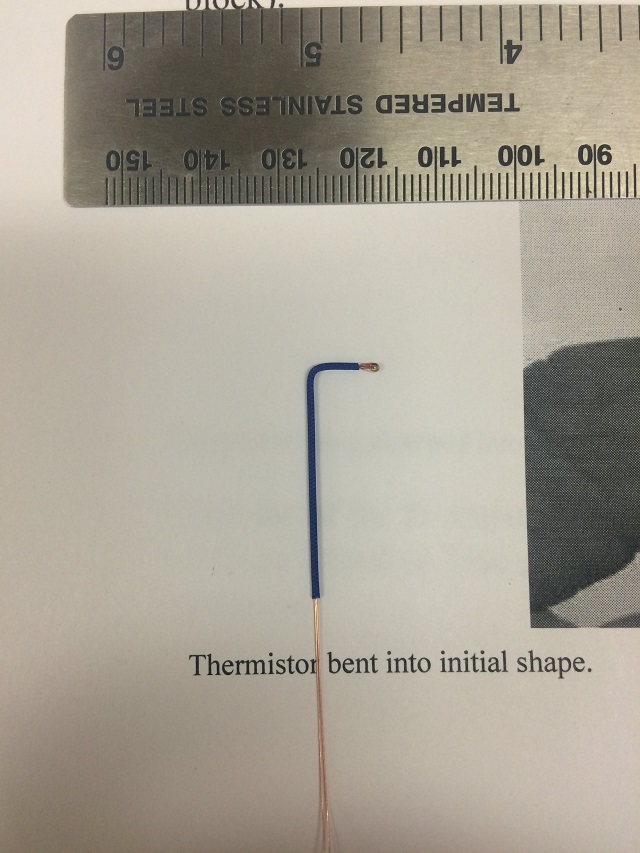
What I needed to do what to separate the very thin wires and push them through the insulation, then they need to be fitted into the hot end where the plastic comes out.
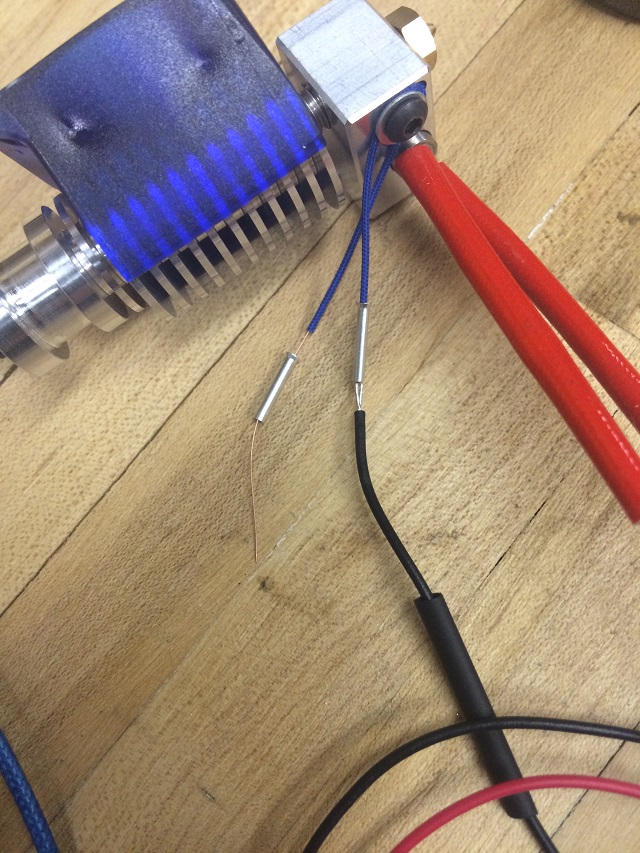
This is a picture of what it is supposed to look like. Those aluminum tubes I have on the wires are going to be crimped. The thermistor is under that black bold above the two thick red wires. I hope I did that right.
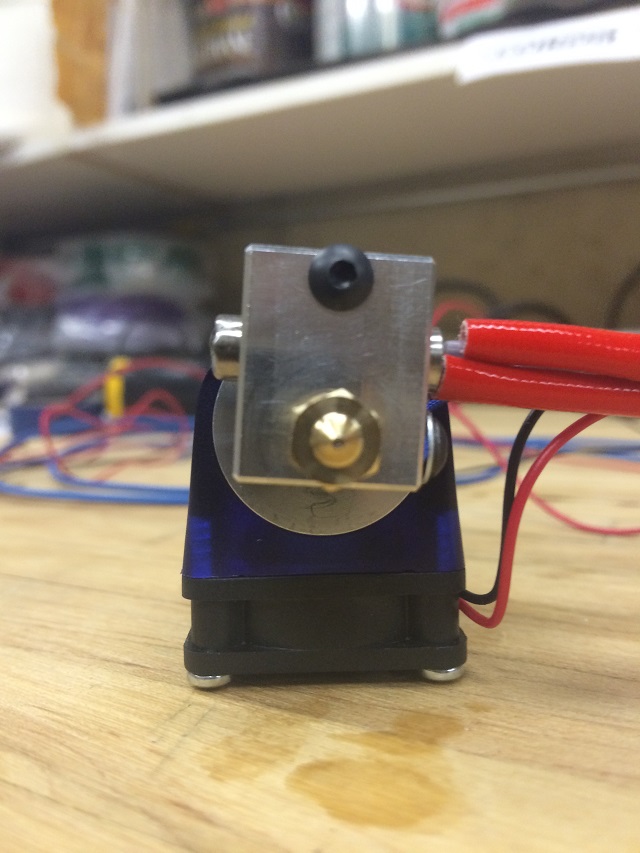
Here is what the finished hot end looks like. My buddy Charlie told me I need to finish tightening that while the machine makes it hot or it will leak. I saw that in the manual. It is important because if I make it tight now, then it heats up the metal will expand and then it will be lose and leak molten plastic.
Here is a picture of the tiny hole that PLA material will come out when printing.
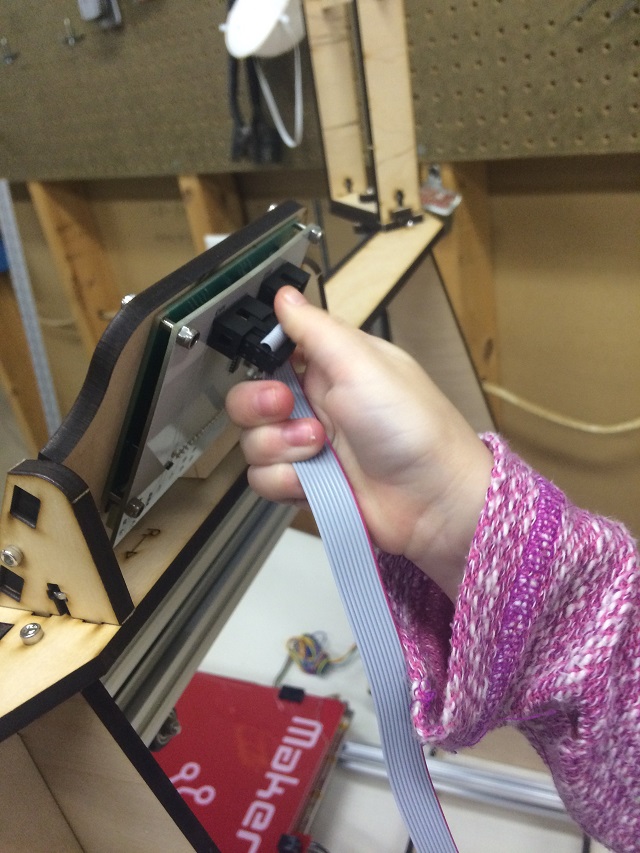
I mount that and this is what it looks like.
I next start to connect all the motors and power supply. My smallest screwdriver from my board wont fit.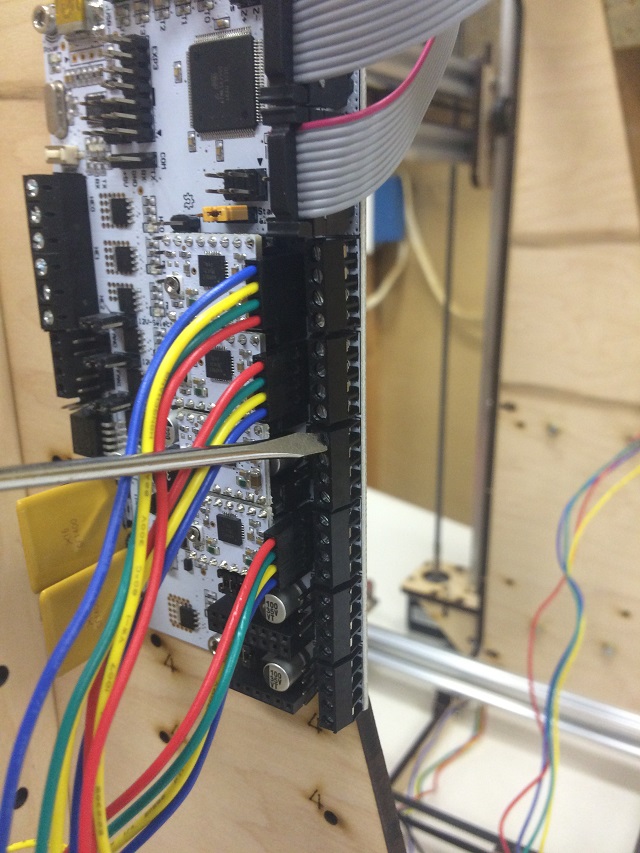
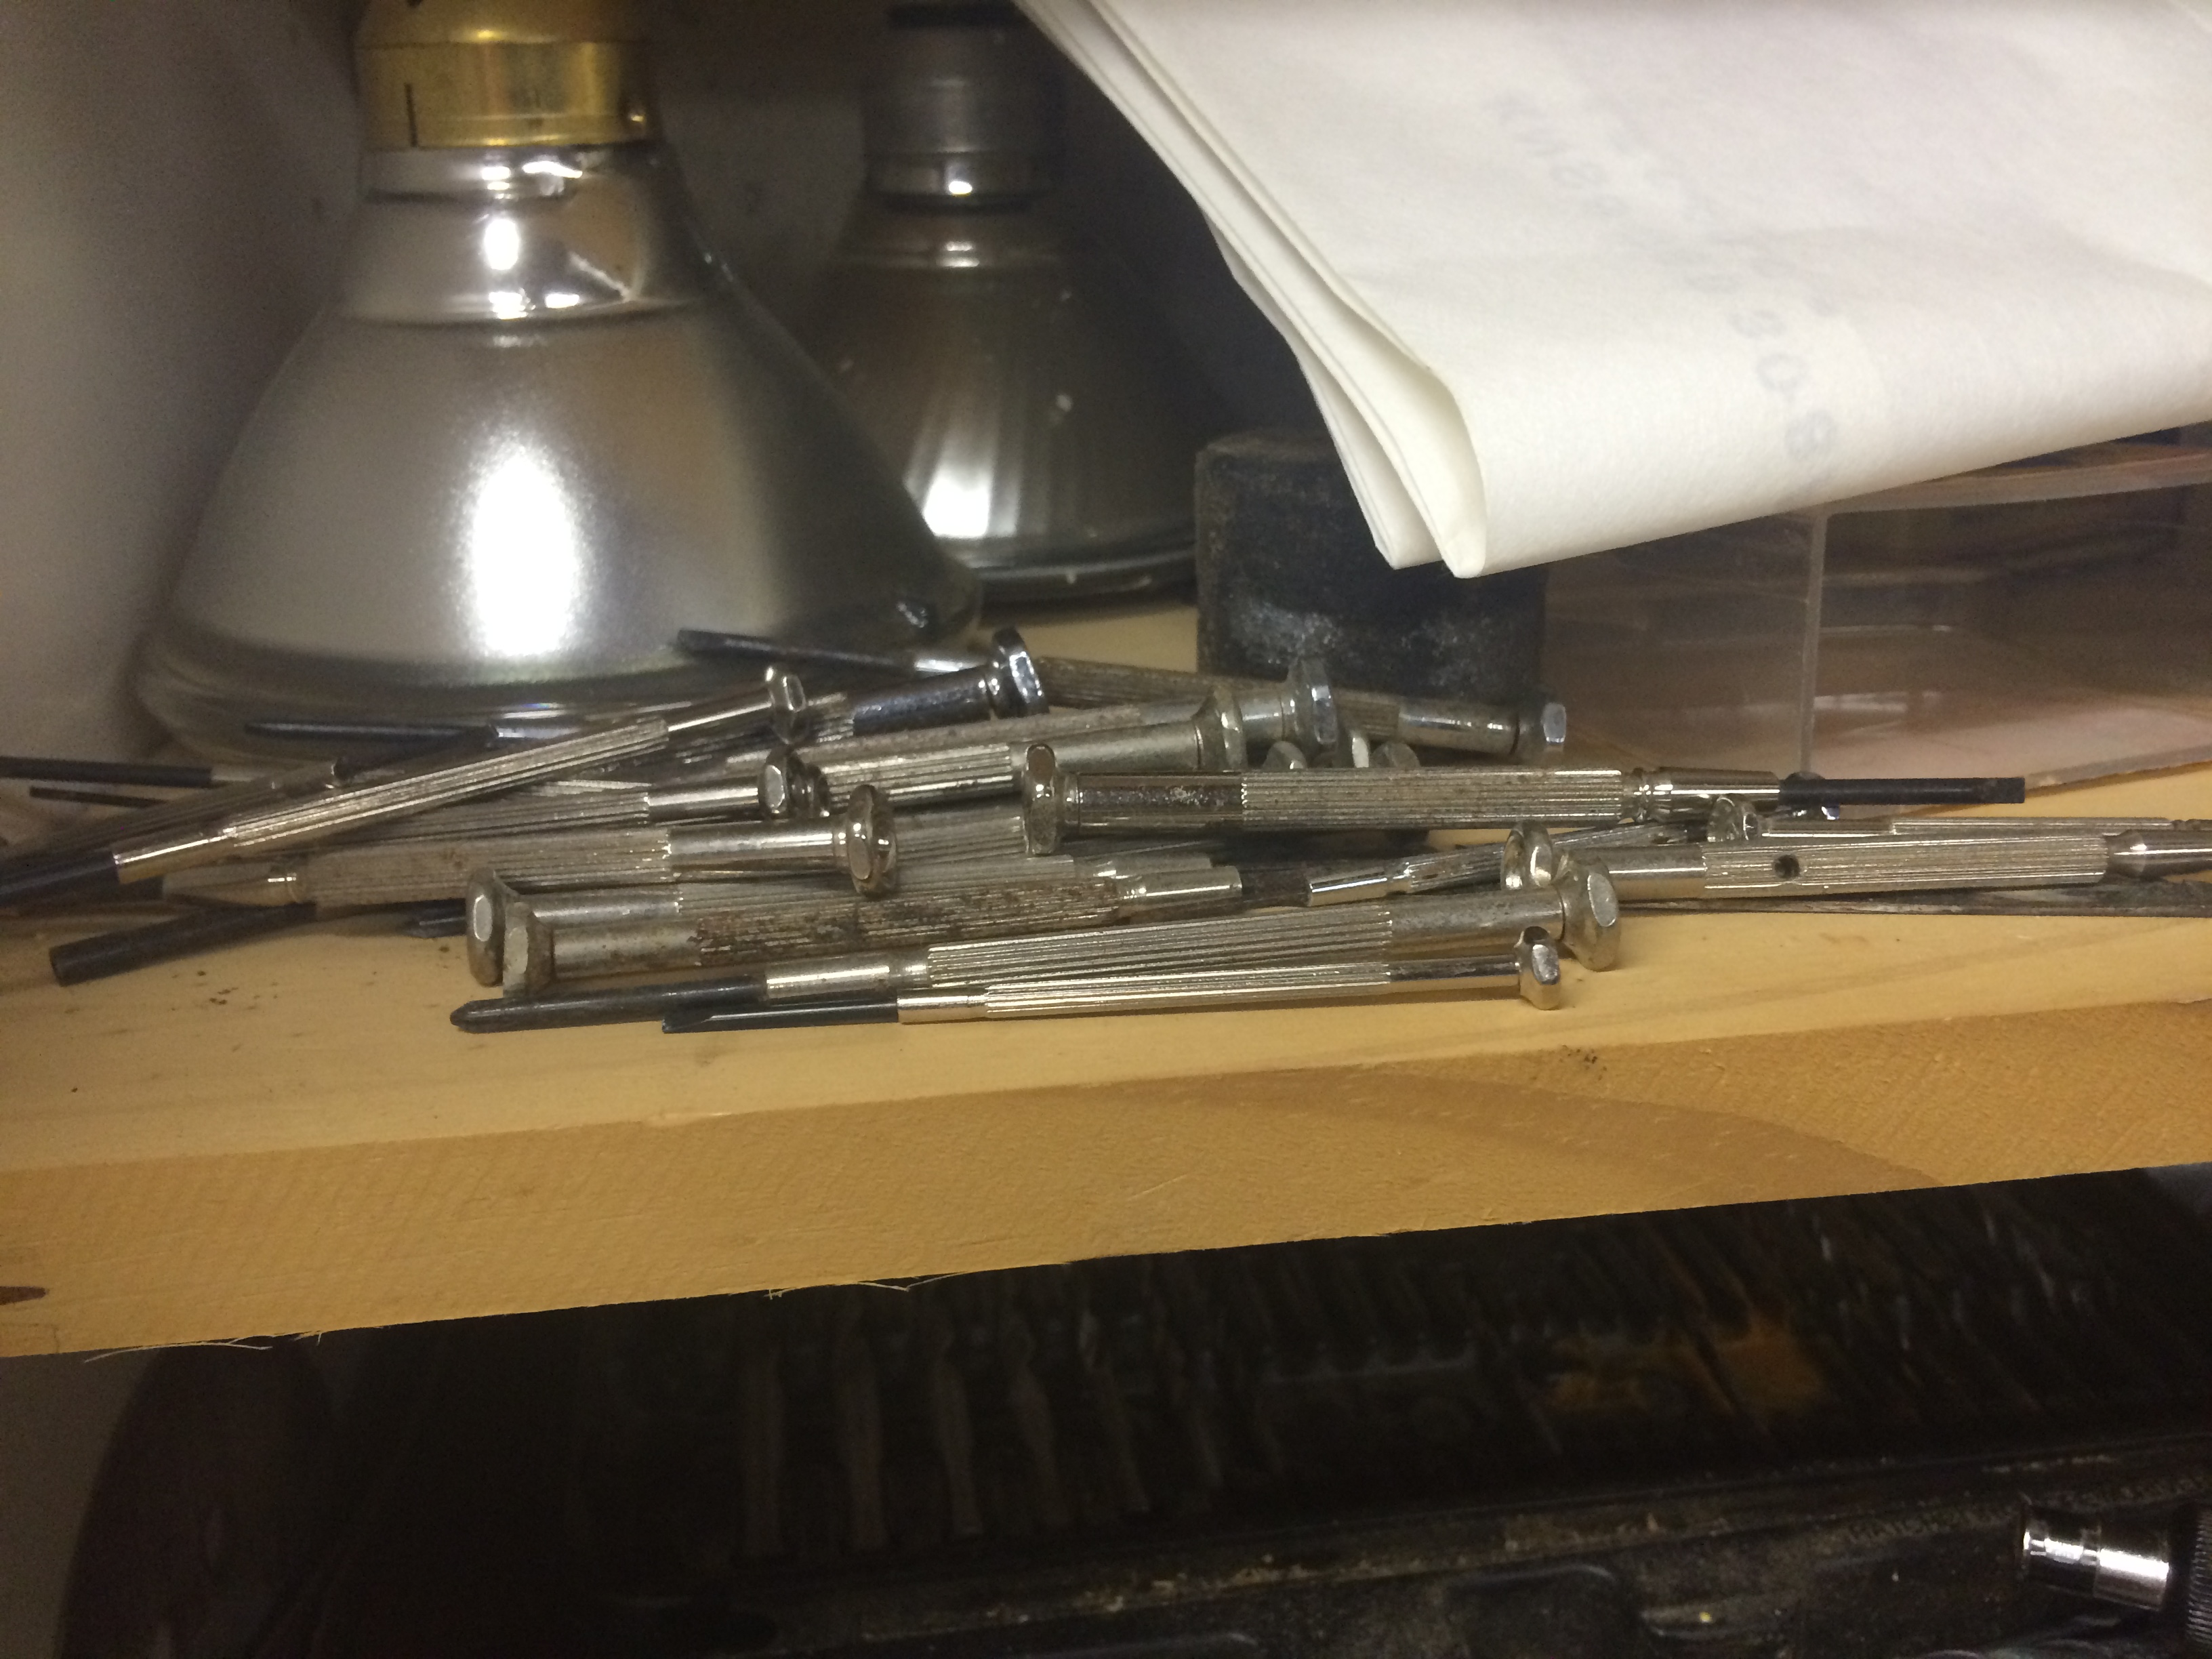
Now over the past few days just by chance I decided to collect up all my precision screwdrivers and put them in one place to be organized later. I literally had these things lying all over, some in drawers, some in toolboxes, some out int the garage. I put them all in once place on the shelf to organize them later. It was easy to find a perfect one for this part of our project.
Here is a picture of it before I start connecting up the power supply.
Now before I connect the power supply I have to be very careful not to connect it wrong as I don’t want to risk blowing the board. So I get out my multimeter. When I turn it on the battery is dead. I pop a new battery in and it works for like two seconds. I open it up and see this.
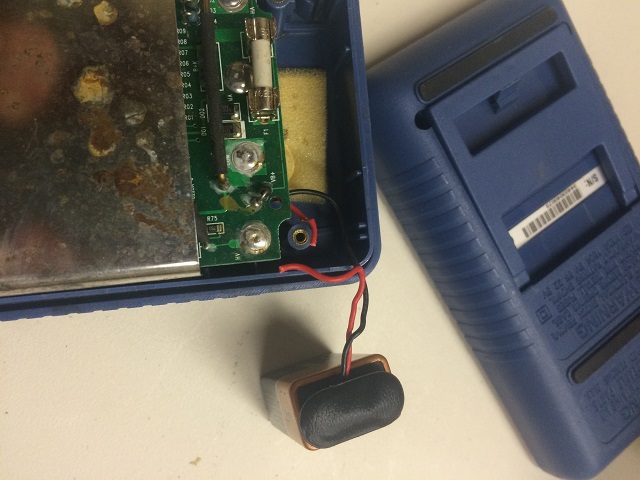
It was an easy fix. The soldering iron was already hot because I was tinning some of those wires. I put it back together and hook it up. Red to positive and black to negative, but I get a negative voltage reading. Something is wrong.
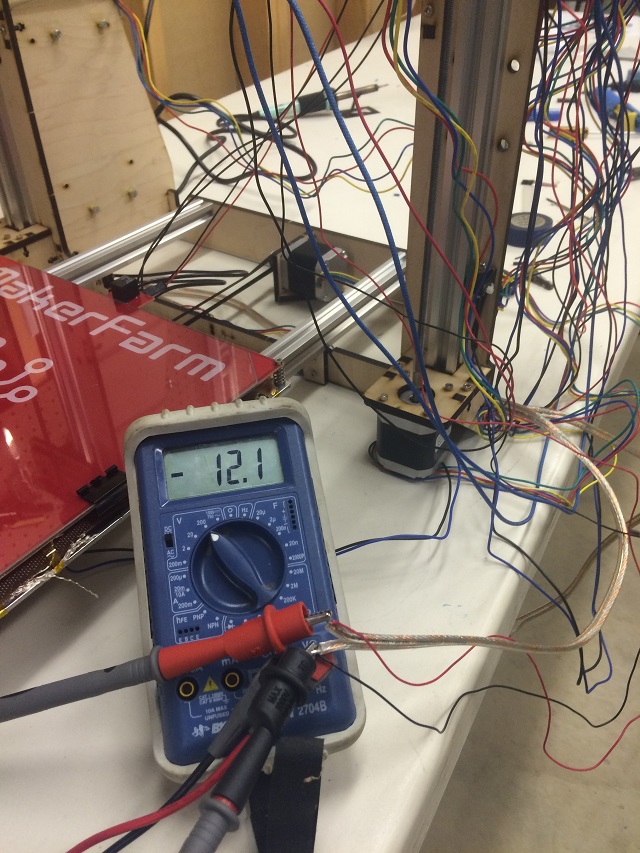
This is a trick… Can you tell what is wrong in that picture? I know for a fact red is to positive and black is to negative. There should NOT be a minus sign indicating negative 12.1 volts.
Oh…. I will give you a hint. It is really hard to see in picture above, but remember this picture of Kasia pretending the alligator clips were growling from last post?
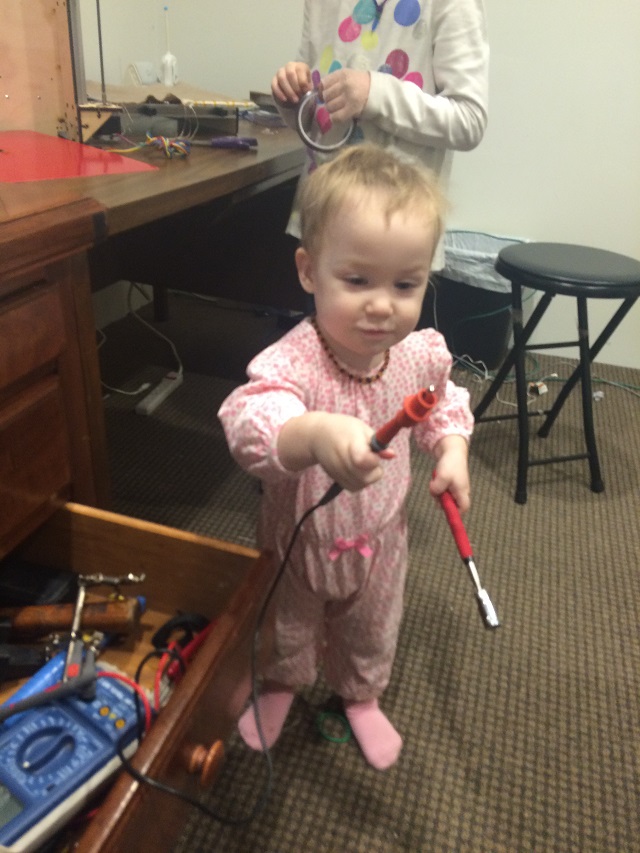
The tip is red, but the handle and the wire are…. BLACK! My kids switched those alligator clip ends on me and reversed them. I switched them back and took this picture.
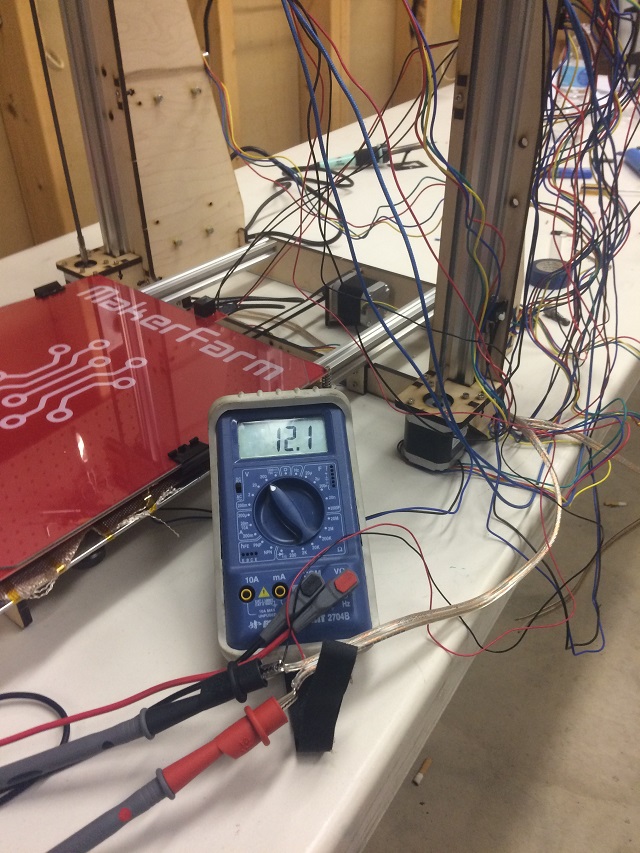
Now that is more like it. Red alligator clip on red probe with red wire clipped to positive… No more minus sign.
I am actually really happy I caught that. If I trusted what the meter was saying and not my wiring it could have been “lights out” for poor 3D printer.
So I clean up all of the cabling to a point where I can test it. I don’t want to cleanup and make all the cables neat because I will have to undo it if anything is wired wrong. I will turn it on and tighten that hot end first.

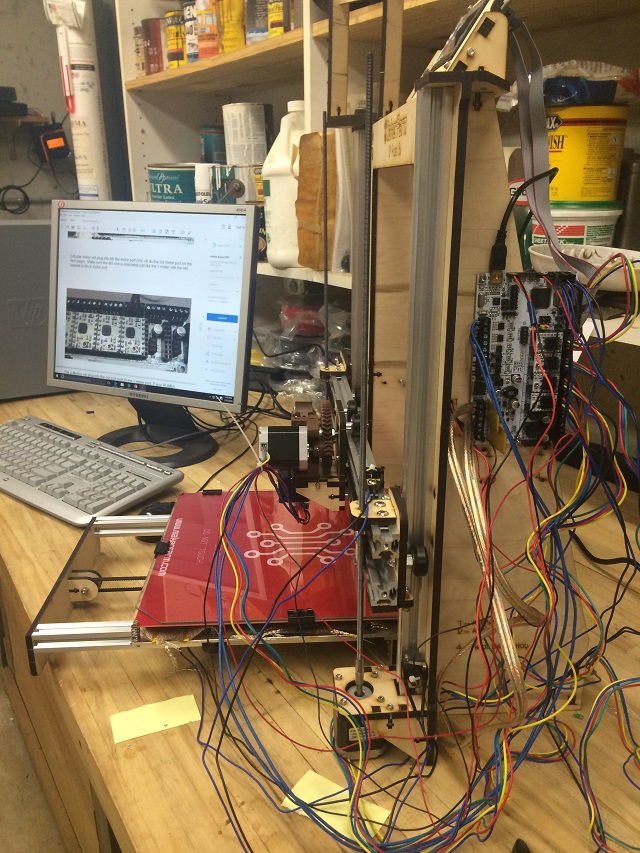
With that. I move the whole printer next to our RAINDROP-PC. I remove the hot end and get it ready to be tightened after I plug it in.
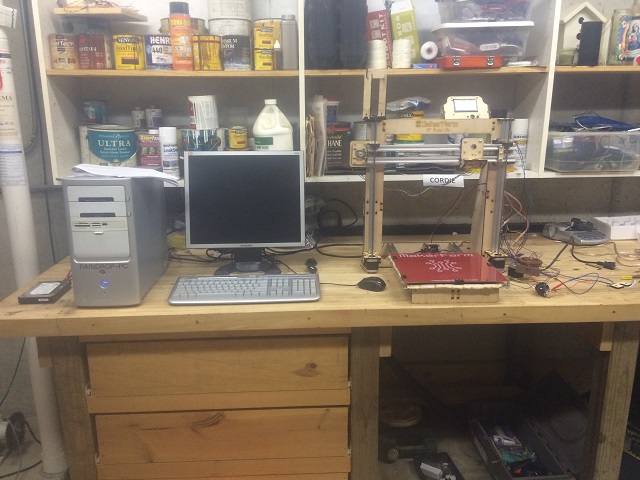
Now my two biggest girls are totally uninterested in seeing it turn on. Lucky for me I have my little Kasia and she will go anywhere with me. So I bring her downstairs so I have at least one audience member to watch if it starts on fire. Here we go… Let’s turn it on.
Well that was a relief. It didn’t smoke. 3D printers don’t work once you let the smoke out of them.
I press on. This project goes into an area very similar to my normal job for a bit. I am changing firmware, updating configuration files. Reuploading firmware. A lot of work just to get the hot end tightened. I still haven’t figured out that part yet.
So before I can print I need to learn how to do 3 things, I have no idea how to do:
- The hot end needs to be turned up to 285 degrees Celsius so I can tighten it. Once that is done I can mount it on the printer.
- The heat bed needs to be perfectly level. If it is not level the material will blob up in places where it is lower than what it thinks is the next layer. That sounds like a mess I would have to clean up. I have to figure out what the story with that is.
- Remember us installing all of those “end stops” those stop the motors from bringing the bed and other axes from going to far. I never adjusted those and can’t remember if or where I saw that in the instructions.
I am going to focus on getting that hot end tightened first. The problem I am stuck on now is that the instructions say turn the hot end to 285 degrees celcius, the control interface only let’s me go to 150 or something like that. I may have set that limit in the code when I was configuring it. I am not sure what to do there. Actually the 150 limit was before, not it let’s me set it to 260. I don’t want to mess this up… I email the manufacturer.
OK… Like always the company answered my email in like 5 minutes. I can raise that temperature in the computer program not on the printer itself. Here goes…I hope I don’t mess this up.
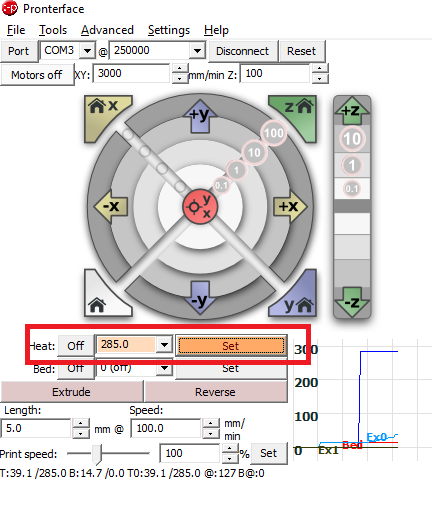
It takes a long time to get to 285 degrees. I need something to do while I wait. They sent me a little SD card with it. I am going to see if I can figure out what that is all about.
While I was looking for where to put the SD card, I accidentally hit this pair of vice grips that was holding the aluminum head that holds the heater on that hot end and I realized it was getting really hot. I thought to myself, “this would make a good picture, I am going to melt some glue gun glue on those vice grips to show people what is going on there.
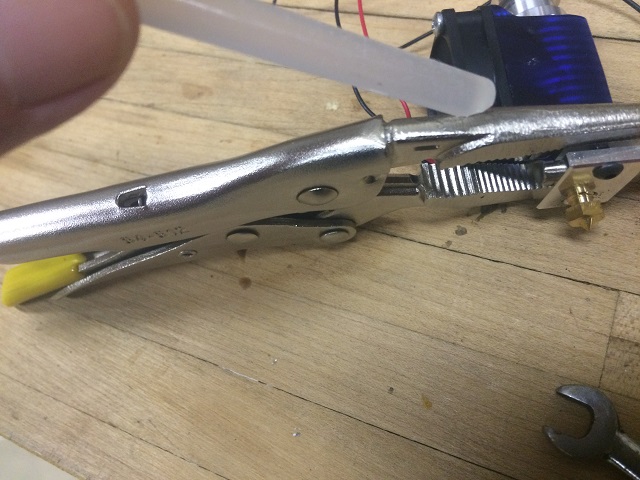
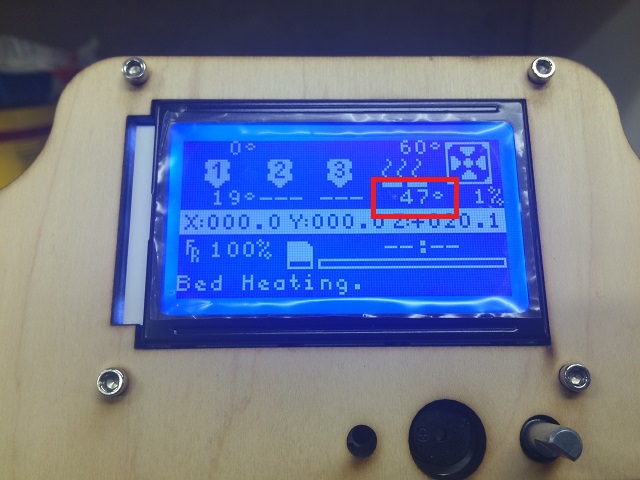
While doing that… I realize that those vice grips are a big giant heat sync and it may never get to 285. I pull them off and the temperature skyrockets. I see this on the display… It trips some sort of limit and just turns the heater off and that is that… The temperature never hit 285 and went down…down… down…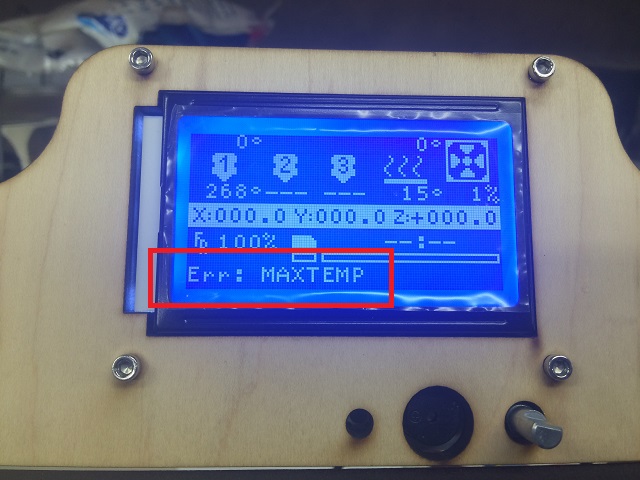
Now what I didn’t write about is that I had to “tune” that heater according to the instructions. The idea is that you set something called “PID” to get the heating function for that hot end to work efficiently. There is an “auto tune” function I run on that little board from the PC. I have to re-run that program and re-tune it now… I think I did that the while the vice grips were on it. That big vice grip heat sync that will melt hot glue gun glue would have messed up that tuning (something that sounded really important).
Sure enough I did some tests and the autotune feature for heating that little tip was way off when I ran it again. I made the necessary changes and uploaded the new firmware.
The first time I set the temperature to 285…. it took a good 10 minutes and never got there. Let’s try again.
This time the heater ramps of really quickly. It takes no time… I get ready with my wrenches to tighten and it goes up… up… up…
And then at 265 degrees Celsius… This.
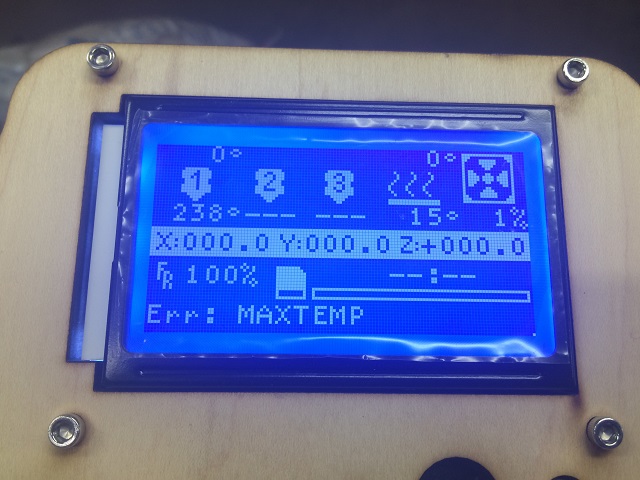
Yep… It is that “MAXTEMP” error again. I am just going to set it for 250 celcius and then tighten. I asked around and everyone else seems to just tighten at 220 so we will have to forget the manual for now.
It takes a couple of minutes to get to 250 so I let it sit there for a bit while I watch a graph that shows it isn’t going over. Then I scoot into the workshop to tighten that hot end. I am perplexed though while “tightening” it… I swear it didn’t move at all. That may burn me later… We will see.
With that all done I let it cool down. I am going to have to accept the fact that I did everything I could to make sure that hot end was tightened the way it was supposed to me.
I was able to talk to my buddy Charlie about my outstanding issues earlier. And the poor guy I just did the brain dump. I found out I don’t need the SD card because I have RAINDROP-PC connected directly to it. I know how to level the printing bed. I only realized now I forgot to ask him about the end stops. It is 12:05AM… I am not going to be able to print anything tonight I don’t think.
So I start leveling the printing bed. Remember this is my first time so I really don’t know what I am doing. While I mess around with the settings it just isn’t clear how I am supposed to adjust anything. I don’t know the software…
I have been messing around for an hour with it and I see that the way I mounted the hot end will interfere with the movement of it accross the heat bed. It’s heater wires are coming way to close to the relay that puts voltage to our heatbed.
I have hit a wall… It is late… I need to retool my brain and approach this tomorrow… or some other day when I can figure out the details of actually tuning and printing something.
————————-
I get back at it early Sunday morning before Mass. I pull off the hot end and then get it all put back together. I realize that the bed itself is too tight as well so I fix that. Last I realize the heat bed wires are run all wrong where it gets stuck when it goes to the back of the printer.
Finally I get it all put back together and I notice something I am totally stuck on. There is this program they had me download called “Proterface”. It is the main interfaced used on a PC to control the printer. It allows me, through software to position all the axes of the printer. I notice that my X axis is reversed. If I click one of the rings signifying the X to go to the right, it goes to the left. 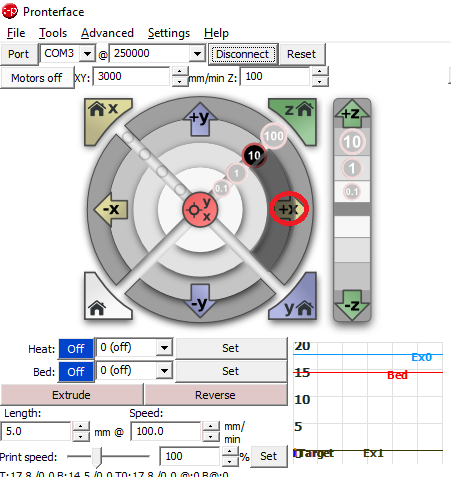
Inversely if I click the X- it is supposed to go to the right. Using my head I just reverse the stepper motor cable and assume I cabled that one wrong. To my amazement, it does exactly the same thing. Now I am stunned. reversing that thing should have worked.
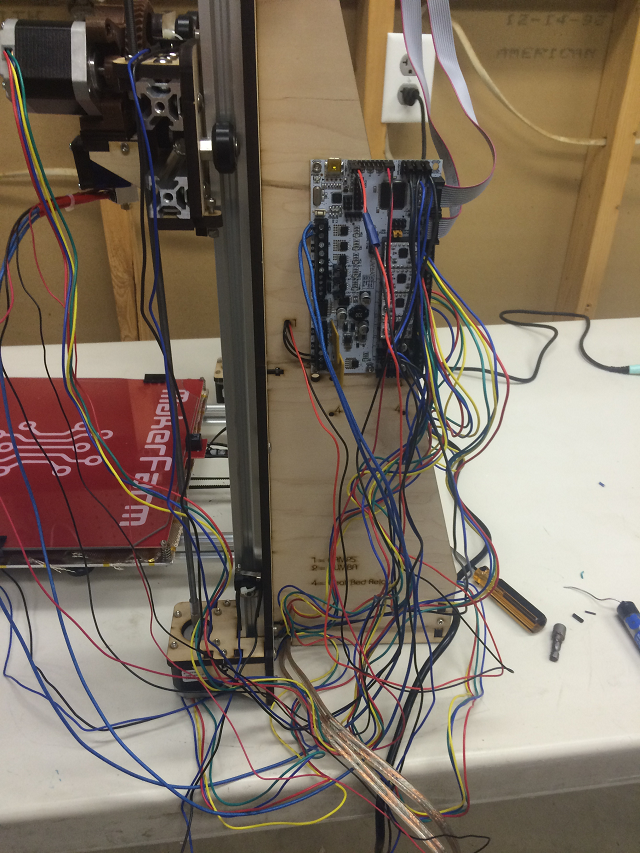
Remember the multimeter from earlier how it was reversed? I check, double check and then triple check and it is always the same. This doesn’t make any sense to me at all. Here is what I am seeing. Here is the orientation of that plug from the manual.
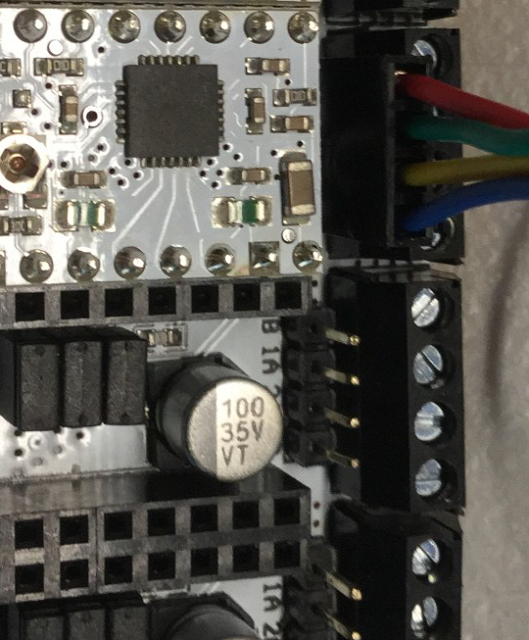
And here is mine:
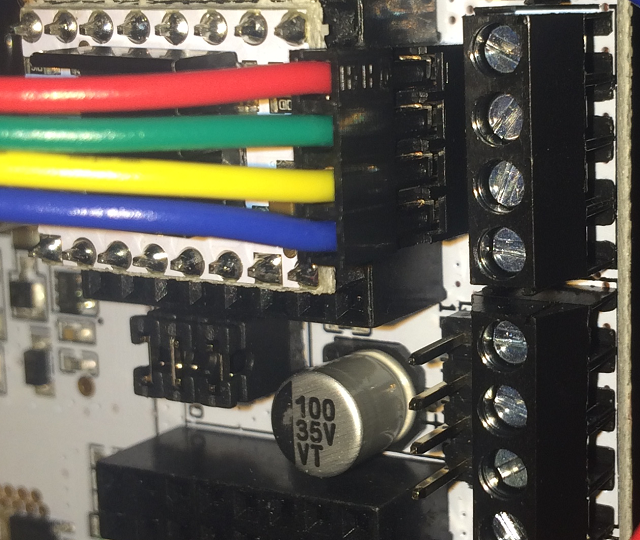
I am totally stumped and don’t know what to do. Maybe I broke that little chip that is on that board. Maybe I messed up something programming the firmware. Actually neither of those makes sense because when you reverse a stepper motor it is reversed. This is a law of of physics. When the poles are reversed, the dc motor will turn the other way. That is it.
Auughhh!!! I have to email the manufacturer again. This is going to be embarrassing because my bet is he is just going to say, “Check again, your missing something with your cabling”.
Here is what I sent:
Colin,
I am soooooo close to printing my first thing, but am stuck on something so novice I am embarrassed to even send this email.
My X stepper motor. It seems as if no matter which way I plug it in to the Rhumba, -X moves the carriage right and +X moves it left. The opposite of what I expect. I checked and rechecked and checked again. I even took pictures because I thought I was going nuts.
Have you heard anyone having this problem before?
I checked the troubleshooting guide and it said just to reverse the connector. Again… This is embarrassing.
Joe
It is Sunday and maybe Colin doesn’t work on Sundays. I still plug away and even start swapping out the driver board for the X motor with the Z driver board. Still the same behavior.
I could scream!!! I just figured it out. I had a total brain cramp and bad diagnosis momentum from last night! I quickly send a mea culpa to Colin so he doesn’t slap me across the head over email.
Never mind…. I am an idiot. I had a total brain cramp as was mistaking the extruder motor for the X motor…. Duh!
Sorry to bug you on a Sunday.
Thanks,
Joe
Here is what I did wrong.
This is a picture of the two motors I got mixed up.
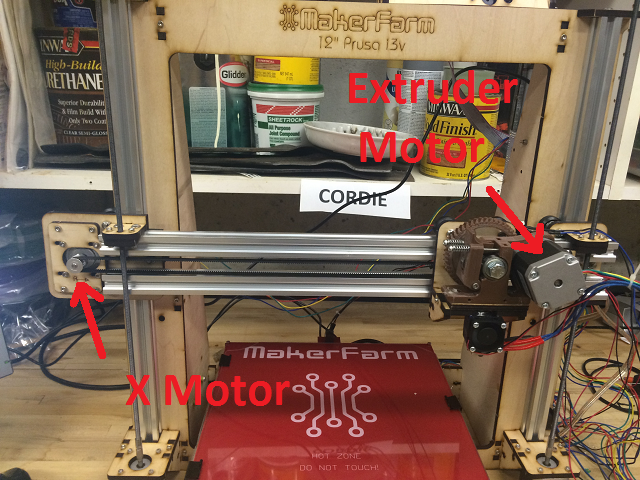
The Extruder Motor that controls spitting out melted plastic is on the carriage that moves. So in my tiredness (and at the same time mastering X, Y, Z axes… I confused these two. Here is the rule…. Just because the extruder motor is on the carriage that moves, does not mean it is moving the carriage… That is the motor to the left. I know… I know…. It is obvious to me know. I had started figuring this out late last night after midnight. I woke up super early today and didn’t really rethink anything.
Thank you Lord for giving me such public humiliation.
Well… I am super happy to be past that point. Now I am going to level that heat bed.
I am not really sure what to do next because the printer doesn’t move where I want it to and it just seems like something is wrong. I call my buddy Charlie and he tells me how to make the thing go “home”. I don’t even need to do that from the computer and do it from the little controller interface on the top of the printer. When I press home lots of things come clear. A lot is cabled wrong. Charlie told me he noticed I printed out all of my instructions in black and white. I agreed this can be a problem when working with colored cables. So now that there is a PC there I just pull up the document on the PC and double check everything.
I still had a couple of motors reversed for some dumb reason and I also noticed I had the X and Y end stops mixed up. This is a good day for humility. But hey… I am in Information Technology, have three little girls at home and a wife that doesn’t read my blog, so I am used to humility (What my wife lacks in technological interest she makes up for in kindness and beauty by the way… I think it is a good trade).
OK… That is enough for now. I have to take my family to my mothers house for dinner. My brother Paul will be there… He is very technical. He will enjoy me telling him about all of my progress. What is more fun that building a 3d printer? Well… Nothing that I can think of, a close second is telling people about building a 3D printer.
——
I am back from family dinner and here is what I am going to do. I am going to go through the steps to send the hot end to its “home” as described by my buddy Charlie. It is supposed to move around a bit to get its bearings and then send the hot end to the back right corner almost resting the head on the heat bed. I am going to post the video no matter what happens.
OK… That was really boring… But it did do what it was supposed to. Thanks Charlie!
Next I level the heat bed. I basically do this: I place a piece of paper under the head and then carefully slid it under the hot end. I then adjust the screws on the heat bed to make the bed meet the paper. Not too much, but just enough to give it a little drag. I do this on all four corners (It seemed easy… I hope I did that right).
I am suddenly struck with a very odd feeling. It is strange. Usually when I finish a project I get an endorphin rush, but this is very different.
Now I do projects all of the time, but they are almost always for work. I get a rush doing something for someone else that makes them happy. I get a strong sense of accomplishment and closure at the same time. Customers love it when people finish projects and it makes me extra happy knowing they are happy (Or in a lot of cases, not mad because the project is finished, instead of… well instead of “not finished” which basically means “broken”).
At this point the printer is built. It is finished… And I am pretty sure…. I am ready to print something! The best way to describe it is that I am 98% scared and 2% excited. Or actually maybe I am 2% scared and 98% excited… Not sure.
Anyway… I have to get to the next step and I think that is to load filament.
My buddy Charlie did this cool thing and reached out to the MakerFarm folks (the manufacturers of the 3D printer and had them send me a roll of filament. It is purple. They put this note on it).
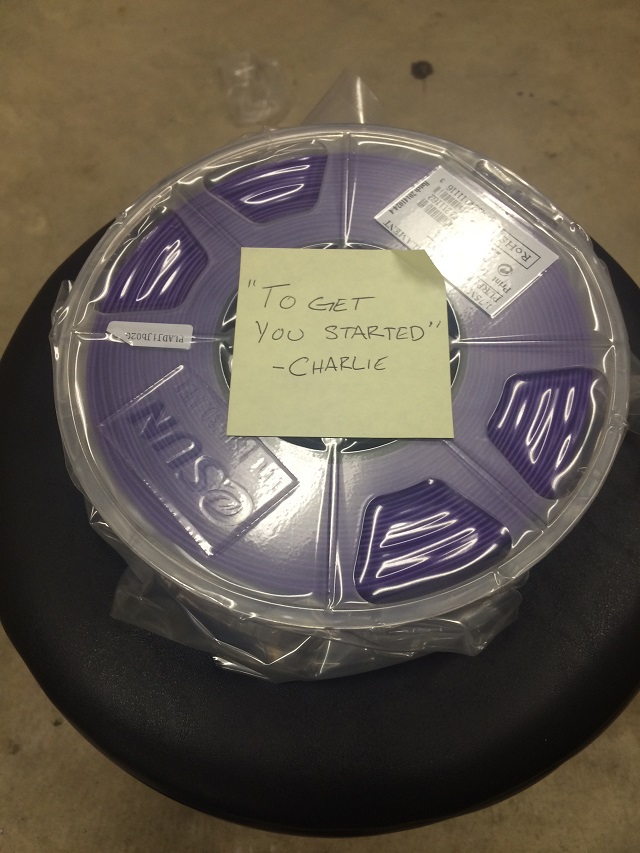
That was totally cool. I am going to use this roll for my first print.
So I load it up into the printer and get all ready… Then… My wife calls down to me, the kids have to go to bed and it is prayer time. So I run upstairs and Hannah shows me this…

She has been making stuffed animals. So she is totally checked out doing her own thing while I am busy making the equivalent of her sewing machine…. She is missing out… But it is my fault. The kids lost interest once it got too hard for me to involve them (Note to self… When Hannah is old enough to blog how she sews this stuff, build her a blog site).
Anyway… After prayers I get right back to it. I load up the printer filament and start the software.
I load a little gear to print first. That is a gear that goes on the extruder motor. It is about a 1/2″ X 1/2″.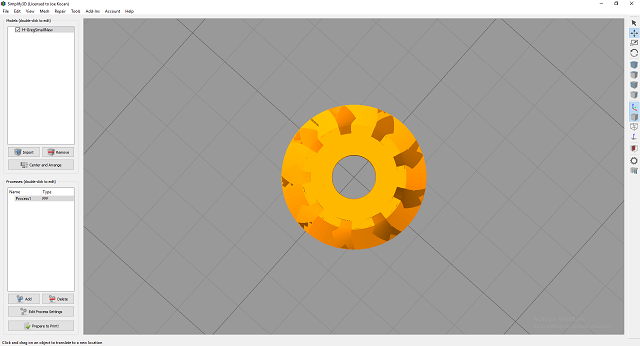
So there it is…
Now I know I said that I can print now, but I am not sure about one more thing. I load the filament up, but it totally isn’t clear to me how the printer would know there is actually filament in the hot end. Before I press the print button… I need to make sure of that part.
I text Charlie… And he may be asleep already because he has to wake up early for his normal job. So… I do what normal people do to find out things… I do a search “How to load filament in an extruder” or something like that. Here is what I find in like less than a minute.
So that is what I do.
Now I am ready to press the print button, or at least I think I am.
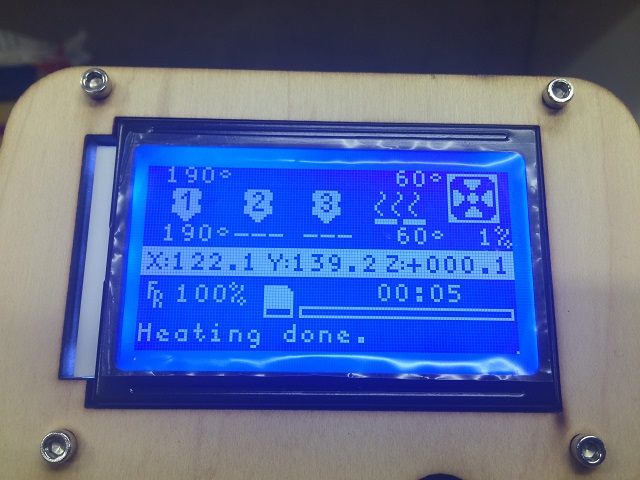
So I press print and things start happening. I can see the heatbed heat up first to 60 degrees C. Next the hot end heats up to 190 degrees C.
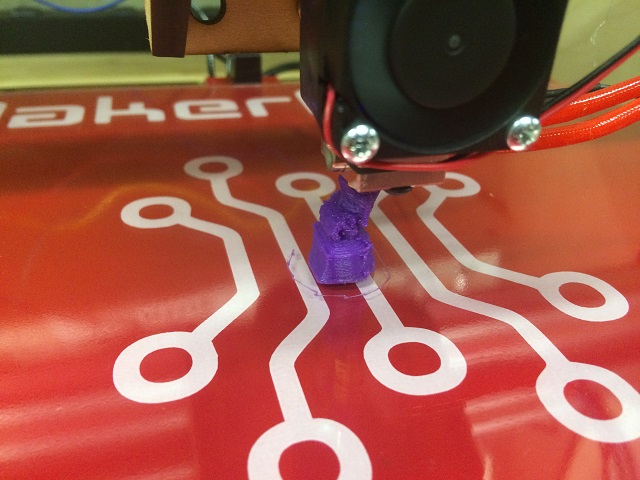
The printer moves to the center of the heat bed and then stops. All I hear is intermittent clicking. The software says this will be done in 25 minutes. I examine the extruder…. This is what I see.
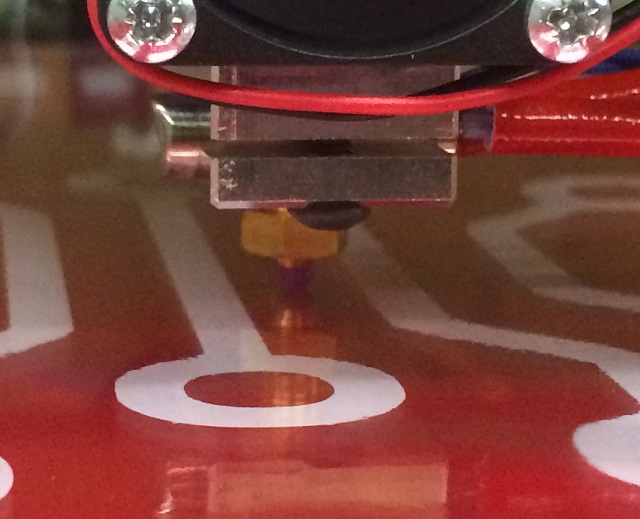
See that little blob of plastic on the hot end. I actually don’t know if that is touching the board or not. I may have messed up when I tried to get the board leveled. Should I let it go and see what happens in 25 minutes? Or should I wait?’
After writing that I check on it again and I can see just a glob of plastic on that hot end. Now I actually have no idea what to do here. That is going to have to be cleaned off. And don’t see a stop the print process.
Finally I know this is wrong and I figure out how to get into the “Machine Control Panel” of the software and I see very clearly, “Emergency Stop”.
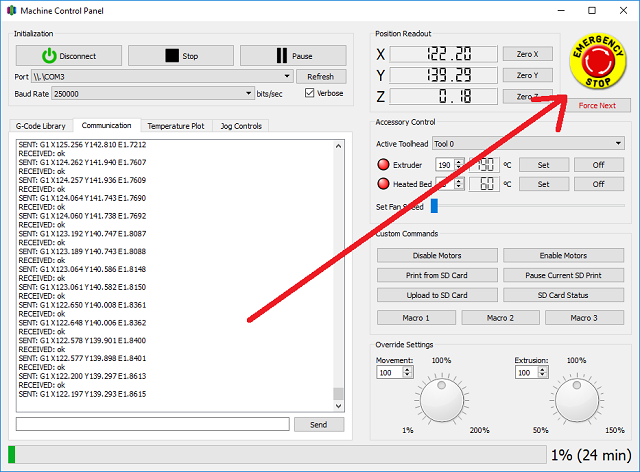
I click it and go to the printer.
I can see right away it did stop and everything is cooling down. I bring up the Z (that lifts the hot end) and clean it off.
Now the program I use has something called a “heat bed leveling wizard”. I run that. It is literally a series of adjustments. It tells me it will bring the hot end to different parts of the printer surface and I am supposed to tighten screws at each corner to make it… well… I don’t know the word for it… Let’s just say FLAT.
I go through the wizard and it takes about 25 minutes. That is what Charlie told me. My first crack at adjusting those was like 5. I didn’t have much confidence with my first try.
What do you say? Should I just click print again and go upstairs and watch a show with my wife without even checking on it?
OK… I will actually check on it to make sure things are heating up… Then I will go upstairs (I have smoke detectors in the basement so we should be OK).
I can see the heat bed heating up. The printer hot end will go next then it will do something. I am going to TRUST what I just did because it felt right. I am not going to check on it. I am going to watch a show with my wife and enjoy something not project oriented for the next hour or so… Keep in mind… When I come back downstairs after the show, if this actually worked, I will literally see a gear in the middle of the heat bed. I am very excited!
—–
OK… I just got back downstairs. I have not entered the workshop. As I was walking up the stairs to watch TV, I heard the printer doing something. The show my wife and I watched was under an hour but longer than the 25 minutes it was supposed to take to print that part. I am going to go into the workshop right now and take a picture of the heat bed. I will post that picture no matter what and comment on it.
Here goes….
And that is what I see. The printer is still trying to do something. That is not the gear I was hoping for, but I am happy. Well happy, kind of… I was hoping that I would have nailed that gear on the first try.
More to come!

Recent Comments