Monthly Archives: August 2013

You are browsing the site archives by month.

My Silly Pondcam – Post 21

We had a pondcam scare earlier this evening. I was at my parents house and I couldn’t connect to it. I didn’t see an alert that it went down, so I assumed nothing was really wrong. If water got in it, I would receive an email from my monitor. that would simply say “pondcam is down”. Since I didn’t get one, I wasn’t too worried. When I got home I can see my whole network was down. We had a power surge and it knocked a cheap switch that connects my firewall offline. I rebooted it and checked pondcam. Still up… Still works. Tested the light… that works OK too.

I called my sister earlier today to tell her she needs to login to pondcam and take a look in case it gets water in the case again. She waited until 7PM and it looked like it was down. I get a one line email from her at 7:03PM, it reads “I can’t believe pondcam is down! Argh!”. I happily wrote her back… Pondcam was up… My network was down. I arrogantly smile and think to myself, “Pondcam and PONDNET could end up being the most reliable network around… If it doesn’t spring a leak”. Since I turned pondcam loose on Sunday night, I have been involved in probably 3 or 4 outages of some kind for customers and just tonight, myself. Pondcam however has remained stable and up. Even all night long… Which is really weird. All of those power problems we had in post 2 were because of batteries that were dead. It totally screws up my understanding of the power part and why it seems to be working so well.

Let’s get back to an actual problem for a moment. For those of you that have bothered to login to pondcam can see something right away… The water is very very cloudy. And we had a thunderstorm tonight, so I am sure the agricultural runoff I get wont help the clarity. I can’t do much about the water quality, but I can do something.

I have a windmill that connects to two diffusers (think of them as a big giant bubbler). The problem is two things…1) it isn’t windy in August. 2) There are trees around it and it really only works well in the middle of winter.

One of the reasons the water is cloudy is because of plankton. I don’t know this off of the top of my head, I know a guy that knows a heck of a lot more about ponds than I do that I called today. If I can aerate the pond, I am hoping to fill it with so much oxygen that no plankton, algae, or any other plant that clouds the water will not survive.

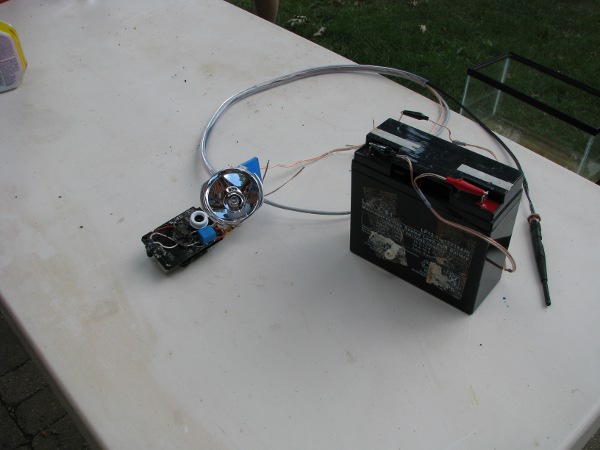
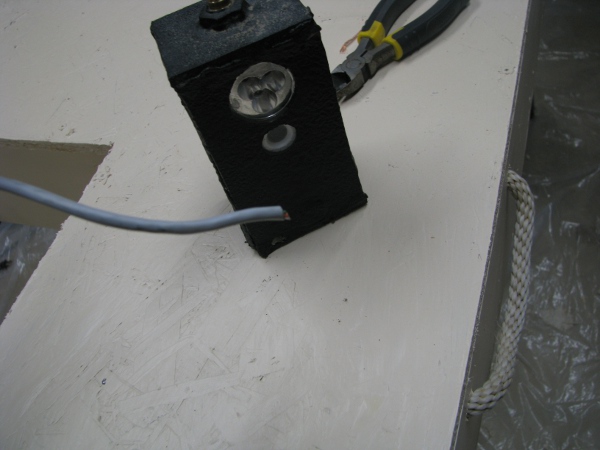
I take some hose, some pliers and some electrical tape out to the aerator for my septic tank. I fit the hose on so it looks like this.

1-aerator-with-hose

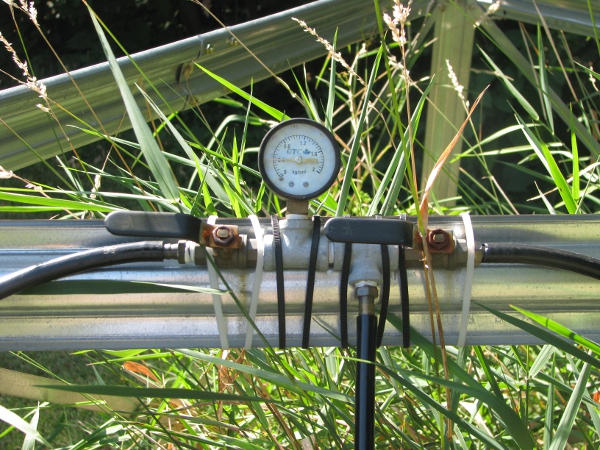
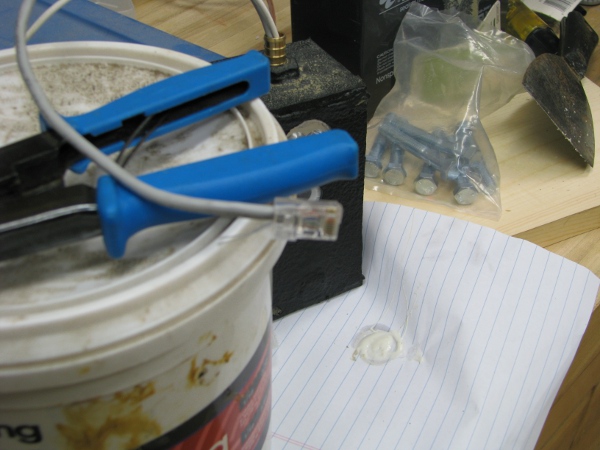
I then connect hose after hose, then another hose, then about 75 ft of tubing that I bought three years ago. I finally reach the windmill and plug it into the two difussers. Here is what the connection looks like at the base of the windmill.

2-connection-to-windmill

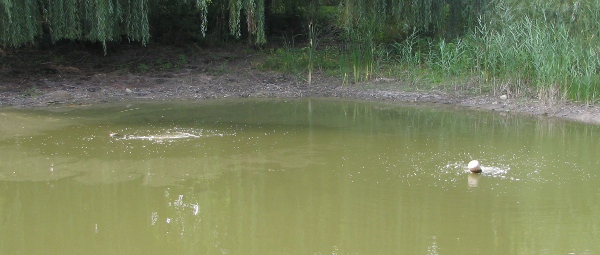
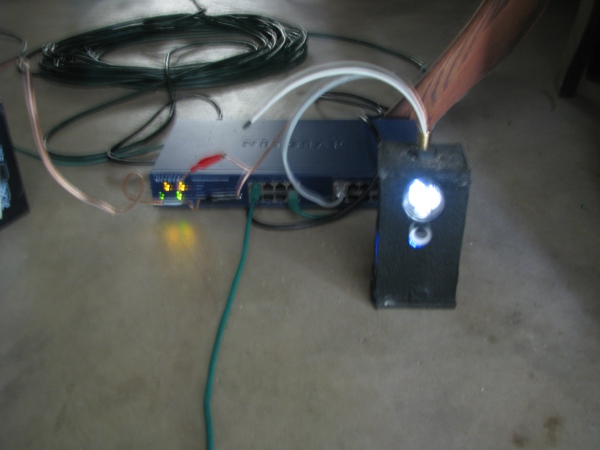
Now let’s see what that looks like.

3-bubbles-the-good-kind

I have no idea how long that will have to go before it starts to clear the water. I can only leave that there for a week or so because I don’t want to risk the septic tank having a problem. I do think of another thing I can do to clear things up. Last summer we had a terrible drought and I worried that the fish would die because the water was getting really low (Kind of like it is now). I basically started running water into it from my house. My well pump for the house is really good. I left the host running for two weeks straight last year and it didn’t do anything to the water pressure in my house, but it did seem to contribute to clearer water. So… I do that. I just stick a hose into a drain on the other side of my driveway that leads to the pond. I will have to let all of this run for a few days to see if it makes a difference.

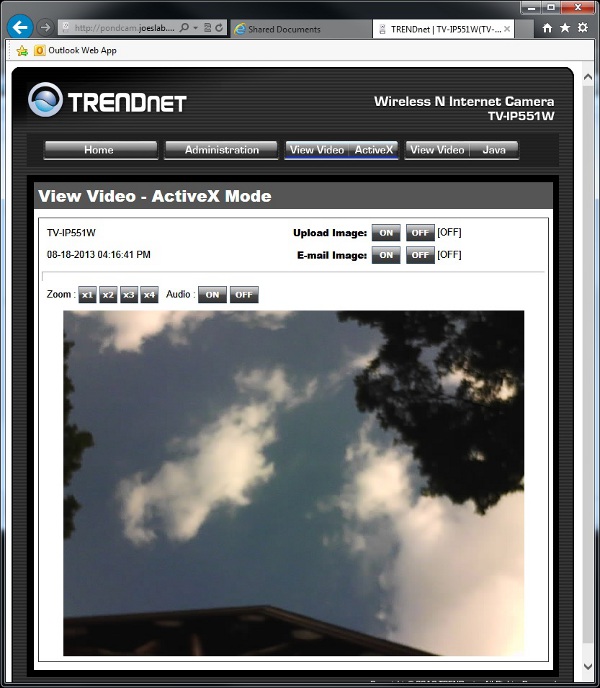
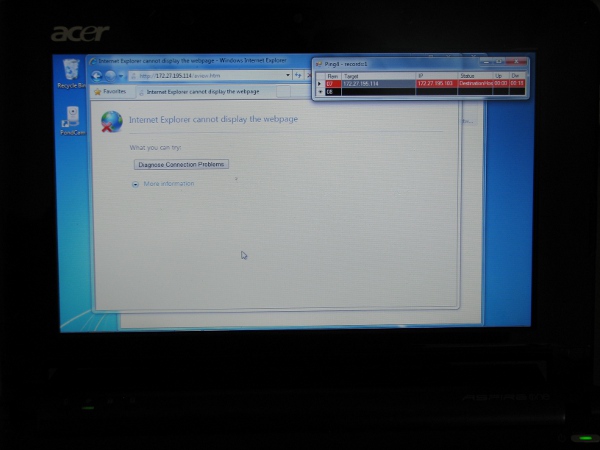
For now I am having fun with pondcam. I can’t get the video recording to work for some reason, but the motion detection where it sends a copy of a picture when it sees motion has been really interesting. It sent 6500 pictures to a network drive for me to review. I looked at a bunch of them and here is the best one I could find (Yes… 6500 pictures is a lot… And this is the best I could find).

4-best-picture

That gives you an idea of how cloudy the water is. I want to fix that. Pondcam wants that too.

My Silly Pondcam – Post 20 – Let’s Sink it again….

OK… Pondcam has been up there on that far berm across the pond for long it enough. It isn’t seeing anything because it was probably the most uninteresting place to point the camera on my whole property. My excuse is… How in the world was I supposed to know that? It looked like a nice place for some weirdo animal to hang out and just have a party. If there were teenagers around, I am sure they would have been drinking beer there all night long, but there are no teenagers in my neighborhood. Only little kids. I have unofficially named that path the “Dead Zone” because nothing is there. Apparently animals don’t go through it at all. Maybe it is cursed. My kids don’t like it, it looks really scary to them and they don’t want to go there as are pretty convinced monsters live there. Now they haven’t seen what we have seen. I am pretty confident there isn’t a monster that lives there.

It is 9:30PM on Thursday as I start this post. I put pondcam out on the far berm staring at the dead zone 4 days and 5 hours ago. That is 101 hours of pondcam being on. In the morning it still acts up. I can see it is having trouble communicating, then as the day progresses it fixes itself. I don’t know why it does that. I suspect it is dew collecting on the connections, but I don’t know for sure. I hope this problem goes away as we sink it because it will be closer to PONDNET.

Before I can move Pondcam, its mount, it’s battery and it’s solar panels I have to see what our dock looks like in the water.

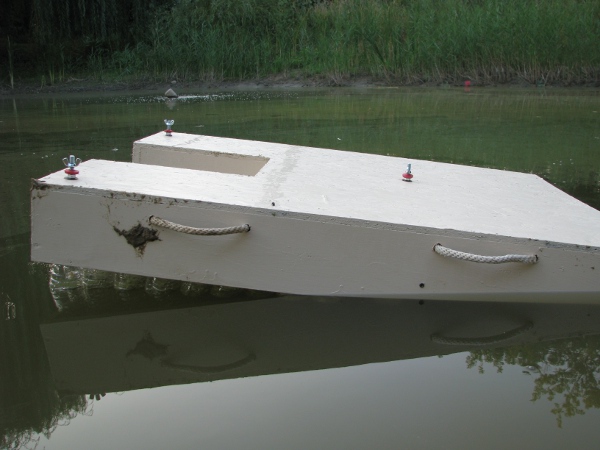
I go to the workshop and drag out the dock. I put it in the water. The dock doesn’t weigh very much, but it is really hot today. Like 96 degrees and HUMID! I hate working in this weather. It makes me very cranky. Here is what it looks like.

1-dock-in-water

That is what I was expecting. After all, our whole front end of that thing is where the bottles are. I am hoping that when I put the antenna and mount on the front it will even it out a bit. I can move the battery around too to make it more level if I need to.

So I drag all of pondcam and its parts back to the path I cut with the manual weed whacker. I put the dock in the water and wingnut the mount for pondcam in place. I tie a couple of ropes on each side of pondcam so I can anchor it to shore so it doesn’t float away. I lower the camera down, connect the batteries and solar panels.

Now doing this was a really crappy job. All around the edge of the pond, even at the beach is clay. The pond is so low this late in the summer, to get really close to the water you have to stand in wet clay. Clay is so much worse than dirt and mud to work in. It really has some weird properties. When my pond was dug they used a 4ft wide shovel and when the guy would lift an entire load it would come out of it looking like gelatin. As he would dump each shovel full it would kind of land like jello and shake a little. That year, like every year, it got really dry in the summer and all of that clay gets really hard like stone. Clay is nothing like dirt. It is super sticky when it gets wet. When you step in it your shoes come off and if you are lucky enough not to step in a really wet spot it still clumps onto your shoes so you are picking up grass and junk every time you walk. I hate working at the edge of the pond. But… pondcam is worth it.

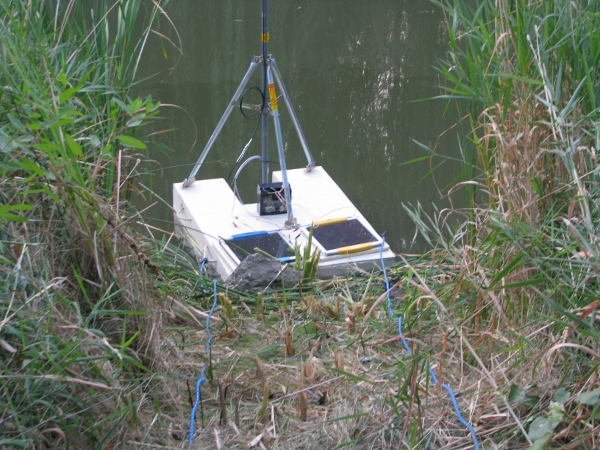
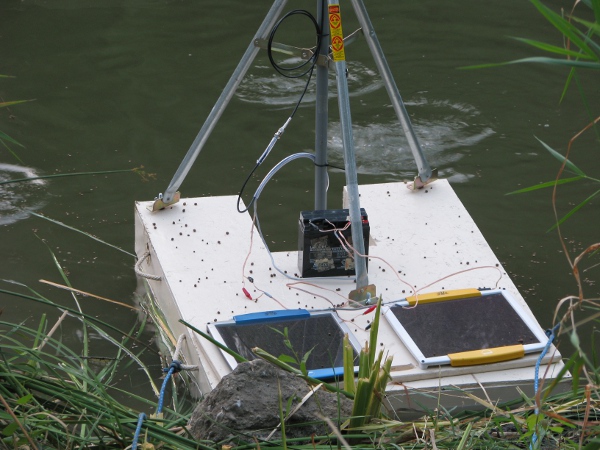
Here is the result of my effort. One thought that comes to mind as I write this is how small the dock looks. In my workshop it looks big. Even with the pond this low were the surface area is half of what it should be, the dock and camera look really small to me.

2-pondcam-on-dock

It isn’t level, but I don’t care. It should be on and sending pictures to my email right now. I don’t check right away. I first sit down by the PONDNET access point and take a look to see if the antenna is visible. I take a blurry picture because it is getting dark and the camera exposure is much slower. Then I grab a stick and start scraping all of the clay and grass off of my feet from my little expedition near the pond (It would take me a whole post to explain the trouble I had with the fresh cut long grasses that were sticking to the bottom of my clay encrusted shoes. I really hated doing that part).

3-pondcam-antenna-over-grass

I am happy. I throw some fish food all over and around the camera, here is a quick pic of what that looks like in the pond.

4-pondcam-with-food

You can see the fish all over the place. My plan is to tell my kids they need to feed the fish by throwing food around pondcam instead of the beach. The fish in the pond are strange. My whole life I have always loved ponds and lakes and mine is different than any I have been too. All of the fish in there are totally used to people. I am sure they were hand fed in the hatchery. And every year I buy about 50 lbs of floating fish food and just throw a bunch in there every once and a while. This completely messed up the natural behavior of all of the fish. If a person walks around the pond, the fish will follow you. If they see the top of my head over the grass when I am walking around it, I can see fish swimming up to the edge where I am. It is totally unnatural. If I can change their behavior and teach them that only Pondcam feeds them… Then they will always be hanging around pondcam. And I will always be able to see them from my desk. It will be so fun.

So I run upstairs and it is getting dark. The email setup where it emails me isn’t working very well because it sent about 100 emails and just sorting through them to find any one picture that is worth anything is taking a really long time. Here is the best I have.

5-pondcam-seeing-fish

It is clear to me now that fish are not going to pose in front of this camera for me to take a picture. They swim. They will move fast past the camera. It will never get a clean shot of them. The video of them is where it is at…. That is what I want to see. If you want to see anything you will need to login to it and look for yourself. After logging in, click the view video button at the top right. And one last thing…. VERY IMPORTANT… If you see an albino catfish send me and email or write a post. It’s name is “Old Whitey” and I haven’t seen it since early last year… I am afraid he is dead.

If you forgot… Here is how you view the video… Remember… It may not be up tomorrow when you read this. If water gets in the camera again… It may be dead for good.

http://pondcam.joeslab.com

User: pondcam
Password: pondcam

Oh… One last thing… I stopped the way it sends me pictures of what it sees, instead of emailing me it now sends a picture to a directory on one of my computers. Tomorrow morning I can quickly scan it for anything interesting because I won’t have to open an email, but just scan a bunch of picture files. I am so looking forward to it.

My Silly Pondcam – Post 19 – Can we wrap this thing up already?

Now I don’t know if we will actually be able to wrap this project up in this single post, but I will try. Several of my posts have spanned a few days because I wasn’t able to get back to the project because of other things. I always want them to end in a way that at least completes an effort on my part.

An interesting thing that you may not have thought of, I actually didn’t know anything about how this camera worked when we started. I did turn it on to see if it worked, about 6 months ago. I played with the software for like 10 minutes. The only reason I used it was because it was  basically just sitting in a box… doing nothing.

Several days ago I setup the camera, battery and solar panels out at the farthest point of my property on the other side of the pond. I could connect to it and I was happy. The biggest part was to leave it there, so I will know what to expect when it is in the pond.

I have no idea what it will do. It is connected to the solar panels. It has a battery to make it run at night. It should just work like this without me messing with it. Right? We did all of the math, I tried really hard to make sure it would be able to be its own little autonomous device that was pretty much built to look at fish… or anything else that swims in a pond.

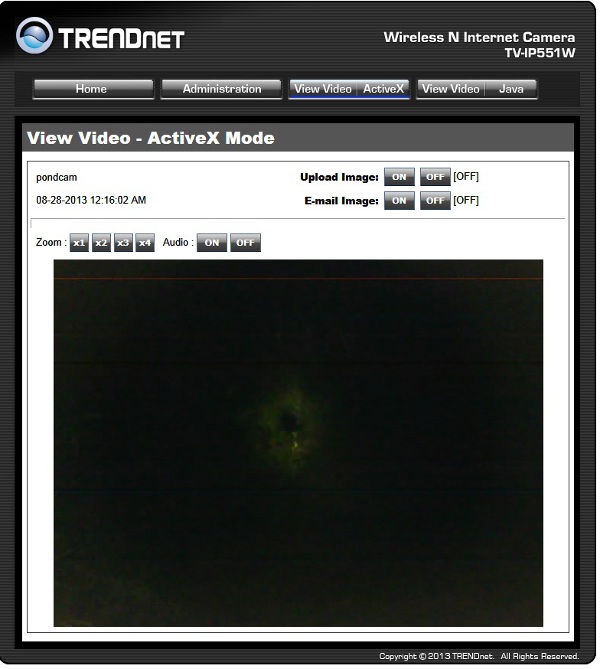
Since I have set it up Sunday night (it is now Tuesday night). I haven’t seen it go down. I feel really good about this because it was what I was expecting as soon as I realized I had solar panels to power it. It is on right now… I can see that it is and connect to it. All I see is black and when I turn on the light I see this.

2-camera-at-night-with-light-on

That is basically a really bright LED light shining down a path with nothing in front of it for about 50 feet.

One feature of this camera that I didn’t know about when I first decided to use it was that it will send an email of what it is looking at if it detects motion. So with it being up for the last two days I was hoping to see something out there… Anything would have been great… Bigfoot would have been nice (But I think he lives in southern Illinois somewhere), how about a coyote? Nope! I hear them all of the time, but none of them go in front of the camera. How about a squirrel? Nope… Not even a squirrel, because they like to chew on my log house at 6AM and wake up my wife… Oh… they would so much rather wake up my wife than bury an acorn (which are really plentiful around here) in front of the view of my pondcam. How about a big giant heron? Nope… Not one of those either, I see them every once and a while looking for fish.  So…. This is the picture you get to see that motion detection on the  camera actually works.

1-motion-detection

Yes… That is my back. I am on a tractor mowing the lawn. Oh… I know you are disappointed and want to see something more. Me too! But all the other email pictures from pondcam are really really boring. I have a picture of my arm… And about 300 pictures of the wind moving the trees in the background when I was trying to adjust the motion sensitivity.

So… to sum up for tonight. Pondcam is actually up right now. It is 12:30AM at night on Tuesday. It has been on as far as I know since I stuck it out there. I suspect that it does go down at night at some point. Out of curiosity, I stick a network monitor on it that will email me if it goes down. Now I will know what time pondcam goes to sleep (If it is up all night long I will be amazed).

——-

OK… It is the next day. I didn’t get an alert that Pondcam went down all night, but I can see that it is having trouble this morning. From what I can tell it has been up since Sunday at 4:00PM or so. It doesn’t seem to actually go down at night. I am happy about this, but also confused. It must be going down at some point. It was overcast this morning and I could see that Pondcam was having some troubles communicating, but it was, in fact on. If I understand what I am seeing correctly. Pondcam is up right now at 10:30PM and has been up for 78 and a half hours straight… on it’s own… out in the middle of no mans land.

I also learned something else. Apparently animals of all types hate the path behind my pond that I pointed it at. I thought for sure I would see some raccoon or coyote go through there. The only way I know that motion sensing works is that when the sun goes down it creates a hue in the plexiglass that makes the camera think something is moving. I have three pictures exactly like this that were emailed to me.

3-camera-sun-go-down

The sun is almost directly to the left of the camera and as soon as that happens it sends me an email with that picture. That is all I get…. no bigfoot… no raccoons, no nuthin’, just the sun going down to let me know that soon I will see black from the camera.

I am thinking now that maybe it is a good thing that animals hate that path because if we all saw something really cool it would derail the real goal of the project which is to see fish!

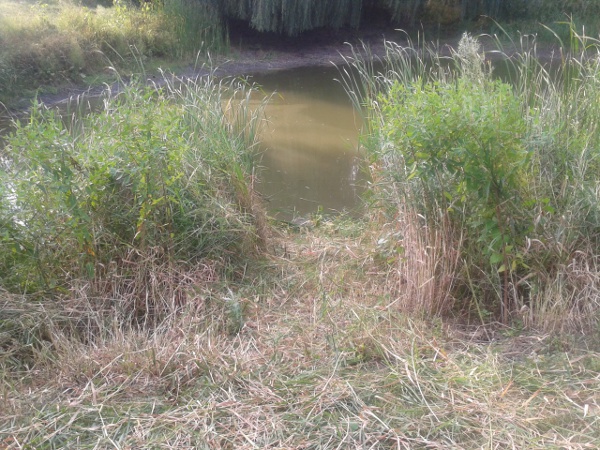
We are close… We are really close; Pondcam’s water proof case is just fine… All the power issues we had way long ago (yes it was a month ago or more) are solved. How about wireless? check! we have wireless triple the distance of where I want Pondcam to go… In all of those areas we seem to be fine, or over-engineered! What is left? Oh… I need to cut a path through the tall grasses so I can place our dock.

I pull out my “manual weed whacker” and make a path for me to bring our dock to the pond.

4-path-for-dock

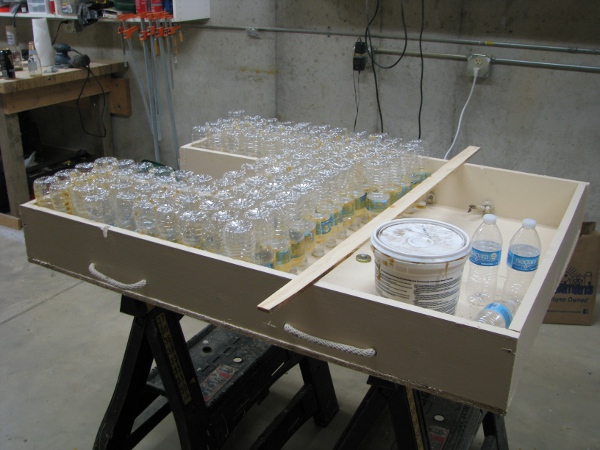
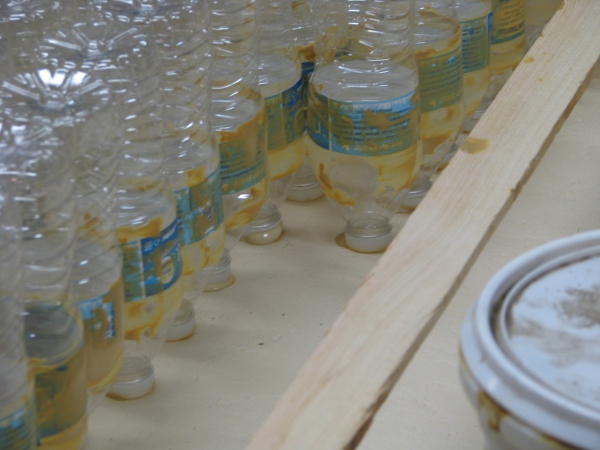
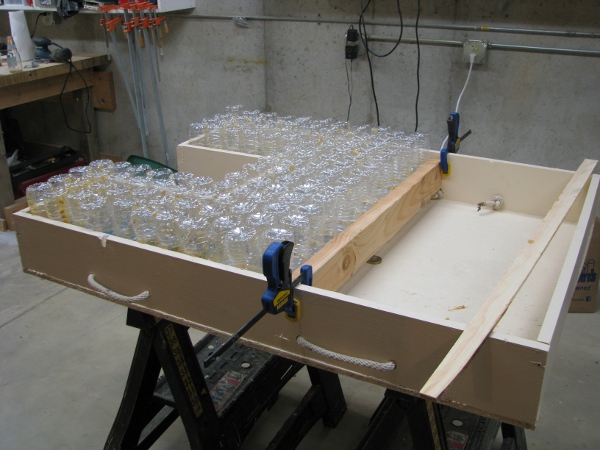
That is right. One thing left. Let’s check on our dock. I go to the basement and line up all of the bottles. I start gluing them into place. It took about a half hour. When I am finished I am here.

5-dock-in-progress

Now that doesn’t look very filled and I am disappointed. But after I think about it for a bit, I am starting to convince myself that is enough bottles. The back area of the dock just needs to support the solar panels. The really heavy part is the roof mount for the antenna that holds pondcam under water. I am going to scrounge and find the rest of the bottles to fill that line and glue the last few bottles in place tonight so it is dry tomorrow.

Now I should mention, I know about as much about buoyancy as I do about water proofing. Unlike electricity I have no math in my brain I can just pull up (Probably many of you do, but I don’t) to calculate if I am even close. Because of that I will have to do a buoyancy test tomorrow. I can’t wait! It might just work, or the dock could be a total disaster like our first case…. I guess we all will have to wait and see.

Oh… I took a picture of how I glued it all in place… Basically I just globbed a bunch around the top area of the bottle and globed a little more on the cap, then placed each bottle. Boring work, but it seemed to do the job. Here is a close up of what the glue looks like.

6-gluing-bottles

So I go for my hunt for a few more bottles. I have three. I need seven. I grab four new bottles and pour them into a picture and put it right next to the coffee maker so no bottled water will be wasted. I glob glue on those last few bottles and finish up that line to make it uniform. I have a problem now. I want to put some wood in place to secure our entire empty water bottle dock underbelly. I can’t use my power tools. My wife and kids are sleeping and my wife and oldest are sick. If I turn on a saw now I will be dead meat. If I am dead meat, then no more pondcam. We want my wife to love pondcam. OK that is a stretch, my wife probably won’t ever love pondcam, but at least I can try to keep the status quo which is… she is indifferent to pondcam. So I take some quick measuerments, grab a 2×4 and a saw, take them to the garage and handsaw a piece of wood to hold all of our bottles in place. Here is where we are with pondcam’s dock.

7-dock-done-i-have-no-idea

So that is where we are. That will dry overnight. Pondcam will be on looking at nothing. It is still on right now at 12:15AM… I can see it with my monitor, it is just plugging away running on that battery charged by the sun. I almost don’t believe it is working that well with power. Will it stay on all night long again? Will our dock work tomorrow?

Oh… One more thing I am totally worried about. My pond is CLOUDY!!!! It will only show a few feet even with the light I am sure. The camera will end up in the pond soon, but I am wondering if it will be just like the path that I pointed it at for the last several days… A whole lot of nuthin’.

My Silly Pondcam – Post 18 – Not in the water yet… but really close

For this post we have to start again with a summary of where we are:

1) Pondcam has a new case. It is bigger. It is clear. It is homely, but not “ugly”. It has a bigger light. It has had way more thought and trouble that has gone into waterproofing. I need to test it to see if it is waterproof.
2) Pondcam has it’s own dedicated wireless network. It covers the entire acre of pond and the walkway around it. It is now an “unsecured” network. I like this, I always wanted an unsecured wireless network for guests, just like I setup for my customers. I am very happy about this network.
3) Pondcam has its own firewall to protect it from bad people on the Internet. I am sure some committed hacker may be able to figure out how to break into it, but in the end, if that is how pondcam dies (by a hacker) it will make for a much better post than if it got water in it. I wouldn’t mind documenting the “post mortem” on Pondcam that way.
4) The dock is still waiting for enough water bottles to make it float. I don’t know what to do about this. I keep finding water bottles in the garbage as my wife and kids don’t really think about pondcam and definitely take the easy route of throwing out the empties instead of saving them.

The beauty of Pondcam, in a nutshell, is Pondcam will be set on its own… In its own autonomous network, running on batteries and solar power. Armageddon can happen… My home can lose power. An explosion can knock out the power grid and people could be starving in the streets. Their could be total chaos, but in the morning… as the sun comes up. Pondcam will get it’s precious sunlight and as it hits the solar panels, it will start charging the batteries and Pondcam will start looking at fish. Sometime (hopefully after 10PM) at night it will burn through the charge of the batteries and quietly turn off waiting for that firsts mornings light to turn on once again and repeat the cycle, just to catch a glimpse of something interesting going on in my pond.

That last paragraph was some good day dreaming, but we aren’t their yet. Let’s get back to our case. I completed it the other day. It has been re-enforced and the back has been put on. Let’s do a waterproof test.

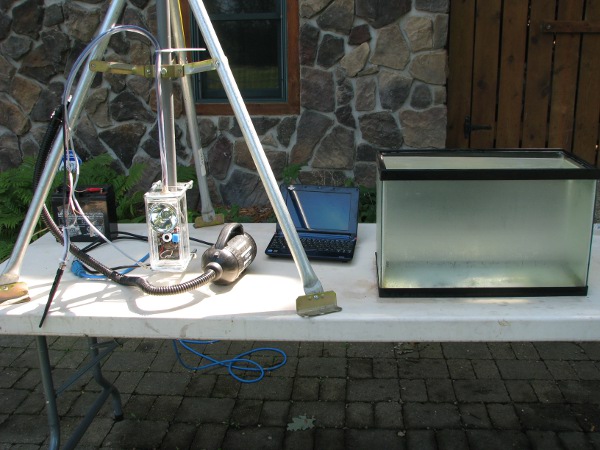
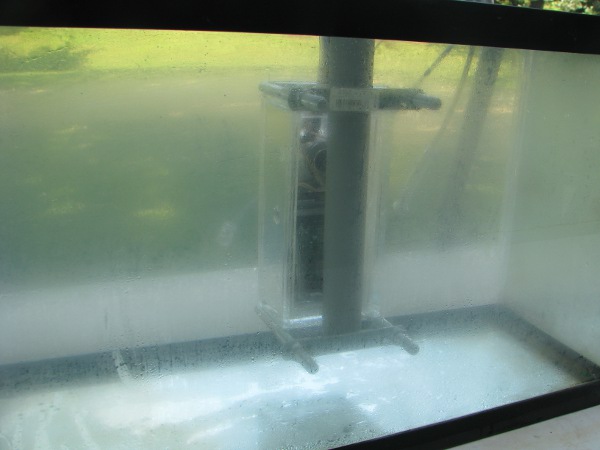
Now you have seen this picture before. But there are two things different. First, their is an air pump in this picture. Second I didn’t plug the tube the wires go through so I can pump air into pondcam as it sits in the tank.

1-Pondcam-and-freinds

It is all there, the battery, the netbook, the air pump (Already connected tot he tube that the wires go through) and the fish tank to submerge pondcam  with air pressure going to it to look for leaks.

Now there is no one to help me do this. Last time Paul was here, this time no one wants to help. My wife won’t help (She has a book she really likes that she is reading), my kids are playing with a frog and trying to stick it in the tank of water and I am crabbing at them. I tried to get Paul over, but he has his own stuff to deal with. I am on my own. So I just do it… I turn on the pump and dunk pondcam… and look for air bubbles.

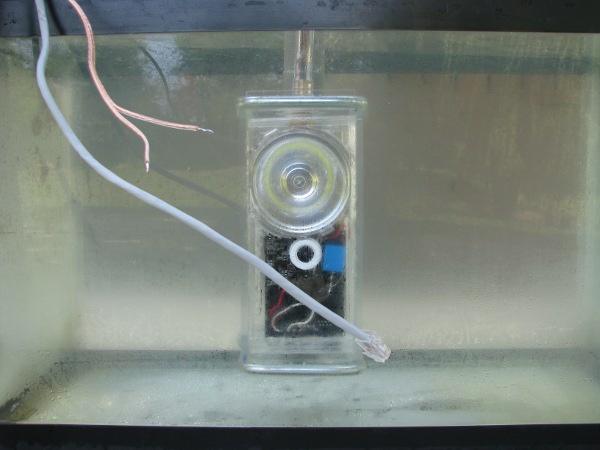
2-pondcam-in-tank-again

I look at the front and don’t see anything. That pump is loud. I think it has got to be pumping about 5psi into it.  I look at the back.

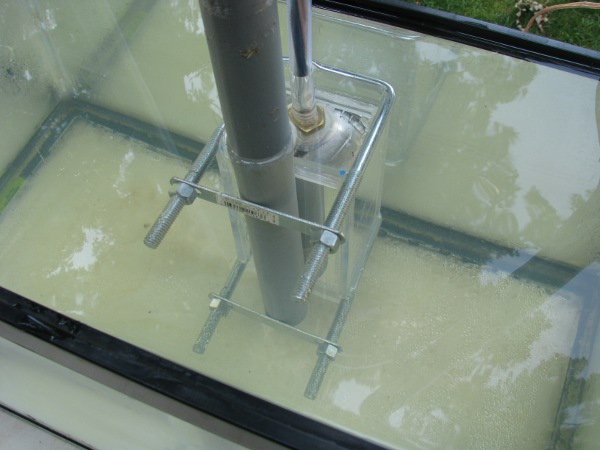
3-back-pondcam-in-tank

No bubbles from the back. I check the top.

4-pondcam-in-tank-top

No bubbles.

OK.. So I know I can sink this camera now. I was able to sink it before, but after 48 hours it got water in it. Now I am wondering… It is water proof, but for how long in the actual water? I have no way of knowing until I just stick it in water and leave it there.

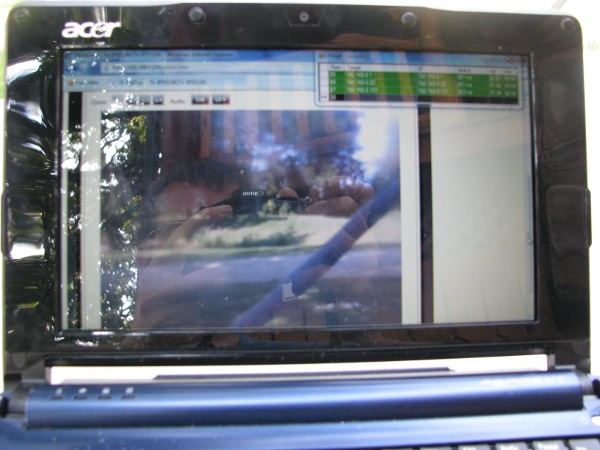
For fun, I connect the battery and turn the camera on. I turn on the netbook and connect to it. This is a really crappy picture, the camera is in the tank, the netbook is connected to it and you see my reflection taking the picture of the netbook screen connected to the camera, but the general idea is there. The camera is in fact on and working, under the water in the fish tank and can see my driveway and a little beyond it. I am happy.

5-testing-pondcam-on-in-tank-again

Before I sink pondcam, I need to do a few things. The first thing that comes to mind is I don’t have enough water bottles… I don’t have enough of them at all. The dock can’t be finished until I figure out how to get the rest of them or just cheat and not fill the bottom (I may actually do that as I know it will float). The other thing is that I really want pondcam to be ON. And ON permanently or at least as much as it can be under its own power so I understand better how it will work on its own. I decide to set it up as far away as I can from the PONDNET  wireless access point (the house).

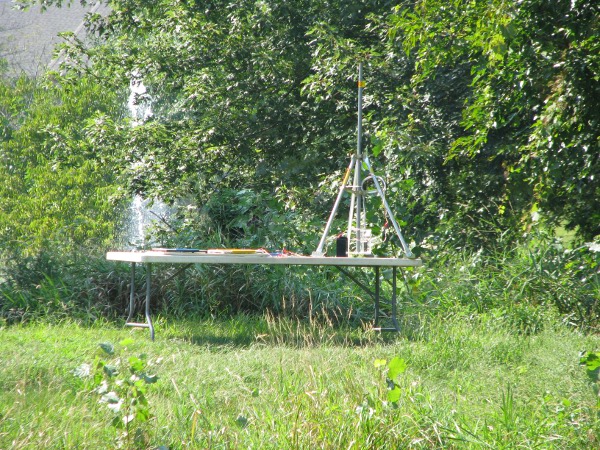
I grab everything; the table, the pondcam, the mutlimeter, the battery, load it all on the tractor and haul it out to the other side of the pond. When I was bringing the table out I got half way and the tractor ran out of gas…. I have to remember to get my tractor in the garage tomorrow. So I drag the table out the rest of the way and set it all up. Here is what it looks like.

6-pondcam-remote-test

It is way out there. The farthest away from “PONDNET” that I could get it. You can barely see it so I will zoom in, but first take a look at the fish tank filled with gross water to the lower left of the picture. Once I dumped the clean pondcam water out Hannah wanted me to set it up by the ornamental pond, it took her two seconds to fill the bottom with gross water and stick a frog in it.

7-pondcam-close-up-remote-test

That is better, you can kind of see the solar panels laying flat on the table, the battery, the camera. It is pointing right into a path that goes behind the pond between some trees. A place where I hope some weirdo animals would like to walk through early in the morning when the camera can see something. The strange looking white that looks like water coming out from the back of the table, behind the tree is my neighbors fountain that aerates his pond. His pond is like 50 feet beyond mine. If pondcam works… I will be talking to him about it (I have known him for a few years and I don’t think he understands exactly how much I love my pond).

8-pondcam-remote-test-path

That is a crappy picture too with my reflection, but it does show the idea. The camera is on and communicating to it’s  “PONDNET” network. I can see it and that is all that matters. It actually wasn’t as easy as this…. I had to mess with the antenna a lot being that far away. I also messed with the wireless settings, but in the end I did get it to work.

After getting the video straight, I configured the camera to email me a picture when it saw motion. I got 350 emails from then until it got dark all with the same picture, just the same view of the path. When I got home tonight, I set the sensitivity down so it would only email if something big is moving around in front of it. I will have to play with the software, but that is fine as it is a really interesting part of the project.

When you first clicked on this post, if you saw the “PONDCAM UP” fish to the right of the website, you are welcome to try to login:

http://pondcam.joeslab.com

User: pondcam
Password: pondcam

It isn’t in the water yet, but at least you will be able to see something. Again… It may be down by the time you read this. I have no idea what the batteries and solar panels will do… That part we are learning together. Oh and if it is night when you try… It will be black. I can’t give the credentials to turn on the light because it will give anyone who sees this on the internet the power to reset the camera. I will send out those credentials to anyone who wants it through email.

My Silly Pondcam – Post 17 – Let’s put together our new case

Now I don’t feel as good about this post as I have about a bunch of the others because we already did this once and it didn’t work out too well. But you need to know why this case is different than then last so I will show you.I already mentioned that I figured out how to cut plexiglass. It basically is very carefully cutting with a table saw, then lots and lots of sanding. Then after that you have to sand some more to make sure all of the pieces fit together will no gaps.

I was all proud of myself and explaining it to my dad and he had a good idea. He said the way a woodworker would build a small box is to use tape to hold it together then get it all aligned and then glue the edges and bring it together to hold it all in place for drying.

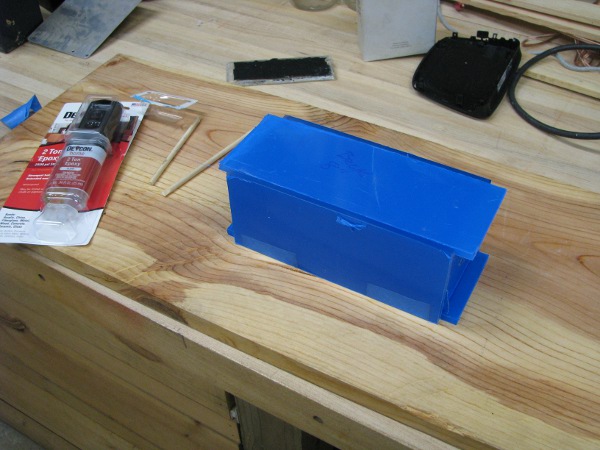
That idea sounds perfect for the pondcam case. So I do that. I build my box and tape it together with blue painters tape. Here is what it looks like all taped together.

1-taped-together-case

I unfold it to prep it for the epoxy. I will not be putting the back on as I will need to put the camera in before the final stage.

2-unfolded-case

I carefully mix and spread epoxy on the edges that need to meet, then bring it altogether. As I am doing this I am very careful to make sure I am setting the correct pieces, my eyes are always fixed on the writing I put on each piece (top, bottom, side, etc.) at the same time I can’t get this song out of my head that my wife teaches my kids about washing their hands. It  goes like this (Sung to the tune of “Frère Jacques/Brother John”)… So you can be tortured like me some day with this silly song, here are the lyrics:

Top and bottom, Top and bottom,
In between, in between,
Rub them all together, rub them all together,
Make them clean, Make them clean.

Yes… I know I am a little nuts. But that is what goes through my head when I have to concentrate and deal with anything that has a top and a bottom.

So after I throw down the epoxy and bring the box together it looks like this.

3-first-step-epoxy-case

Unlike the old pondcam case where I had that grey pasty looking epoxy, this stuff is clear. I can examine potential problem areas as it is curing. I can see where the edges meet with the epoxy and try and put pressure where I think there may be issues (I can see there is an issue at the top and at the bottom, the last pieces I made).

4-problem-areas-with-case

The next day I do a similar test with water (by filling it up) as the last case and I can see there is an issue, not as drastic as the last case, but definitely a problem that would destroy pondcam (I don’t think it would survive another soaking).

5-water-beading-from-bottom

I dry it all out and take some measurements. I have to make the camera sit flush so I put a small piece of finely measured, cut and sanded at the bottom to make sure the bottom of poncam stays in the correct position to make the camera point straight instead of angled. This will hopefully take care of that leak and also make it so I don’t have to drill holes and push wood dowels thought later.

6-fix-bottom

That part was easy enough. I start to think about how water got into our last case. I know I have to be much more careful now. This case has taken me a really long time to build because of all of the sanding and trepidation. If I didn’t want pondcam to get wet before, I so much more don’t want it to get wet now. I decide to build in some reinforcement to give me even better odds.

7-plexi-strips

I cut some strips of plexiglass and then I; sand and sand and sand… Then I take a little break and sand some more. I cut them to the exact length and place them everywhere to reinforce the case and hold the camera in the correct position.

Literally every part where plexiglass meets I fit a carefully sanded strip and glue it into place (yes I use the mock goop glue for this, not epoxy). Here is what it looks like drying overnight. What you see is me  building out the back wall with a border of those strips so that our back will have double the area for epoxy to cure.

8-reinforceing-

After this dried I put our cable assembly in and tested it. I didn’t take any pictures because then I would force myself to write about each one. This keeps me up way too long and makes my posts hard to get through because they are so long. Instead I will sum up:

– When testing I was trying to connect the antenna cable to the camera and I ended up breaking the connector off. This caused a big problem and I had to troubleshoot it. I found the issue and then reconnected it and tested to make sure it worked.
– I permanently mounted our pondcam wireless access point in its new weatherproof case.
– I went to the store and bought a firewall just for pondcam and pondnet. Actually they had some cheapy refurbished ones so I bought three of them. I don’t want any of my projects to touch my actual work network. I reconfigured pondcam so it would be on its own network (They were 14 bucks… old technology, maybe not so good for fast wireless networks but perfect for pondcam).
– I reconfigured pondam’s wireless network to be unencrypted with no password. I want people that hang around my pond to see that they can just connect and browse the web and not worry about asking anyone for a password.
– I test pondcam again and again and make sure everything works as expected. Then I put the back on.

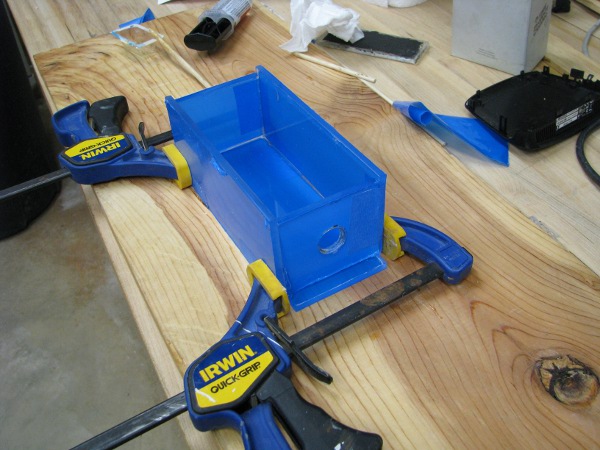
Here is what the pondcam looks like in its new case right now. I spread as much expoxy as I could without fear of it leaking onto the inside of the camera and clamped the back of the case down. I am not sure there is any turning back from this. This case better work.

9-final-case

Now that has to cure all night.

One last thing… Just like the silly song that was going through my head that I mentioned at the beginning of this post, I have a similar thing going through my head every time I have to wait for something to dry. Except it isn’t a song, it is a story. If you have ever read  “Go dog, Go!” to your kids you will know exactly what I am talking about (I have read that book to my kids so many times). Near the end of the book it goes like this “Now it is night. Night is not a time for play, the dogs go to sleep, the dogs will sleep all night”.

go-dogs-go

My Silly Pondcam – Post 16 – How do you permanently wifi enable a pond and your walkway around it?

At the end of our last post I was prepping the camera connections to be tested in its “real world” way of working. I did finish that part, but don’t want to glue the pondcam together until I have a lot of what I call “adjacent minutes” free. That is a rare thing for me as I am constantly (but happily) interrupted by real life. I don’t want to glue those together and have an ugly pondcam. I want to be able to be methodically do that right. And that will take a lot of “adjacent minutes”.

I try to think of something I can do that I can just piddle through and it doesn’t matter if I am not concentrating. There will be nothing that I need to dry and I can be free to just leave a half finished part of pondcam for a while and not worry (not like letting epoxy dry and placing a case together perfectly).

I decide I need a permanent wireless solution for my pond. Now I am a utilitarian guy. If I can get more than one purpose out of some work I am doing I am all for it. Pondcam needs wireless network connectivity. Pondcam is going to be in the pond. I really like to walk around the pond when I police my yard (if you look up the word “police” the military word for it is to clean and put in order… Whenever I walk around my property I always think of that word “police”… it is the perfect word to describe what a suburbanite dad who is walking around his property is doing.

Let’s permanently wifi enable the whole pond and area around the pond.

Note: Literally as I wrote that sentence above I thought to myself, “I should have done this years ago! it is such a good idea”.

Here is a picture of my precious pond. It is bigger than it looks in this picture. In the spring it is really big because it floods and those back willows have water going up and over to my neighbors pond. I have a walkway around it. I want to permanently provide wifi so I can connect a notebook anywhere in the pond, across the pond, to the left of the pond or right of the pond. That whole part of my property needs to have wifi.

1-pond-low-august

I want to setup a lawn chair on the other side of my pond and watch my kids from on top of the hill on the other side and drink coffee (or beer depending on the time of day) and watch my kids play on the beach… while I am looking at pondcam from my netbook.

I know what you are thinking, you are thinking, “Joe, you covered all of that and you had to pull out cantenna that was not good for transmitting wifi to a big area like that. You have it all wrong and it won’t work”. You are thinking that, but I am not. You forgot something. The broken connector to the antenna when Paul and I were working on the pondcam so many posts ago (man that was fun… I wish Paul would help me everyday).  I am going to make these two things do some real important work for me instead of just sitting in bins in my basement.

2-wap-and-antenna

That is the wireless access point that I butchered to test pondcam. I mentioned I bought my wife her own that runs in her own little network and guess what? No complaints… Everything is working… The iPad, the kindle, her new computer, her iPhone, her new wireless printer… It all works. Why? Because it has nothing to do with anything that I do on the network. Her network is her own… That means that access point is totally mine and I can do anything I want with it. So let’s get to it.

I want to mount the antenna here. Right above those doors. That will make that high gain antenna send wifi all over that entire acre. There are no trees in the way, so it should work really well. The lady at the bottom of this picture is my wife’s buddy Celi. I know I can rope her into helping me.

3-antenna-place

I ask Celi to hold the antenna where I want it and I use some deck screws to hold it in place. Here is what it looks like.

4-mounted-antenna

I know this will work, but I have a problem. I am not sure how to power the wifi permanently. I do have an outlet there right at the bottom of that door to the right. The problem with that it is connected to a switch that runs a waterfall in our ornamental pond. I need the wifi to be on 24×7, not only when my kids are playing with the waterfall. I remember something important… I have one of these!

5-poe-injector

I am totally happy to use this. All I have to do is get an Ethernet cable to the wireless access point, then I can run power over the unused data cables in the Ethernet. The way these things work are just great. On the one side, you connect power to an adapter, then it shoots 48 volt DC current down the cable along with the data to the device (48 volts is what old “ma bell” phones use and it can go a long way). On the other side, you connect an adapter that steps down that voltage to either 12 or 5 volts. You then plug in your device.

So all I need now is a long Ethernet cable. I have lots of that (And I bought more at the hardware store the other day). I need to drill a hole in my basement wall so I can feed the cable out to the wireless access point under the porch. I drill a hole that would go right under the porch and start feeding the cable in. I push a whole bunch through.

6-basement-ethernet-out-to-porch

Now I have to do the hard part that I totally don’t want to do… I have to crawl in here and find that cable.

7-no-cable-why3

The cable is all the way at the back of that dark cavern… There is lots of spiders and gross things. It gives me the heebie geebies just thinking about going all the way in there.

I ask my six year old to go get it because she is small. It is pointless to ask her because she makes me go with her. The problem is that I can’t see it. I realize later that it isn’t under the porch it is on top of the porch. I mess around and even get my two year old to help me grab the cable (she was too scared to get the cable and I didn’t realize that I never taught her the word cable so as we are both under the porch she didn’t understand what I was pointing at. Eventually… I get the cable pull it all through, I try to clean up what is obviously a cable coming through the front porch going to under it.

No one will notice this, right? My wife is due back in a few minutes… She totally wont notice this blue cable going out of the bottom of the wall and going down beneath the front porch, right?

8-ethernet-cable-front-porch

Nope… She noticed. She got home a few minutes later and said, “Why is there a blue cable coming out of my house going under the porch?!?!? is this for Pondcam?”. My shoulders shrunk forward and my head tilted down for a moment and I just listened for more. I know she was waiting for a response and just standing by the front door. I said, “yeah… I though that hole would land under the porch… my bad”. Then I listened for a response…. I hear her walk inside. That sound of her walking in brings me back to childhood where you are doing something your mom doesn’t like, but your mom just lets it go, it is called a “green light sound” OK good let’s get back to work.

I connect our power over Ethernet and our antenna to get things rolling under the porch. Here is what it looks like.

9-wap-for-pondcam

Now this isn’t permanent… I still have to figure out how to keep rain out of those devices, but for now I am just interested in seeing if this will light up connectivity on my whole pond. I configure Celi’s phone to connect to the wireless access point and I send her to the other side of the pond with my kids for a picture. They are way out there and it is working (I am sitting just in front of the antenna on a lawn chair).

10-pondcam-wap-test1

Yes… That is right! They are so far away you can barely see them giving a “thumbs up” that it is working. I am happy. But you may not believe me that they are really giving me a thumbs up because you can’t see them… so I will zoom in.

11-pondcam-wap-test-zoom

It is all good. That whole acre of my property is lit up with wifi. But I have a problem…. The wireless access point will get wet if it rains. The power over Ethernet connector will get wet too. We have to keep them from ever getting wet. I think about this for a while. I could coat them in goop glue, but I hate that idea. After a bit I remember… I have one of these!

12-water-resistant-houseing

Now that is an outdoor case for electronic equipment. I can totally fit pondcam’s wireless access point and power over Ethernet connector in that. I just have to get rid of some bulk plastic. Basically I have to fit these in there.

13-wap-and-poe

So I take the board out of the wireless access point (I can do that now because it no longer belongs to the family and now is free to be dedicated to pondcam). I stick it in there and carefully place the power over Ethernet connector and now I have this.

14-wap-and-poe-in-case

And now I have this ready to be permanently mounted to under the porch to light up my pond with wifi indefinitely.

15-outdoor-wap2

Somewhere in this process I did test all of the cabling on pondcam, so I should be able to glue it together soon. Here is what it looks like testing my cable assembly and all new connections with a small antenna I found in my wireless bin (After testing I wonder if I really need that big 9DB antenna… I doubt it).

16-test-camera-again

And yes… I thankfully was able to see a picture.

17-pondcam-test-with-connections

That is the top gable of my house and it is all for now… I have important real work to do for the next week. I am not sure if I will be able to work on pondcam, but I will try. I will also drink a lot of water. I really want my next post to be about gluing our new case together… Unless I can think of some other thing I can do (I am very intimidated about the gluing process and don’t want to screw it up).

For those of you that are getting impatient (dad) and just want to see fish in the pond (like I do). I want to tell you something personally. When working on a small, but complicated project like this at some point it all needs to be wrapped up. I know there are a lot of moving parts; the dock, the camera, power and internet connectivity. It seems like there is too much separate things going on and it really needs to come together. We took some really bad turns and there may be more of them in our future, but today… I can see it all coming together and finally having a camera that sits permanently in my pond.

My Silly Pondcam – Post 15 – An unexpected bonus…

Now so many of you that are bothering to read this blog know me very well, but for those of you that don’t. I would like to explain something. My real job is not like pondcam, but does have to do with technology. I am not an electrical engineer like my mother, which is why I stick to the simple math of Watt’s law and Ohm’ Law. I am a network engineer by trade and do a whole bunch of stuff with firewalls and operating systems. Customers hire me to make sure they are secure and won’t get hacked… And if something does happen to someone’s computer that is related to security I help with that too. I almost never get into soldering and measuring voltages. Literally, the last time I used a soldering iron at a customer site was like 9 years ago and before that it was another 9 years (Both for “cold solder joints” which is an easy fix even for someone that doesn’t do it every day). And I don’t know if I have ever had to use a voltmeter on site like we do with pondcam all of the time.

So here is what is strange…. Last week a customer wants me to make sure every computer in their office has a UPS (Uninteruptible Power Supply, we got our batteries for pondcam from one of those) so when the power goes out their computers they still run for a little while so the users can shut their computers down so they don’t lose any of their work. That part is not strange. Lots of customers want that. So I do an assessment and tell the customer to order 12 of them and some surge protectors. It took a week or so for it all to come in. Me and a coworker installed them all. The next day they are all failing. They are beeping and beeping and all the users are getting really distracted and ticked off. We mess around with them for a bit and realize that the batteries are not getting charged. We talk about it for a while and figure that we have to just get the whole batch replaced because they are defective.

The customer says they will call the company they bought them from to get them all replaced. This is a piece of cake I think, it is a bad batch of UPSes and they will just replace them all. That was last week when I was thinking that.

Today I get a call from the customer and guess what? He is really ticked off. The tech at the manufacturer didn’t believe him that they were all dead and thought it was just batteries, so he wanted the customer to take a “voltmeter” and measure the voltage across the outputs of the transformer that charges the batteries”. When I was talking to the customer he was beside himself and pretty much told them, “NO WAY, I am not going to do that, this stuff is crap, just send me new UPSes that work!”. The tech on the phone with him pleaded and said, “Look… All I want to do is know if I should send you batteries or new UPSes”. As the customer is venting to me about this whole conversation, I am thinking… Crap… I literally just did this exact same exercise a whole bunch of times over the last month…. Which is trying to figure out if our solar panels will get our batteries charged.

Then I say what I absolutely love to say to customers. I say, “Don’t worry, I will take care of it”. If I didn’t make pondcam I may have said something like, “Oh… We are IT guys we are too high end for the crap, let them just send a whole new batch over and be done with it”, but not today. Today I said, “don’t worry I will take care of it…” Why? Because I have experience and while I am talking to the tech from the manufacturer of those UPSes, I will be trying to figure out a way for him to read about pondcam!

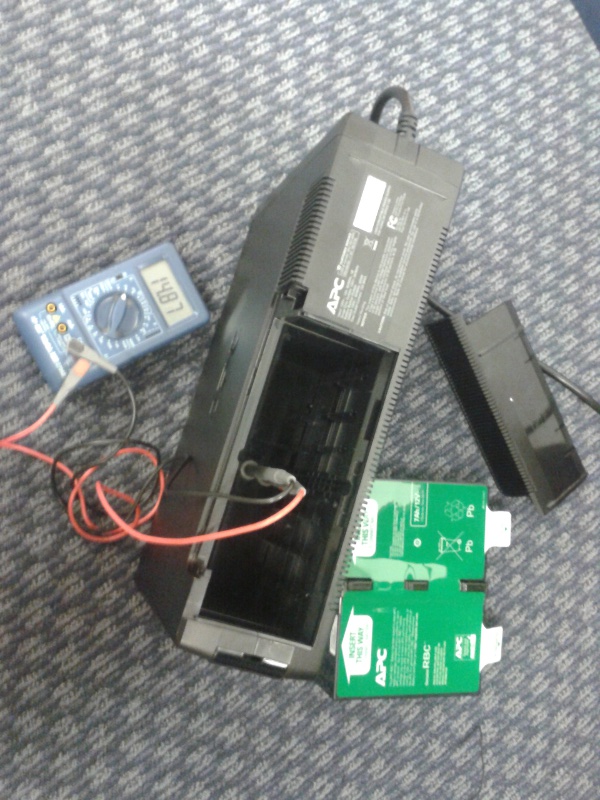
I get on site and do a bunch of other work for them first, but the whole time I am working on the other things I can’t wait to look at a defective UPS. There is clearly a defective one that is at a desk I was using as the battery was showing almost no charge on it’s display. I flip it over and open it, pull out the battery and sick the voltmeter on it. Here is what I see.

1-UPS-measuerment

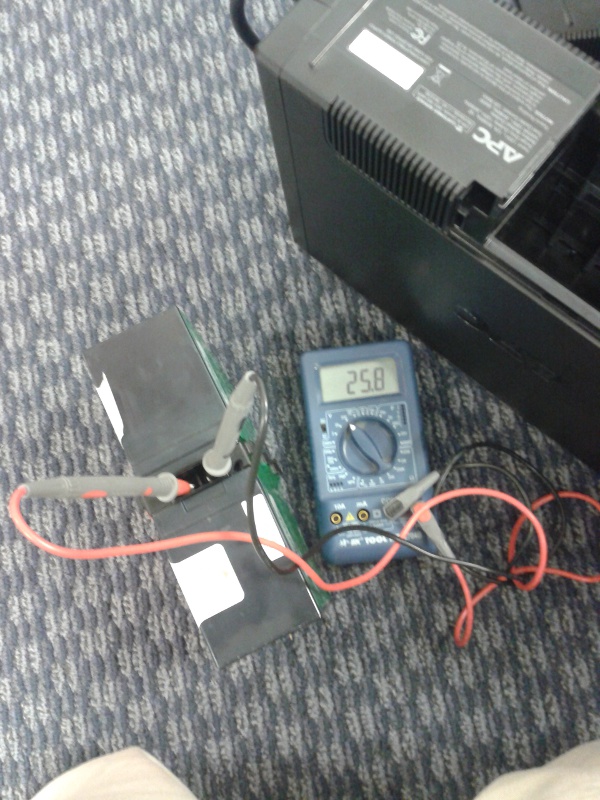
That is 15 volts I think. OK… Cool, the batteries are 12 volts and they are being charged by a little over 12 volts. Well, I think… Let’s see what the batteries are doing. They have been on the charger for over a week, they are probably going to show nothing.  So I stick the meter on them.

2-battery-measurement

Oh.. That isn’t right at all. I can see right away something isn’t right. 25.8 volts from the batteries? These guys are in series which doubles their voltage. I want to learn all about the way a UPS works now so I run around testing any and all that are defective. When I am done messing with all of them I see they are all working correctly. It took a few days of them being plugged in, but they are all just fine. I go back to the first UPS that was clearly not putting out the correct voltage and it just started working as expected.

I took a lot more pictures, but I won’t bore you with any of them. I learned something at this customer site. I learned about our solar panels, our batteries and how a lot of stuff in the network world runs. UPS batteries charge at 24 volts. That means that UPS batteries have to be in series. They need two 12 volt batteries put together to drive a 24 volt system. Here is the neat part… Pondcam’s power supply can work with a 24 volt input. The Solar panels work with a 24 volt output in full sunlight. I am supposed to be working with two batteries instead of one.

Sorry for a lot of writing and not a lot of pictures (I have got a few complaints about how long my posts are… I always say, “they are mostly pictures!”, but in this case they are not… I will try to fix that moving forward).

—-

Before doing anything on pondcam, I need to take an assessment of where we are right now. Here is an executive summary:

1) Pondcam still works. I tested it. But haven’t tested it in a while (I am afraid with all the stuff I do to that thing, eventually it will just end up broken).
2) Pondcam has a new light. It is way brighter, but wider. It uses more power than the old light.
3) Pondcam needs a new case. I know how to cut plexiglass now, I need to get it back together so I can stick it in the pond.
4) When I busted open my wireless access point and moved it, I broke my wireless network at home. I didn’t blog about this before, but that ended up in a series of events that made me buy my wife a new computer, a new printer, her own wireless access point… My wife now has an entirely separate network that is more powerful than mine…. I did it happily because she doesn’t complain about me working on pondcam…. And I never want her too. She doesn’t care about Pondcam, but my plan is to have her be really happy that I am working on it.
5) Pondcam does have a dock, but I don’t have enough empty water bottles to make it float the way I want it to. I have been working on this.
6)  We appear to be on top of everything else… I learned more about power so I think we are going to be OK there. I think we are pretty good on connectivity, because now I have a wireless access point with all sorts of possibilities.

What do we do next? Well first I want to get everyone up to speed on where we are with our dock. I have been a big pain at making my kids and wife  to give me their empty water bottles over the last couple of weeks. Here is what I have.

3-water-bottles

That is not enough to work on the dock. I need at least another bag and a half (it was one and a half bags when I first started collecting them… We need to drink more water).

As I have mentioned, over the last week or so I have been messing with cutting Plexiglas and getting it perfect so I can epoxy it together. I couldn’t bear to take pictures and bore everyone with the trial and error so I will give a summary of how I cut perfect (or as perfect as I can make it) Plexiglas:

1) I use my table saw and cut 3″ by 8″ strips. (This is for the front ant he back).
2) I cut two more 3″ by 7″ strips. (This is for the sides).
3) I cut two more 2 and 1/2 ” by 3″ pieces (This is for the top and bottom).

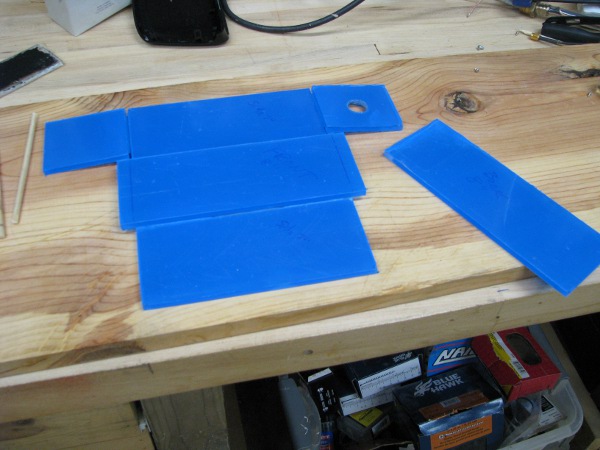
I sand and sand and sand some more. I start with 100 grit sand paper then move down to 200 grit to make it smooth. Here is what I end up with. All sides to our new camera case as perfectly measured as I can get them.

4-plexiglass-box-parts

I didn’t spread them out on the table because I wanted to draw attention to the sides. They are really clean and straight.  I also did the same trick with the blow torch to get the brass fitting for out top as I did with the last case. These guys are ready to be glued together, but I need to do something first.

Here is my problem. I need to test all of my connections for the antenna that go to the camera. Everyone should know how sensitive wireless equipment is to connections. If they are not really good the wireless doesn’t work well. I need this camera to send good video data back to my network on the other side of the driveway when I sink it. So I need to test my new connectors, but I have to do it in a way that will be exactly the way pondcam ends up. So I have to squeeze these….

5-cables-that-need-to-go-in-tube

– The Ethernet cable.
– the new thicker antenna cable.
– and the power cable.

Through this…

6-tube-for-cables

It took a lot of messing around… I took out some motor oil and greased each cable separately so they would slide through it. It seemed to take forever. My hands were hurting from trying to grip the greasy cables and push them through the tube. After about a 1/2 hour… I ended up with this.

7-new-cable-assembly

Now I have to connect the antenna end and the Ethernet ends for the camera. Ethernet is easy for me so I won’t bother to post that. I crimp two ends on and will test that later (remember I need to have the Ethernet outside of pondcam in case it gets reset back to its defaults for some reason, jut like it did when it got wet). The antenna though… I am not so sure about. I do the same trick as I did on the other side. I strip back the shielding on the two cable ends I want to bring together and solder the center… then put some goop glue around that solder to protect it.

8-attaching-wireless-ends

Well… I have to let that dry. I try to think of more to do and can’t because I am too tired. I will stop for now, but really hope to put together the case really soon.

My Silly Pondcam – Post 14

OK… It is late on a Friday night and I do have to work tomorrow (The Friday I started this post was a week ago). I haven’t posted anything in several days as I got all in the weeds with a lot of stuff this week that just needed to be handled (I call that stuff “real work”). It is 11:47PM… BUT,… and this is a very important thing…I don’t have to be anywhere until noon tomorrow and my wife and kids have to wake up early because they have something going on that they have to get to… Sooooooo I can sleep in. As I calculate it, I have two hours tonight…. I better be sleeping in two hours… I may regret working on pondcam tomorrow if I don’t.

I have to get my head straight so I can prioritize what I am going to do. From what I remember here is where we are:

1) Pondcam (the camera) is still working. The light is goofy, but all other components are fine.

2) We have pondcam’s dock that is in the process of being built, but it needs lots of water bottles. I have been saving them, but it may be a while before I get enough to finish the dock.

3) We have serious water issues. It was incredible that water got into the camera housing and the camera still worked, but le’ts be real… That was really bad news. Instead of writing this blog post I should be turning on and off the light on pondcam while it is in the dark water outside and seeing if I can get a glimpse of a fish or something.

The day I wrote my last post (I dunno was that a year ago? It feels like one as so much happened since then) I was talking to my father and he mentioned that he was able to get a clean cut of plexiglass with a table saw. I do have one of those! But it looks like this right now.

1-table-saw-upsidedown

I know what you are thinking,  “I can kind of make out the table… And there may be a saw at the bottom… But why is it upside down?”. Well… That is because I was all about to document my dads way of cutting plexiglass and I realized my table saw was broken. It is upside down because of this.

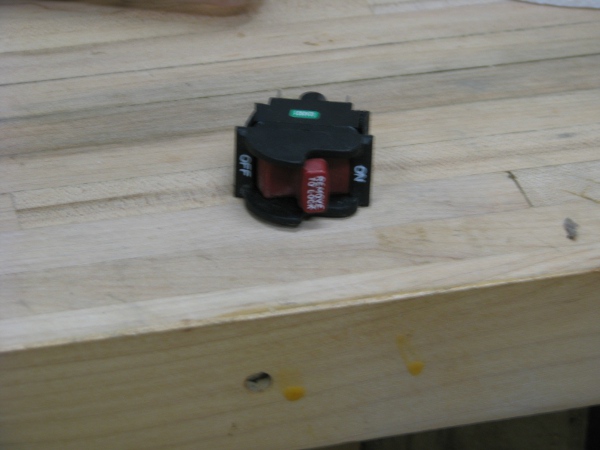
2-broken-switch

Yes.. That is the switch to the table saw and it is broken. How do I know it is broken? I didn’t actually have to do anything to figure that out. Why? Because my wife’s brother came over. My brother-in-law is just like me (And maybe you too) if you are working on something he just cant help himself, he has to take over. I was explaining to him that I wanted to figure out how to cut plexiglass in a very clean way, like they would do it in a factory. He humored me and was glad to watch, but when we turned the table saw on and it didn’t work, he took over. I pretty much just did what he said, we flipped the table saw over…. messed with power outlets, etc. etc.. He was underneath, messing around with stuff, before long he said, “dead switch”. Perfect! I thought, just don’t throw away the switch because I want to take a picture of it later. So that is what I have, a dead switch on my table saw.

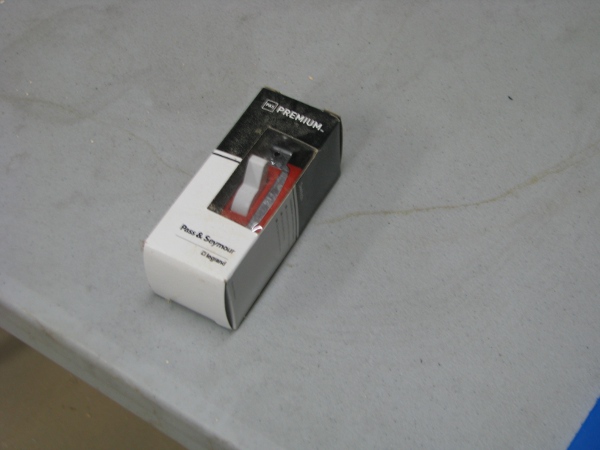
All I need is a simple switch to turn on the saw. I kind of want it to be safe, but to be honest the thing is so loud and I have watched a few table saw accident videos on youtube, I always unplug the darn thing when I am not using it. I look through my electrical bin and find this.

3-new-switch

The only problem I have now is fitting it here.

4-switch-socket

OK… It took some messing around, but this is what I ended up with.

5-table-saw-fixed

I plugged it in and turned it on and it worked. I know I am a crappy dad and a crappy husband… But I don’t think I woke anyone up when I tested it at 12:30AM. It is late, I need to focus on something quieter.

I tried to do other things, but what I really want to do is cut plexiglass to figure out how to do it. I give up for the night. It is 1:31AM… I am bored because I can’t use my table saw because it is way too late…. I should just sleep.

——-

OK… After getting some rest I figure I really need to break open the pondcam. I know I drilled those holes into it and was thinking about patching it, but I don’t think that is the way to go. Here is what it looks like as I open the top. My two daughters wanted to help so they are sitting on the table… If you are wondering what is under my elbow in this picture, it is someone’s toes.

6-open-pondcam

Oh… That is so ugly, but I love this camera. I have to do something for it to make it better . I pull the camera out and place it on the table, right away I notice some oxidation.

7-corrosion2

This is what happens when electronics get wet… Very bad. Here is what the case looks like all broken apart.

8-ugly-case

Pondcam makes me so happy that I want to do better by it. I am building it a nice pretty dock for it to rest from, I am doing my best to save all the empty water bottles so it will float comfortably on the water. I need to do more for pondcam.

Let’s do something I know how to do. The water made pondcam’s light a little gimpy… Let’s fix that, but how? Well, I have one of these!

9-new-light

Now that really is my daughters flashlight. The other one I butchered for pondcam wasn’t her’s (I was lucky). I bought two of these, one for each daughter because I was expecting the power to go out this past spring and I wanted to make sure they had flashlights to make the power outage fun, instead of being just scared while my wife and I walked around the house trying to figure out what to do with no lights, no TV, no Internet. Well… the power didn’t go out this past spring, so my kids forgot all about them… lucky for pondcam.

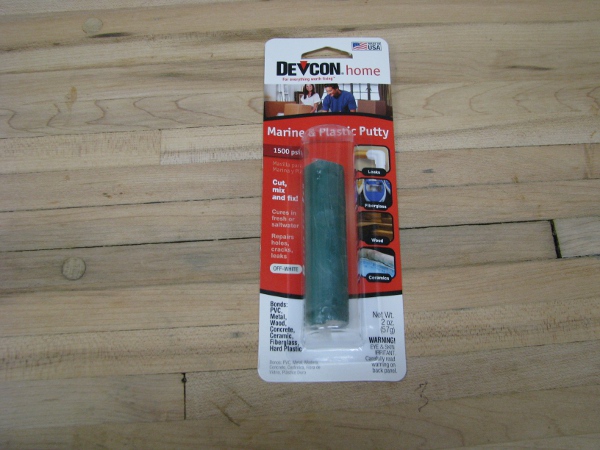
I don’t do anything with the flashlight right away. I don’t like ruining something that works perfectly well for something that may just fail altogether and fill up one of my mystery bins with parts from projects that don’t work, so I distract myself for a few minutes. I really need to figure out what to do with the case and waterproofing. Something went terribly wrong with our case and pondcam got all wet. I need to learn more about waterproofing. I want to try that other epoxy I bought. The other epoxy is like a clay. You mix it together by hand. If you don’t recall, here is a picture from an earlier post to remind you and me that I documented buying it for this project.

4-marine-epoxy

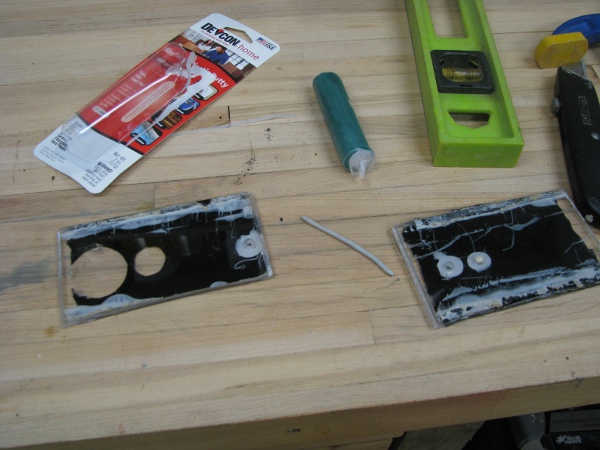
I open it up and slice off a small piece with a razor and knead it together and roll it into a line. I am going to join these two pieces together to see if that will hold. Here is what I want to do.

10-clay-epoxy

I am going to use that little clay looking strip to bond the edge of one of these gross old pieces of plexiglass to the other. And see what happens.

I won’t keep you hanging on this lame idea, I check the next day and it is totally useless. The wrong way to waterproof a plexiglass box, but at least I know that and didn’t waste any real time on it.

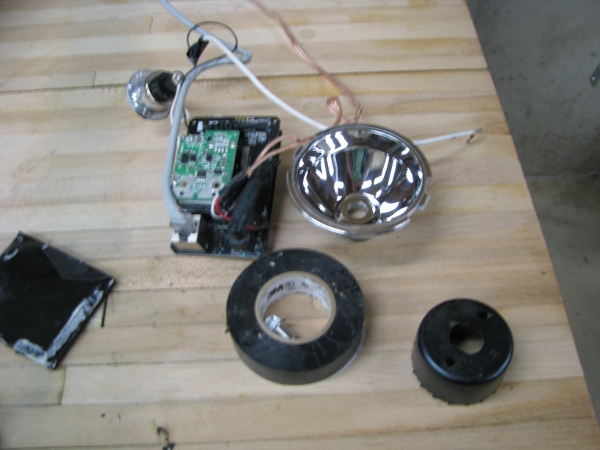
I get the nerve and finally pull apart the new flashlight. It is wider than the other flashlight, so I notice I have to trim it down or make the case a good amount wider. I also notice, instead of three LEDs there is just one big one. You can see it sitting in middle of the electrical tape in the picture below.

11-light-next-to-pondcam

I take a hacksaw blade and cut away at the edges of the light housing to bring it down below 3″ in width to fit in a new case that will be 3″ wide (I will worry about making that case later as I don’t know how to cut plexiglass yet).

12-trimmed-light

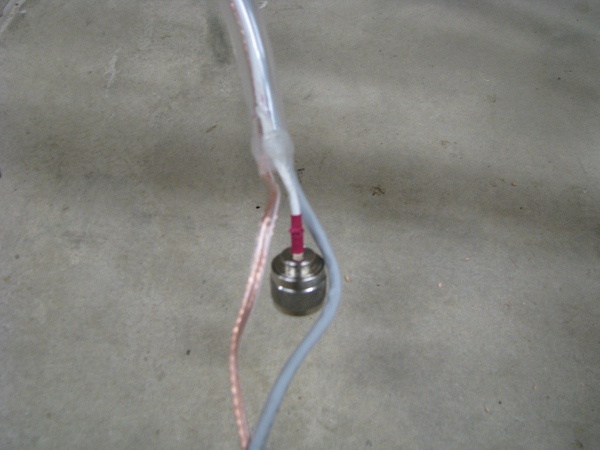
After trimming the case down and having pondcam all out of its home I started to think about something else. I am worried about our connections for the antenna. I pull a “N” connector off of a custom cable I made so many years ago and fix it to the edge of pondcam. Then I take a new mini wireless connector and attach it to the connector on the board.

14-new-antenna-attachment2

This will give me an easy way to attach and detach the antenna without worrying about that little connector getting broken. Hopefully the cleaner connection will give us less signal loss. If what I understand now about wireless is true we are only losing 1/2 db from that connection, but it could be less or more, but as far as I am concerned that is totally acceptable as we have lots of ways to boost signal in this house (Boy, I hope I don’t have to get into that).

Now you may be thinking, “that is all fine and good but what are you going to connect to that?”. Well… I have to make a connection for it… Here is my plan to keep it as low loss as possible. I strip a connector that will fit that and connect it to a cable that is very similar to the thinner cable that goes up to the last pondcam antenna cable we used. Here is a picture to give you an idea.

15-low-loss-connection

I stripped the shielding wires back and soldered the inner wire. Then I putt a little glue over that connection and then a little electrical tape, then some aluminum foil, then some more electrical tape and now I have this.

16-new-antenna-cable

The connector to the left isn’t connected yet, but I show it so you have an idea of what I have to do later. After I push the cable through the new plastic hose, I will then attach it to that connector. Also, if you look carefully you will notice a coating of goop glue over the fragile parts on the silver colored connector. I want to avoid all of the wireless connectivity problems we may have had because of that broken connector. Remember this picture? Ouch.

31-bad-connection

That sucker fell off when I brought it inside. I doubt it was even working when Paul and I were doing all of that testing. That was a totall setback and wasted a lot of my time and Paul’s time… I am careful with connections now because I want to make sure no one wastes time on stuff that isn’t teaching us something.

Note: I learned from a satellite dish installer that 90% of all service calls are because of bad connections. Good to know.

I pretty much had done everything I can to avoid messing with the table saw. I really needed time to think about how I was going to handle it safely. I fixed the table saw days ago and have just been doing other stuff because I don’t want to ruin the little plexiglass that I have left.

I want to make sure everyone is clear on what the problem is. Here is my picture from a previous post.

box-peices

I can make it out now, but when I took the picture I wasn’t really thinking of it. Those pieces of plexiglass do not have smooth edges. If you look carefully, they aren’t even square. I cut them with a jigsaw. I really thought this would be OK weeks ago. I just figured I would just pick up the slack with extra glue. Let me use a term that I use with my six year old, “that was dumb dumb”, I should have known better. Pondcam got all wet because of my misunderstanding of how “easy” it would be to waterproof something.

Let’s take a close up view of the crappiest part in the picture above. Tell me if you see something wrong with having this part fit into a box that will protect a sensitive piece of electronic equipment.

17-bad-angle

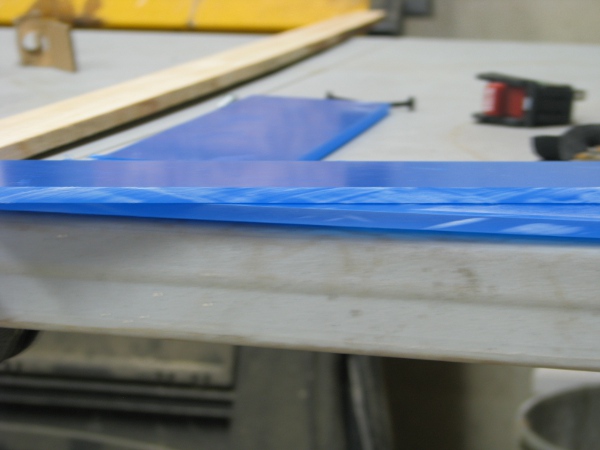
Oh… That is no good at all. I liked that a lot a few weeks ago, but now… Oh… I can see that is all wrong. That isn’t good enough for pondcam. I need to do better. Here is another picture to give you an idea of how bad a jigsaw was for cutting plexiglass. This is a picture of a jigsaw cut next to a clean factory straight cut. The clear side is the jigsaw the blue side with the cover still on it is the factory cut.

18-not-even2

Pretty much every joint on the old pondcam case had weirdo gaps like that and all over the place. That is what I have to fix.

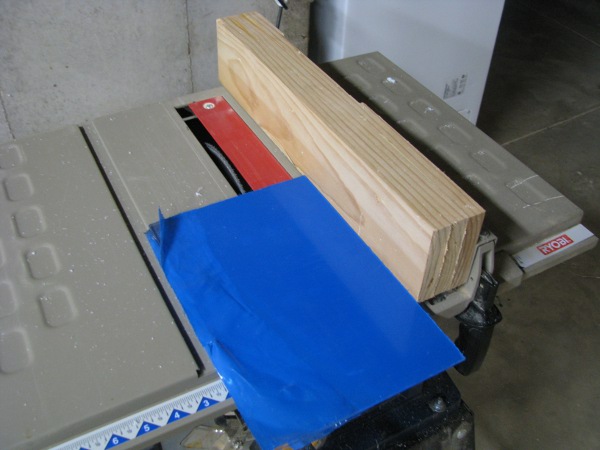
So I finally bite the bullet and I carefully measure 3″ with my table saw and make my first cut.

19-first-cut

After it is done, the edges are straight, but they totally have some melty crap on them and are rough. I do the first thing I think of and start sanding the edge with 100 grit sandpaper. I notice a big difference and can see I am getting somewhere right away. If you look at the picture below you can see that the top wasn’t sanded and was straight off the saw, but the bottom looks much better.

21-sanded-not-sanded

While I am messing around with this I want to get something else going. I did have to go to the hardware store to get more plexiglass. I bought every last bit they had (no big pieces), the guy made me a deal, he said, “Two bucks”. I said, “No! one fifty!”, actually I didn’t’ say one fifty, I said, “OK”.

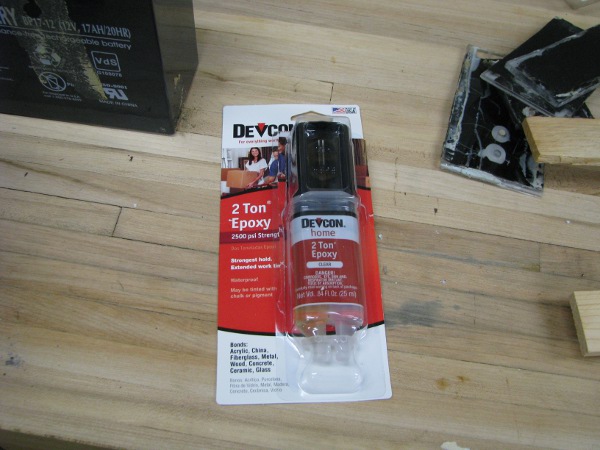
While I was there I really wanted to improve on all things waterproofing. I put a bunch of different types of glue in my cart (When I read the ingredeients they have the same stuff as goop glue and the same warnings, but I didn’t read them until after I got home, so I didn’t know I was buying stuff I already had, some of them had better spouts than the goop globber, so I was pretty happy). In the next isle I came across this.

22-2ton-epoxy

Oh yeah… that is right… 2 Ton Epoxy… I looked at all of the “marine” epoxies in the same isle, but I didnt’ care, they all weren’t worth anything to pondcam. I wanted this stuff. It would cure clear, it should be perfect. I can’t let it touch any of our precious plexiglass for pondcam’s case so I have to test it first. Here is a picture.

So I grabbed a gross piece of old pondcam’s case and sanded it off, then placed it on top of another piece of old pondcam case.

23-ugly-epoxy-test

A couple of days later it was strong. Really strong. I broke it when playing with it (I was planning to put one of our batteries on it for a picture, then it broke, I didn’t get the picture, but I did get the idea…. It is pretty strong and a much better epoxy than then “marine” epoxy that I bought becauase of the label (I know… Irony… I bought this one because it said “2 ton”… sue me then).

………

All things are going fine with pondcam and then something very interesting happens while I am working on it. I take this picture.

24-packing-up-the-multimeter

Now I know what you are thinking. You are thinking, “Why did you take a picture of that?”. Well it is because I actually need my multimeter on site for the first time in 23 years. I got a call from a customer and he is really ticked off. I have a conversation with him and I realize pondcam has to deal without a multimeter for a bit as I need it for my real job. Poor pondcam.

My Silly Pondcam – Post 13

Is pondcam dead? I have no idea at this point. I got home from Mass (it is Sunday). Hannah wants me to ride bikes with her and I just cant. I have work to do. The fact that pondcam can be dead is really bugging me. I have been thinking about it all day. I almost don’t want to check it. It is still sitting out there in my back yard, connected to the aerator that is supposed to be pushing oxegen into my septic tank, but instead is pushing warm air through the pondcam. If you don’t remember I put the cover on and it looks exactly like this.

10-aerator-for-septic2

Under that green enclosure is our camera… It is attached to the pump with a tube… It so may be dead. I am scared to test it, but I have to. I need to know if I have to get another camera somehow. I totally don’t want to buy a camera. But I can’t just do nothing today, so I lift the cover off and disconnect the camera. When I pick it up, it is nice and warm. That makes me think it is really dry inside. There is another thing I check right away. On the white housing that surrounds the camera lens there was some water dropplets. I though they would never dry from our tests yesterday so I ignored them. I look for them this time and they are gone. That sucker is as dry as a bone inside.

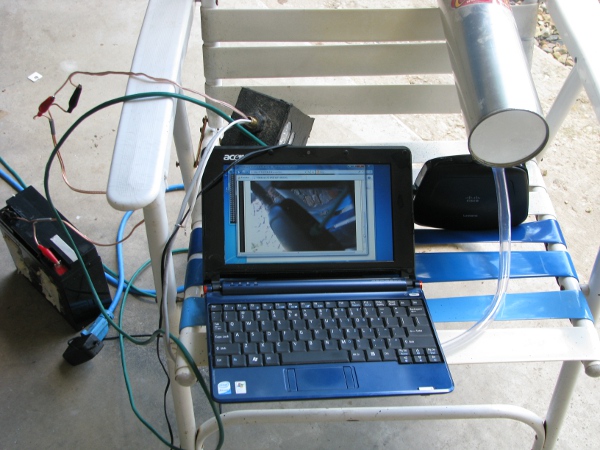
I bring the camera inside and connect it up to the battery right next to the wireless access point.

2-connect-to-batter-to-test

After setting it up the light still looks the same way as it did before. One of the three LEDs was bright, the other two dull, but still on. It did flash a few times like it was booting. I run over to the netbook and check to see if it comes live.

3-connect-netbook-to-wireless-and-test

Nope… no picture, no sound, no ping. I can’t see it at all. At this point my stomach sinks a little. I am sad. When I was working on it I thought I really would be OK with buying another camera, but now it really hits me. If I were to buy another camera I should buy one that is more suited for what I am doing. That would mean a lot of what I did would be absolutely wasted. I got a little sad. I just didn’t want to have this project take that terrible turn. It would be like saying to a customer (granted I am the customer and also the contractor in this case), “Um… Sir, I really thought this would work out, but you have to buy a whole bunch of stuff that you never intended, basically we made a mistake and ruined everything. It is going to cost you a bunch of money to get this project back on track”. Who wants that? I would hate it if that happened to me and I were the customer and a contractor said that to me I would say, “Isn’t there anything else you can do? Anything else you can think of? Anything else you can try?”. Yes… I would beg the guy to try to figure something out. As my poor little tired and sad brain is griding this all out I do have an idea. The little Pollyanna in there isn’t dead yet. Water got into the camera and maybe it broke it, but also maybe it just sent the little guy back to its factory defaults. If it is at its default configuration it would have no idea how to connect to my wireless network.

Remember this cable?

4-remember-our-ethernet

Yep… That is an Ethernet cable. I clipped the end off way back in another post because I didn’t have a good way to waterproof it. Let’s put an end on that.

5-that-was-easy

That took like two seconds because all of my tools were right on the workshop (Remind me to clean that up later, it is a total disaster). Let’s plug it into that switch that is right by the garage door that we used to move the wireless access point.

6-connect-to-switch

OK… I do see a link light, let’s see if we can ping or connect to the camera. It should be on the same IP as last time as it hasn’t been down for that long.

3-connect-netbook-to-wireless-and-test

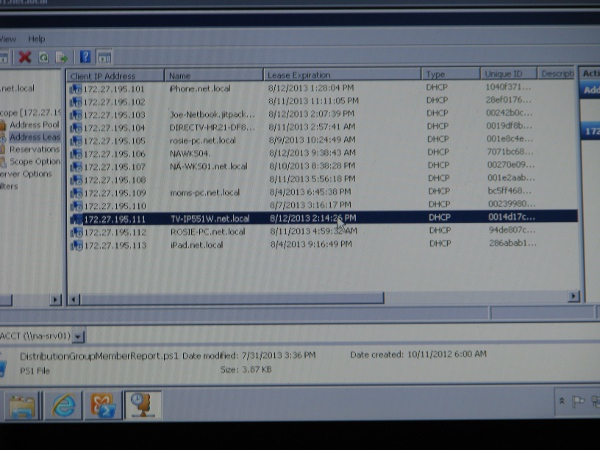
Nope still nothing. I think,well maybe it will be at a different address (I am really desparate here). I log into my sever that hands out IP addresses and look.

7-pondcam-new-address

Yep… There it is. It shows it’s default name “TV-IP551W”… That is our camera… It grabbed an IP address. All we have to do is see if we can connect to it.

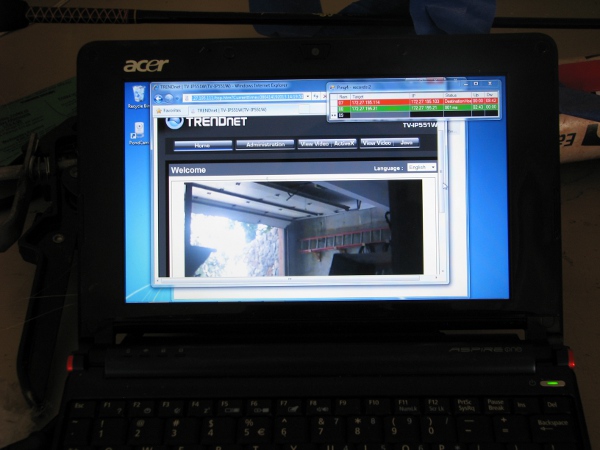
8-camera-and-ethernet-work

Oh that is really nice. I am very happy. The camera still works. I configure the wireless and set it up over next to our wireless access point and cantenna.

9-time-to-test-wireless

Yep… Everything still works. The light… The wireless… The camera… I am happy.

—–

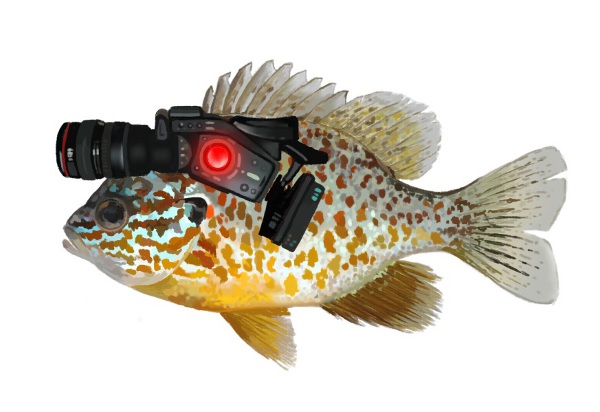
When my family got back from my parents house tonight, I really wanted to get moving on one of the most important parts of pondcam. A buddy of mine who is an artist created me two different pictures. Here is an example of one of them.

10-cyborg-sunfish

I took the pictures and added something to the right side of my blog site. I added a widget that would just show a picture. Then I wrote a script that would ping pondcam every 5 minutes. If pondcam is live, it would change the picture to a “pondcam is up” image. If pondcam is down, it would change it to a “pondcam is down” image. If you go to my site and see the “pondcam is up” sunfish, you will know the camera is on and working. Sometimes you will see it down (Actually I think a lot of time it will be down only because it is going to have to be re-waterproofed (it is up right now because I am too lazy to disconnect it from the battery).

I will send everyone the login once it is sunk in the water again and at a safe distance from people. Who knows what kind of stuff you will hear if I just gave those out and someone connected to it while I was working on it (Maybe lots of swearing!).

For now the camera works, but its an absolute mess because of all of the holes in it. I talked to my dad tonight about cutting fiberglass. He had a really good idea. I also talked to my mom about a way to build a resistor bug that would light up. I have some ideas I need to digest. I have to work tomorrow, so I have no idea when I will be able to get away and work on pondcam, but for now I am really happy… Lots of good ideas to think about and the camera still works. This was a very good day.

My Silly Pondcam – Post 12

I had a lot to do today before even touching pondcam. First I wanted to go to first Friday Mass then have a lunch meeting with a friend of mine. While at lunch I was talking to him about Pondcam. He had all sorts of really great ideas. I mean really good ones. While we were casually talking about it something came to my mind. I said, “I just realized I never really got to see what the camera looks like under water.” He looked at me very plainly and said, “Oh.. You need to do that next”. He was totally right. I don’t know how that slipped out of the top  priority. I did put it in the water, but it never showed anything because it wasn’t connecting. Then I got all distracted with the washout thing, then the dock idea came up and the coyotes were all on my mind during post 10. It was too much going on and that very important test slipped my mind. As soon as lunch is over I speed home to sink pondcam!

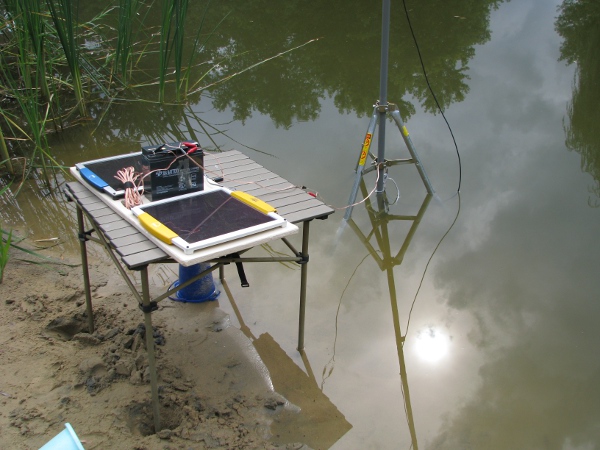
Now today is Friday and my family goes to my parents house for dinner. I really like to get there by 5PM or before so I hurry up and start getting to testing. I grab two landscaping pavers and place them in the pond in about 1 1/2 feet of water. I place them out into the pond a little (on the beach so I don’t have to step into gross clay). I tell Hannah (my six year old) to dig two holes for the back legs of our table. I needed to do these two things to make each somewhat level, so it doesn’t look stupid. I setup the camera and make sure it is sitting as deep into the water as it will go. Here is what it looks like.
1-camera-in-water-again

The water is pretty cloudy, but I don’t care. I need to see what it looks like from a computer, I run upstairs to look and I can’t see it on my computer (I found out later that I typed the wrong address for the camera when I was trying to ping it). I couldn’t so I grabbed the netbook and powered it up. I then connected to the camera and this is what I saw.
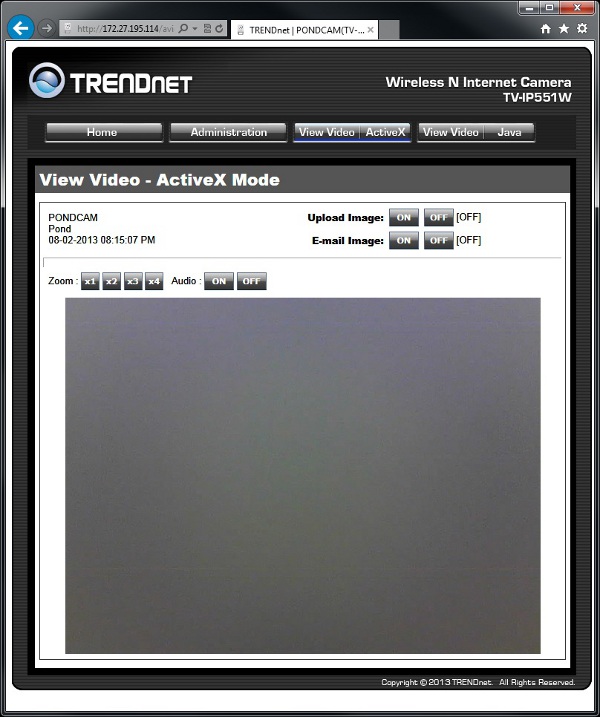
2-grey

That is with the light on. I don’t know what to make of it. Why can’t I see anything? I must mess with the video settings, but I can’t. My wife and kids are already in the car waiting for me to hop in and go to grandma’s house. So I just anxiously leave everything the way it is.

While I was at my parents house I brought them all up to speed on where we are with pondcam and mentioned the fact that I can’t see anything in the water. My dad brought up a good point. He said that if there is nothing to see then it is likely that there will be no picture in front of the camera and it will be grey because there really is nothing there. He said you need something for the camera to focus on like a ruler or some sort of measurement in the distance a bit so there is something to focus on. Now that sounded good to me so at least it got it off my mind (We left as soon as we could from my parent’s house because I had to get home before there wasn’t anymore light).

When I get home it is a little bit light out. It it is 8PM or so. My wife Rosie takes the girls inside and I check out our camera.

As soon as I connect to it, it is the exact same thing. Just grey. I remember what my dad said and thought, “Well… I don’t really want a ruler out there, I want to see fish.” So I grab some fish food and throw it in the water all around the camera. I run upstairs to my office. I can see fish swimming around, but it is really messy. I can make them out, but it is terribly fleeting. I am more excited at this point than I have ever been during this whole project. I just love seeing those fish in the pond from my desk! I don’t care if the water is murky! I grab as many screen shots as I can and here is one of them after I turned on the light.
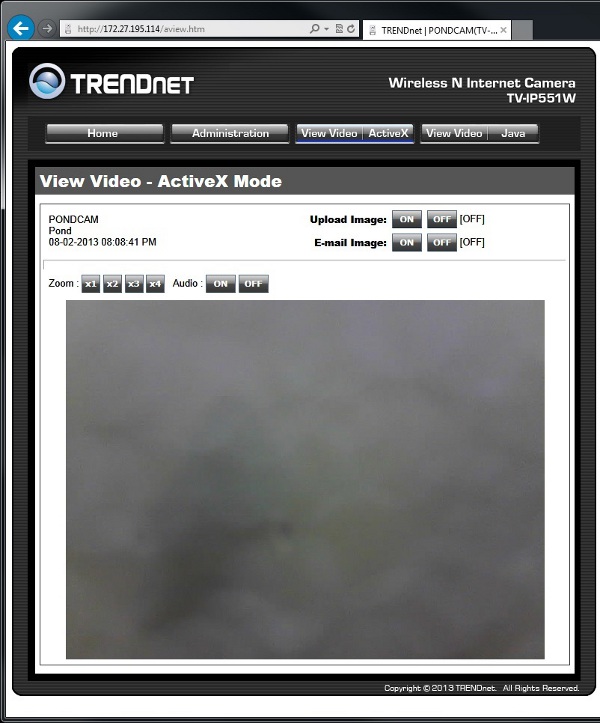
2-FISH

That picture is really crappy. But it is something. Here is what I really like; that is the face of a fish that was looking at the light. When I turned on the light and the sound was going I could tell the fish, every once in a while, we trying to take a bite out of the camera, I could hear them pounding on it. I could see them too. Sometimes pretty clearly, but always very fleeting I couldn’t get a good capture of it so the picture above is all that we have.

Another thing to notice about that picture is the weird bubbly mess all over. It is hard to make out from this picture, but as I watched the video it was a little clearer, it looks as if tiny bubbles formed right over the lens as I sunk it. I have to figure out what that is about because it looks terrible.

I run outside with a paper towel, take off my shoes and march out into the pond (I discovered there was a leak in my pond sloshing boots, so I have to get new ones). I wipe down the Plexiglas on the front of the camera, and literally run back to my desk to see if I can grab a screen shot of what I see (Yes I am back to running all the way back up to my office, I know I am nuts). I see fish swimming past the camera. It isn’t is as clear as I want it, I try to capture the picture, but I got all screwed up messing around with video settings to get something clear, but it was too late… It got dark. Even with the light on I can’t see anything in front of the camera. I can say the weird bubbles are gone, but the picture just wasn’t clear like I was hoping. I really need to do some better underwater tests.

I think that I really need to start recording or getting better pictures instead of my screen captures. There are some more features on this little camera. It came with some recording software. I played with it a little bit but not enough to really know what it does, let’s look at that.

The software is “SecurView Pro” and it came with the camera. When I first installed it and attached it to the camera it looked pointless, but then after I dove into it tonight, I can see it really is perfect for what I want. Here is what I want and it matches nicely to its features:

1) I want to record only motion in front of the camera so I can see what is going on. If there is nothing going on and all it sees is grey, then don’t bother recording because that is boring. Well the software does that.

2) I want to record sound because if a big fish tries to eat the camera even if I can’t see it I would like to hear it.

Those features are well within the software’s capabilities so I start it up and also start my normal web browser connection to the camera. Currently it looks like this (I turned the light off, it wasn’t doing anything anyway and I hope to capture something big moving past the camera in the morning).
5-nightime-recording2

If I can figure out a way, I will get some recording of what is going on and figure out how to embed the video into my blog. All I have to do is wait for something interesting to happen. I really hope I setup the motion recoding properly. I have no way to test it. I also hope the camera doesn’t have a small leak and will be filled with water by tomorrow as I am leaving it in the pond overnight!

A little while later I see the camera go down then come back up again. I fuss with it a bit, then a little while later it just goes down and doesn’t come back up. I figure, well it is nighttime and the battery is probably dead. I thought to myself, “I did fully charge it so it should really be good until morning. Maybe that battery is no good too, or maybe we sprang a leak”. I will wait until tomorrow when the solar panels get some sun and see what the story is.

—- Next day —-

I have to work in the morning for a customer so I don’t have a lot of time. Before I leave the Sun is just about to shine over the oak trees on our solar panels which should turn the camera on. It may be a little while. I did check to see if could at least ping the camera and I couldn’t. I don’t have time to mess with anything so I just take off to the customer’s site.

I worked until about 2:30 and didn’t get home until 3:30PM. I still had stuff to do. I don’t bother messing with the recording software because that obviously wouldn’t have anything on it. I check our camera. I don’t want to pull it out of the water. I want it to stay, this will be a good underwater test if I can get it back up.

I run over to the camera and I disconnect and reconnect the battery to see if it will come up… Nothing. I mess with the direction of our cantenna and try to reboot the camera again, still nothing. I then notice I never plugged it into the solar panels. I thought, “Oh… that is it duh!” I plug them in and figure there will totally be enough power because of all of the tests we did in earlier posts. Still nothing. I can’t ping the camera, I can’t connect to the camera. It is down.

I even pulled out some “known to be good batteries” out of a UPS that is sitting in my basement (a UPS is a power supply for a computer that will keep it on when the power goes out). The batteries are brand new, but I have to break them apart because they are stuck together with really sticky double sided tape. I bring one of them out and connect it. Still nothing!

I am convinced. The camera might be dead.

I go to the beach and drag it out of the water and set it upright on my patio. I see something right away that looks really bad.
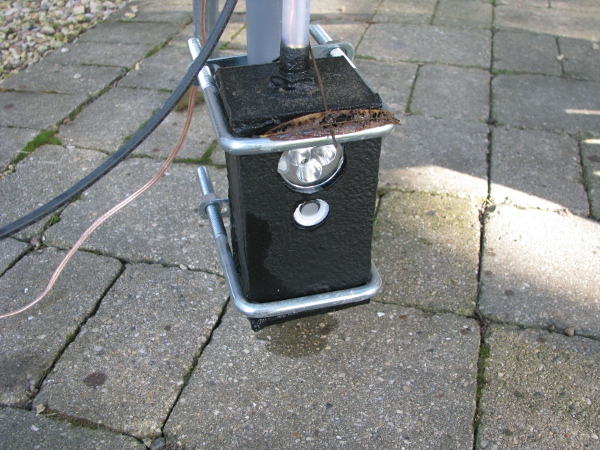
6-camera-out-of-the-water-wet

Just look at the lens. It has got fog on it. I don’t think it was that humid when I put the top on it. I pull it off the mount and turn it upside down so I can see if there is water in it.
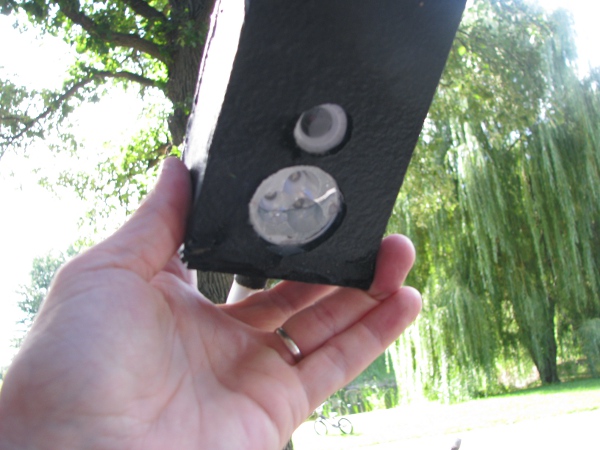
7-water-in-camera

Oh… That is pretty much the worst thing that could happen to our camera (Aside from lightning). There is water in it. My waterproofing job didn’t work at all. I dry the outside as good as I can and take advantage of the water that is still in it. I want to see where the leak is. I stand it back on the table and just look around for water leaking out.
8-leaks

I can see two leaks there. There may be more on the top and sides. That is a really really bad water proofing job. I thought we tested this and it was going to just work. We aren’t going that deep. I have old empty Clorox bottles with just their caps on floating beneath the surface of our pond for over two years to allow me to pull up the diffusers that are attached to my windmill pump. They don’t sink. It is late summer and they are still fine, but our epoxied, gooped, rubberized paint sealed camera didn’t last overnight. That is bad bad bad. The camera might be toast.

Now you may think this makes me sad. But it really doesn’t. Not even a little bit. It is the punches that you don’t see coming that knock you out. I always thought waterproofing was going to be the hardest part. I am familiar with the techniques to get every part of our pondcam working before we started, so I at least knew I had a shot at it. The one part that I never did before in my whole life was actually waterproof an electronic device so you can put it under water. More than ever I want to figure that part out.

Another thing. I really am a Pollyanna by nature. Like the ugly burnt power supply there may be a chance that we can get this sucker to come back to life. It is a small chance, but definitely there is a chance.

Now I know what you are thinking, “What are you talking about? You are crazy, that sucker is dead just like the battery charger your sister and wife connected to the car the wrong way. It has water in it you DUMB DUMB! This Pollyanna crap has got to stop, you are wasting all of our time. Just tell us what you are going to do now.” Now that is what you are thinking, let me tell you what I am thinking:

– Granted there is water in that camera. And I did all sorts of bad things when that happened. Instead of quickly pulling it out of the water and drying it off, I let it sit in the pond overnight. That was really bad. Another thing I did was to keep trying to power it up. I connected solar power to it, when that didn’t work I connected brand new batteries to it. Oh… That is really really bad. I did notice a spark when I connected the new battery to it too… That probably fried a bunch of stuff, but… maybe it didn’t.

– I have seen all sorts of devices come back to life after they dry. Twenty years ago I dropped a pager into a cup of coffee when I was driving. I pulled it out and dried it off. It smelled like coffee forever (I think I still have it somewhere), but it worked.

– My buddy was canoeing in my pond last spring and fell in. His cell phone got all wet and he put it in rice for a month. He turned it on and it was broken. He left it in the rice for a few more weeks and then it worked. As far as I know that phone is still working.

– I jumped into my ornamental pond with a brand new phone to get my niece out of there when she fell in. It was dead when I got out, but I stuck it in rice and in the morning it worked.

– My nephew took a digital camera and put it in water. I took it apart and dried it all off and it worked again too.

OK.. Granted we cant do the “rice trick” to dry out our camera. It will be 50 years before we  can finish. So I have to think of something else.

There is a LOT of water in it. It isn’t filled to the top, but there still is a bunch. I clip our antenna connector off and pull off the  clear tubing that is connected to the brass fitting. I empty out whatever water I can.

I don’t want to take the camera apart (Remember the pegs I drilled holes for to push the camera and light? I would have to destroy the whole case and start over). I haven’t even figured out how to cut Plexiglas properly so the next case I make wont leak. I am hoping I can save this one… somehow. I have to figure out how to dry this sucker out without opening it and my only opening is the unplanned holes that are at the bottom and the brass fitting at the top.

I look around for a way to dry it out. I do have a lot of canned air. It isn’t warm dry air that would really help dry the camera, but it will do something, so I stick it in the brass fitting and just blow the remaining contents of the can into it.
9-canned-air-into-camrea

Water is coming out all over the place. This is getting some of the remaining water out, but I know to make it totally dry inside I am going to need to do something different. I want to do the “rice trick” on steroids.

I am pretty desperate for ideas where I can get air. Now I have lots of things that can blow air into this camera to dry it out. I have blow dryers (Like for hair), I have electric air pumps for bikes and car tires, but I really want something that will run for a long time. Like overnight. Blow dryers and tire pumps are not designed to do that at all. I am getting so desperate I am even asking my wife, who doesn’t care about pondcam in the least, if we have a bubbler for our fish tank. I ask her, ” Do we have to have a bubbler for a fish tank”. She says, “No”. I believe her because I don’t remember ever seeing one and if I did have one I would have set it up this year when I cleaned out the ornamental pond and put my biggest fathead minnows in the fish tank overnight. They died from lack of oxygen. So the bubbler idea is out. Too bad because it would have been perfect. A constant stream of air pumping into our camera overnight to dry it out completely. Then it hit me… I have one of these!
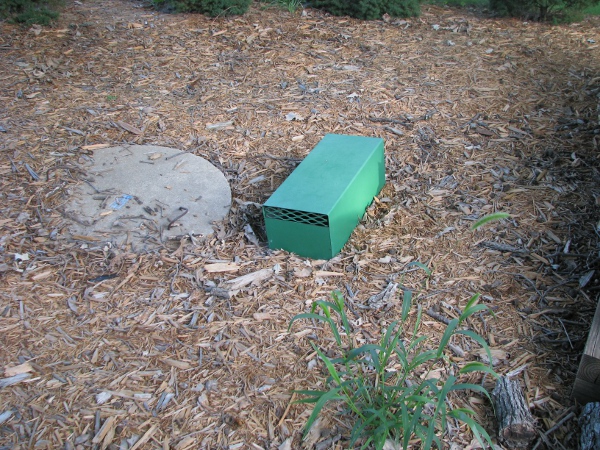
10-aerator-for-septic2

That is a septic tank aerator. And I know a hell-of-a-lot more about these than I ever wanted to. When I bought this house I noticed an big jewel light attached to a power junction box against the basement cement wall toward the back of the house. During the first year we lived here I didn’t have much going on in the basement at the time so I almost never went down there. One day I was getting something downstairs and I notice this light flashing and this kind of quiet alarm noise. Not loud enough to be heard upstairs, but definitely loud enough to be really annoying in the basement. Well, I figured out what it was. The motor/aerator for the septic was dead. I bought a mantenence kit which required me to pull it all apart and replace what looked like graphite blades that run in a housing to pump out the air. When I was rebuilding and testing it I did notice three things. 1) It was warm air. 2) I was probably about 15 PSI. I could easily hold the pressure back with my hand against the air outlet. 3) And this is the most important. This air pump is meant to pump air 24x7x365. It runs all of the time.

Now I know what you are thinking, “You have got to be kidding me Joe. Don’t hook your pondcam up to that, just leave that alone. That is an important functioning device that is part of your home. If you disconnect that it may ruin you septic and then you will have a whole mess on your hands”. Yes… And you are exactly right, I would have thought the exact same thing. But when it broke and I ordered the repair parts I talked to the lady on the phone and she said, “Oh.. Those go out for people all of the time, as long as you get them up and running in a week or so you will be fine”. Good enough I thought. Last year (during the drought, when the wind wasn’t blowing at all to aerate my pond) I hooked up water hoses all the way up to the outputs of my windmill aerator to pump air into the pond for a few days (That was like 300 feet or more away). I may actually do that again this year if I want to clear up the water for pondcam.

Now we have to figure out how to use that warm dry air coming out of our septic aerator to dry out our pondcam. Let’s pull the cover off as I forgot what those connections look like.
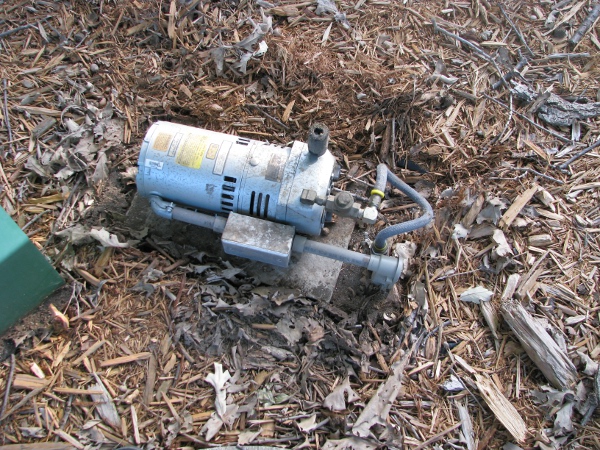
11-cover-off

OK… We can do something with that. I take our camera and drill some holes across the bottom where we know the leaks are.
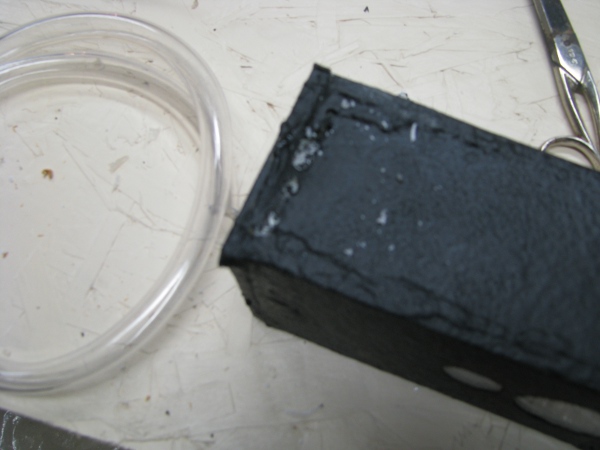
12-drill-holes-in-pondcam

It doesn’t look like holes are there but there are. They are really small and I drilled like six right across the bottom (On the other side of the camera where the air will be coming in). You can also see I cut a nice long length of the clear tubing to push our wires through to allow us to pump air right into the camera. Here is what it looked like after I got the wires through (I had to give the three sets of wires a thin coating of motor oil so I could get them through that tubing and attach the it to the brass fitting).
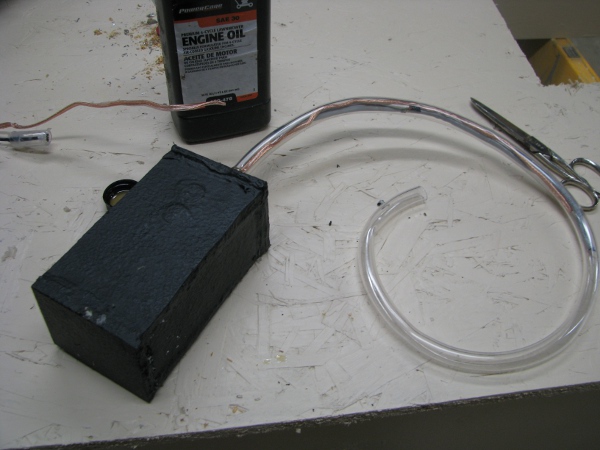
13-pondcam-ready-for-air

The rest is easy. I just take that, disconnect the output to the aerator and connect our pondcam. Here is what it looks like.
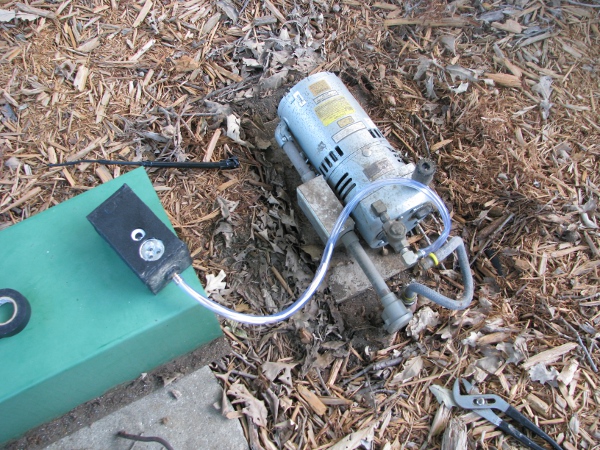
14-drying-pondcam-with-aerator

Now I really learned a lot when I did this. Little bits of water were coming out from all over. Top and bottom the sides, everywhere. My seals on this case were just terrible. I am happy though. I found a really good way to test the pondcam for leaks that won’t risk its life (If it ever works again). I can hook it up to this thing and stick it in water. If I don’t see bubbles we could sink the enclosure to the bottom of the pond and it would be fine.

I want to leave it there until it is completely dry. I look for evidence of water that I can watch for to dry up so I can test it. I do see this.
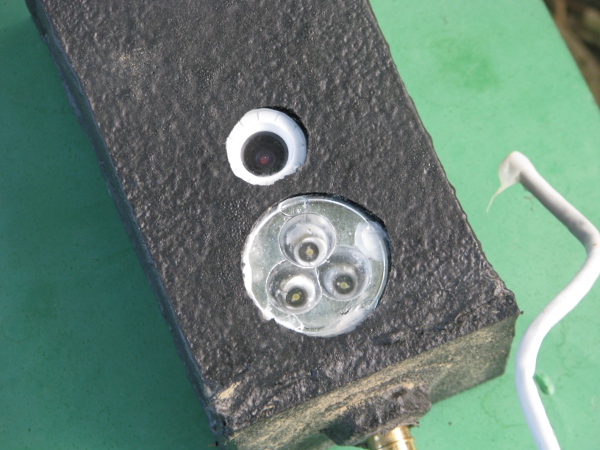
15-water-on-light

There is some water that I can see (not glue) that if it is dried up I can test.

After a couple of hours it really looks dry. I pull it off of the pump and see if it works.
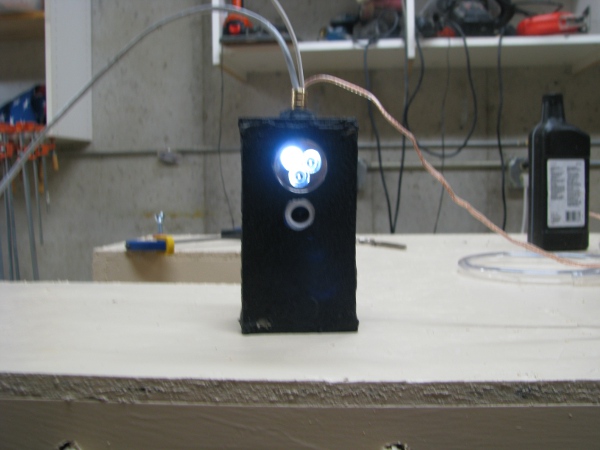
16-pondcam-after-drying-out-maybe2

Now I can see right away that is not right. Two of the LEDs are not as bright as the other. That tells me something is wrong. They were always the same and very bright. Water must still be in the camera. I test it anyway, but it still doesn’t look like it is working. It does act like it is turning on, but I get nervous while trying to connect to it and just give up for the night. I re-attach it to the aerator and put it under that green cover over night. After Mass tomorrow it will be dry. If it doesn’t work then, it will be garbage time for that camera.

I am very intersested in what everyone thinks at this point because I have no idea if the camera will work or not. I would love to see some comments on this. If you think the camera is dead or not. I have some hope, but again… It may be over for the camera and I will have to find another.

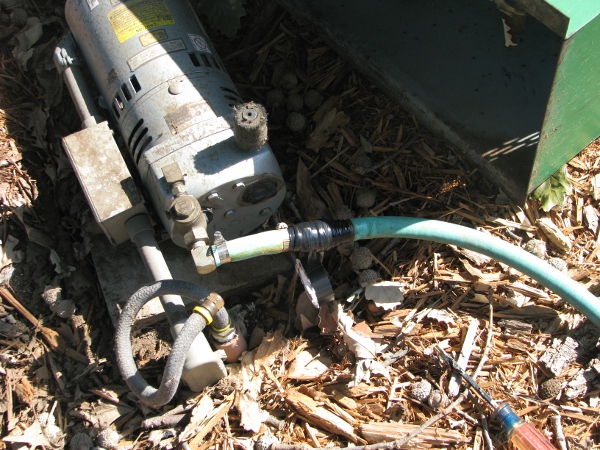
Post Navigation