
In an earlier blog post “My silly PondCam – Part 1” I described my desire to have an underwater camera for my pond that I can view from the Internet. In that post we conquered the connectivity part of the camera. That leaves us with two other steps: 1) figuring out how to get power there and 2) making the camera water proof and the rest weather resistant (because I don’t want to ever have to take it inside).
This post will be all about powering up the unit. If you don’t recall this is what the camera and antenna look like now.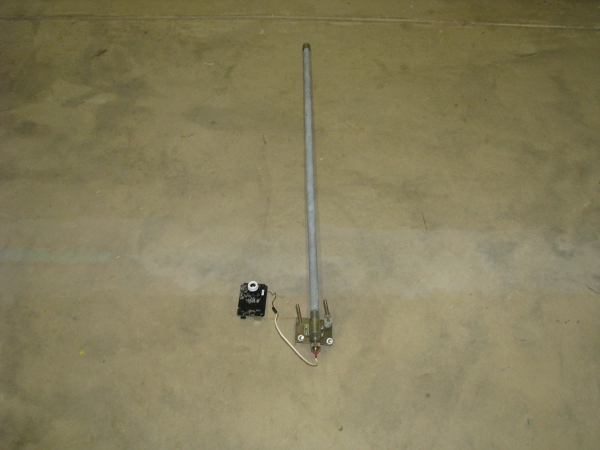
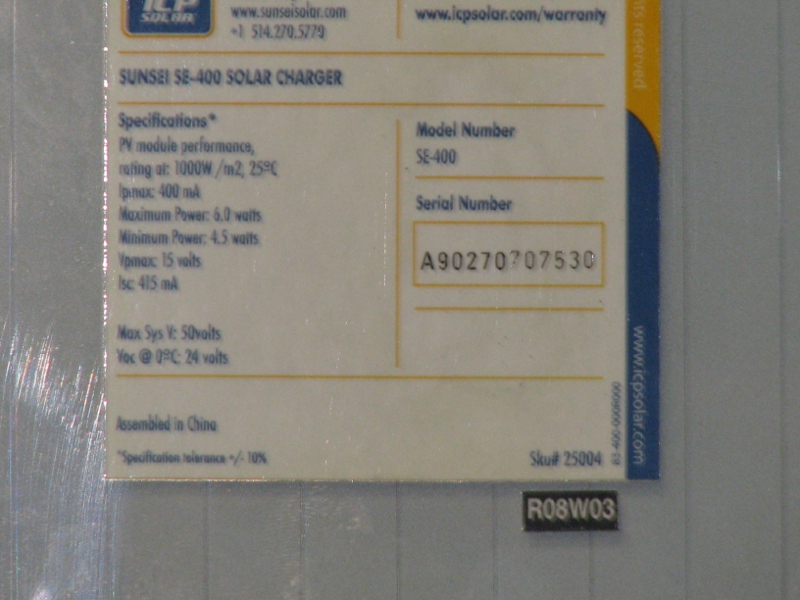
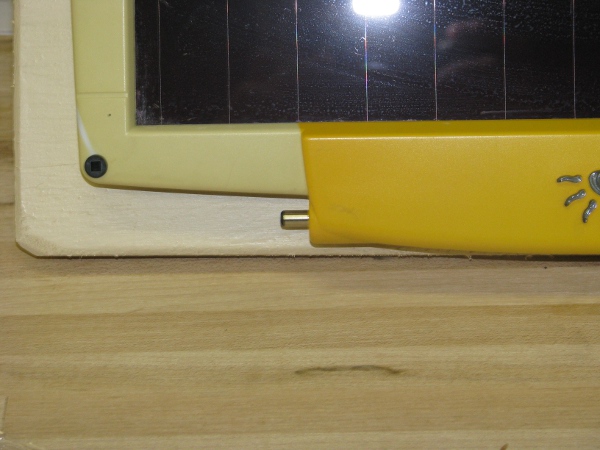
When I took the camera out of its plastic cover I noticed a voltage and amp rating near the power input. Here is a picture of our two current issues with power. First we need 5 volts, next we need 1.2 amps.

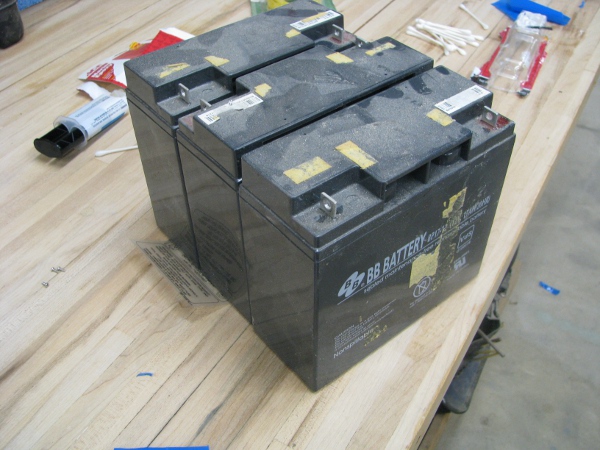
My first thought was to use batteries. Like wireless antennas, I have a lot of those. Here is a picture of some that may work well. I have no idea how long they would last and am not sure what voltage they are (This is a little embarrassing because I should know all about these as they are from UPSs for servers and I deal with them all of the time), so we are going to have to find that out too. In the picture there are three separate batteries, two of them are stuck together with a really sticky double sided cushioned tape.
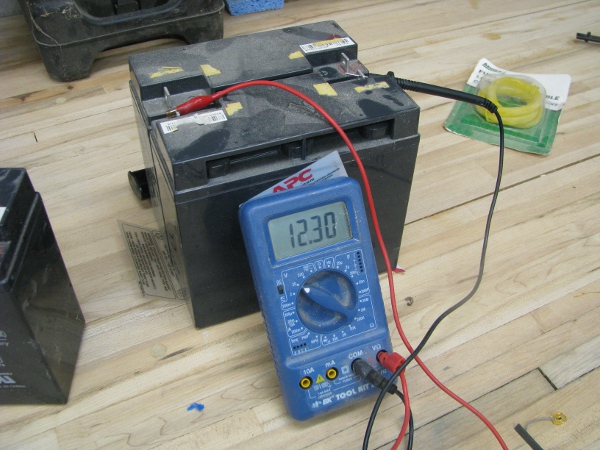
I am not sure if these are 6 volt batteries or 12 volts. Here I am checking one of them with a voltmeter.
Right in the middle of messing with these batteries I kept thinking to myself, “This really stinks. I don’t want to use batteries because they will die and then I will have to charge them.” This project is really fun, but I don’t want to end up with something I have to maintain every couple of days to get any use out of it. That is when I remembered that I have THESE!!!!! Two solar cells… And yes there are weather proof.
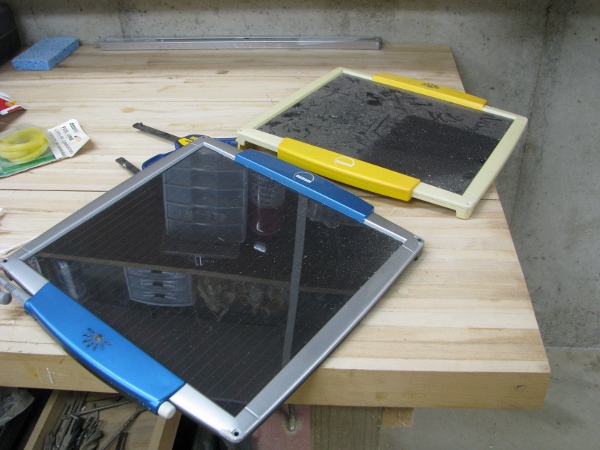
I got these solar cells from a customer of mine who used them on a project that only lasted a few months. They were sitting in a box in my basement for a long time. There are some problems though. I have no manual and don’t know much about them.
These panels operate in a pair. At least I know that much. On the back of one was this.
Looks like we have too much voltage and not enough amps. I really want to use these for this project, so I have to figure out what to do. At least I know this, we have 400 milliamps which is a third of the power rating on our adapter (1.2 amps). Lets see what that camera really needs for power.
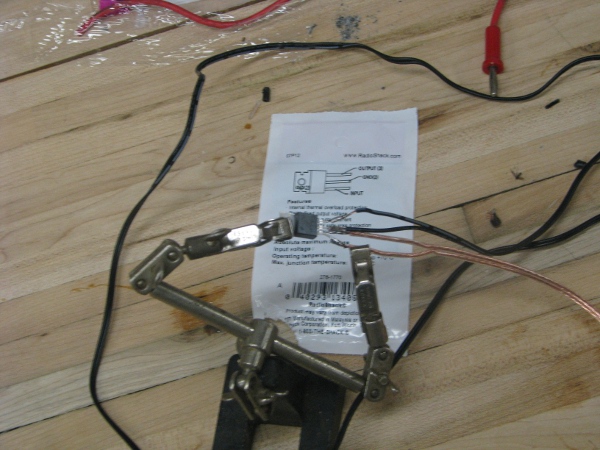
It is tough to see what is going on in the next picture, but what I have done is splice the positive lead of the power supply and put an amp meter in series (In the pic it is still set to volts, I will fix that before I plug it in).
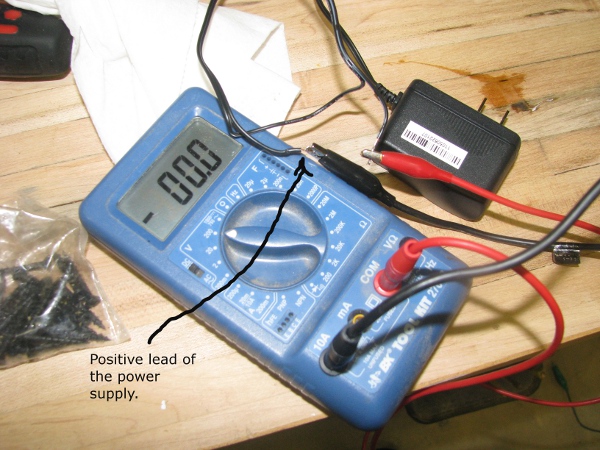
I now have to bring the whole shooting match up stairs again and set it up. When I set it up I placed the amp meter so that it will be in front of the camera so we can see it when I turn it on. That should tell us what current it uses when video and sound are streaming. Here is what we have.
It is .27 amps. That is 270 milliamps. We may be OK with the solar… yay!!!!. Let me see what is next? Oh… Right those solar panels. What to do about them. They are kind of dirty and cumbersome. Let’s clean those up.
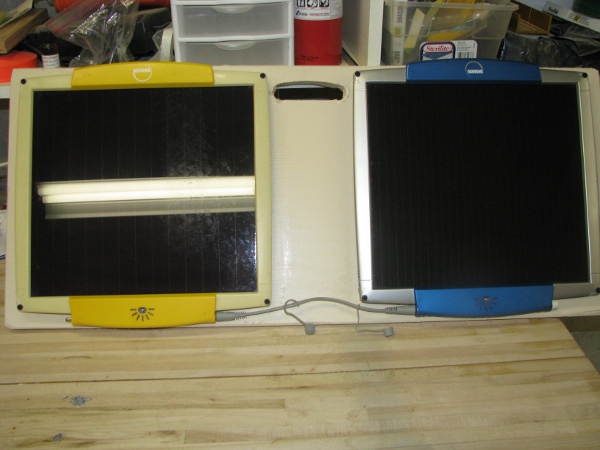
I have all sorts of wood in my workshop. I want to set these solar panels up in such a way that they would be easy to move around. Right now there are no handles on them. And because they work together I really need to have them on some sort of board. I do want it to be weatherproof, let’s see what I have for that. Oh.. Here ya go, some porch paint I have left over from my old house. After some sawing, sanding, drilling and painting, here is what it looks like drying off.

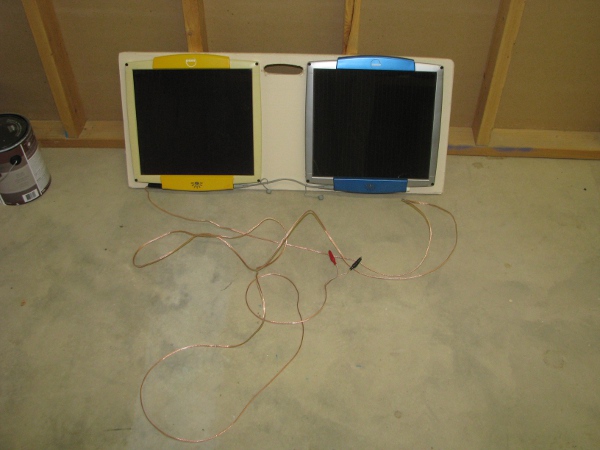
Then after a little positioning and a few deck screws, here is what the solar panel assembly looks like.
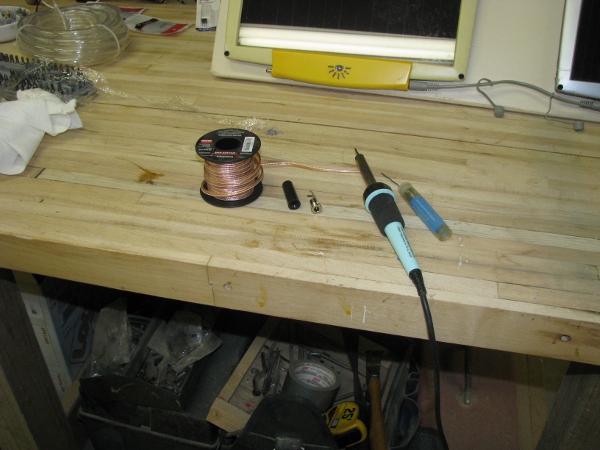
These are so cool, this isn’t the only project I will use them for I am sure. So now I want them to have a really long output leads with alligator clips on them. I first have to solve a problem. The units didn’t come with all of the cables, so I have to make an output cable. Here is the connector I am dealing with.
Well, I do have a solution for that. I have lots of wire, alligator clips that are like fifteen years old and just sitting in a box, and a power plug that will fit that I picked up at the Radio Shack.
It was a pain trying to solder that in place. I had to search around for my “helping hands”. I bought these twenty five years ago when I was a teenager. I replaced the normal alligator clips with these bigger clips that made it look more like robot hands rather than pinchers.
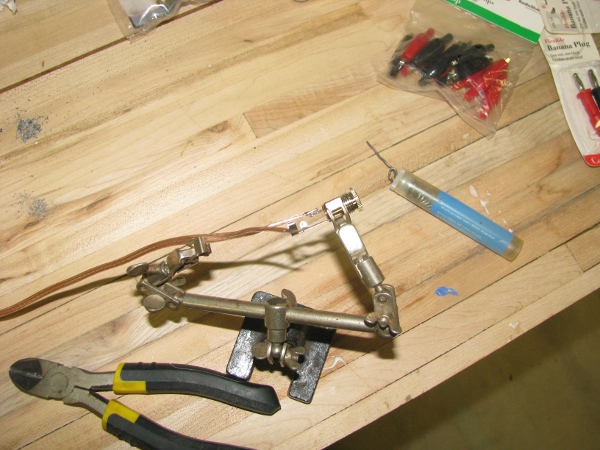
So with my helping robot monster hands I finish up the power cable for the solar panel assembly quickly. Here is what it looks like now.
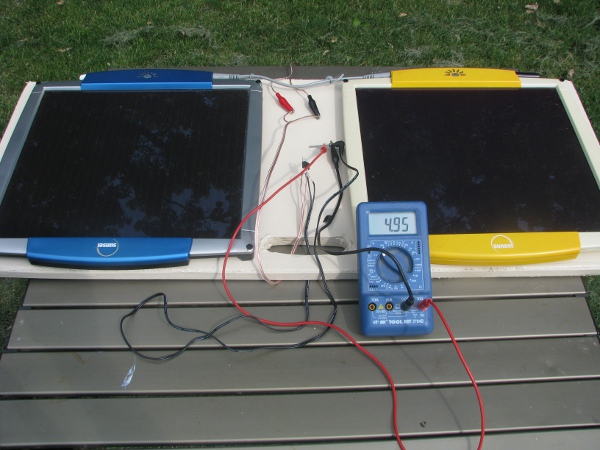
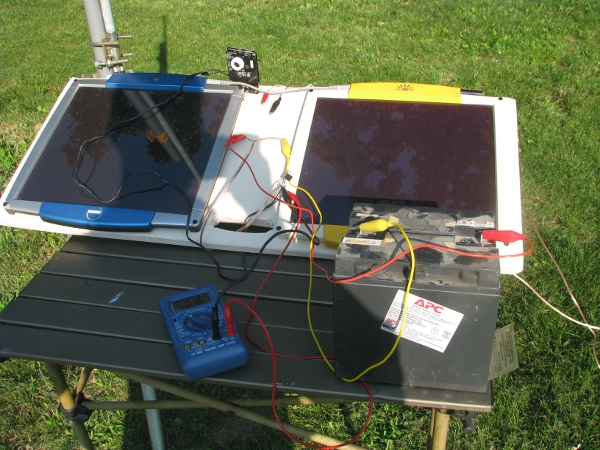
I really am exited now and want to see what these do in bright sunlight. I take my camping table out and set it up next to the pond. I grab the solar cell assembly place it on top and connect my voltmeter to see what we have. Here is the result.
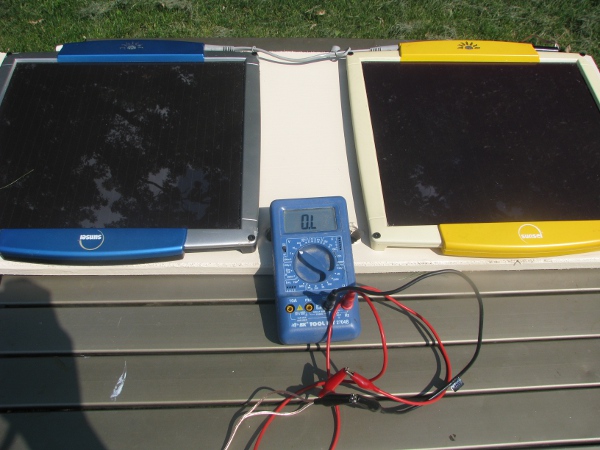
The reason I included this picture is because I thought for a moment my solar panels were dead. Before it went to “OL” it really looked like they weren’t working. I thought, “Crap! I did all this painting and mounting for something that won’t be working at all. Maybe this whole project is dead and I just wasted all of my time”. But before I completed that thought, I did notice the “OL” which means over load, so I turned the switch from 2o volts to the next setting. Here is what the actual output was in direct sunlight.
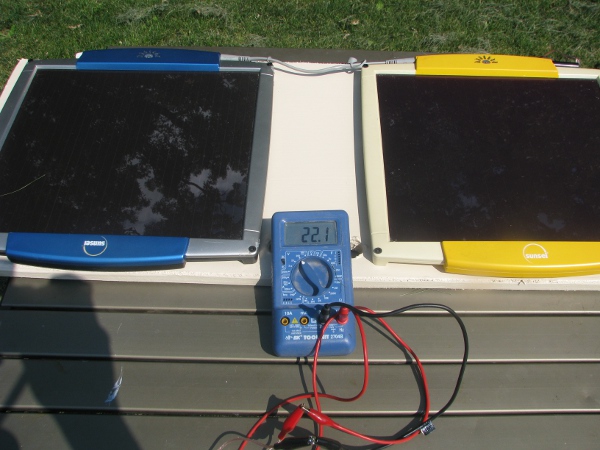
Now that is better, 22 volts. I can work with this. So far we know this about power and the camera. It consumes 300 miliwatts when running and streaming. It is also 5 volts. I need a voltage regulator, but I don’t know much about them and if I learned about them in college over 20 years ago I don’t remember it at all, so it is time to call mom (Yes, you read it right, my mom). My mother is an electrical engineer, her PhD thesis was on something called “systems theory”, she has numerous patents and she contributed to the RFC on token-ring ( for fun you can look it up and search for the last name “Kocan”). She has to know what the deal is with a voltage regulator. Or at least how to make one.
I have to take another side note about my Mom. Being a geek and having a mother that is an electrical engineer is very cool. When I was a kid my parents would never buy us batteries (I know what you are thinking, “What!, no batteries, what did you do?”, well I took apart old radios and pulled the transformers out of them and plugged them into 110 AC in the house). In one of my experiments I was telling her about how I got a DC motor to turn by introducing a diode into the circuit. I was so excited, I felt like I discovered gold. I did complain that it only turned slowly. She told me, “oh, Joe that is a half wave rectifier”, she drew me a schematic of a full wave rectifier and I built one and the motors in my experiments were flying!!!!. If you are interested here is a schematic of a rectifier.
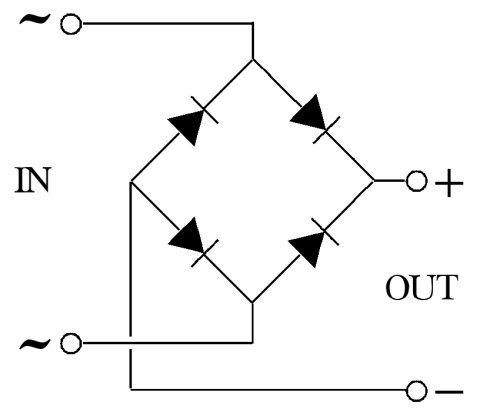
Now we won’t be using one of these (At least I hope not) for this project because everything we are dealing with is already direct current. But if it weren’t the rectifier schematic and my mom, I probably would be blogging about how fun it is to drive a cab for a living.
Where was I?, Oh.. That is right, I called Mom and asked her about using a 5 volt voltage regulator to deal with my power issues. She said it would work, but the problem is they dissipate the extra electrical power in heat and was thinking we would have a lot of waste. If you recall the label from he back of the solar panel had this in the writing, “Maximum power 6 watts”, “Minimum power 4.5 watts”. If I understand this correctly by using a regulator at 400 milliamps, in direct sunlight we will be losing 2.5 to 3 watts in heat generated by the regulator. Even if it does work, I am going to have to deal with that heat some how. – I am making a mental note that I may have to figure out how to step down that voltage without a regulator, but I really don’t’ want to do that now and hope that we don’t’ have to do that at all. For info on the math see here. Watt’s Law.
So I look up a voltage regulator on the Internet and find that Radio Shack has them. I have been going to Radio Shack for thirty years at least I just love it that they have all these components for my projects. Anyway a few minutes later I find EXACTLY what I was looking for… A 5 volt voltage regulator.
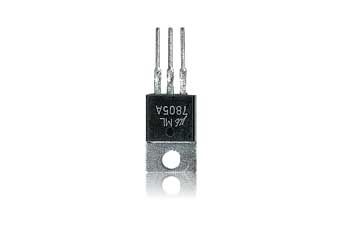
Notice the metal backing on this device with a hole in it. If you haven’t figured it out already, that is to bolt it to something big and metal to dissipate heat. Mom was right, all the extra power from the solar panels are going to be making this little thing hot. That means two things; wasting valuable electrons and also dealing with a hot hot part that can’t be next to the camera (In the final stage of the project, I was thinking I would just stick this right next to the camera when it was complete. That isn’t going to work).
For now I just have to see if everything we have will work. Instead of figuring out more about the voltage regulator and what really happens in a controlled environment, I decide it is time to connect everything up and bring it all outside by the pond to see what happens.
First I need to connect the voltage regulator to the solar panels. This was really easy with my helping “robot” hands and the back of the bag which tells you what to do. It isn’t the prettiest circuit I ever built, but I am so excited I just do what is required and not mess around with anything but the goal of getting everything outside in the sun.
I grab a roof mount bracket for the antenna and set it up next to the camping table and connect everything up. I have to be careful though. If I connect something wrong I could blow the camera. I learned something very early in my technical education, the saying goes like this, “Devices don’t work if you let the smoke out”. So to keep the “smoke” inside all of the devices involved, I will bring just the solar panels, the regulator and the multimeter out to test. After connecting everything up, here is what we have (First try by the way… not bad).
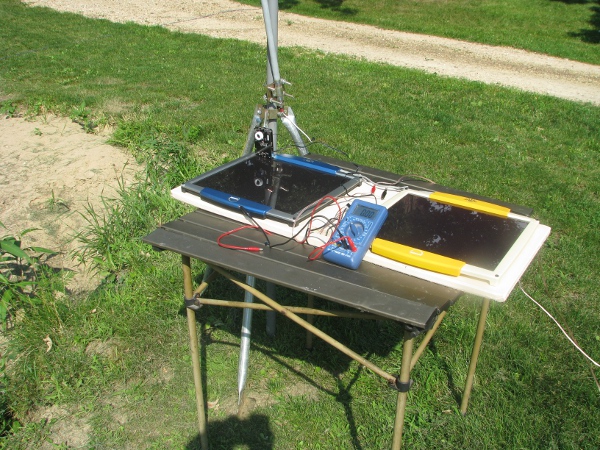
4.95 volts. I am totally exited now. We are so close everything should work. Here is what all things, antenna, solar, camera, everything so far looks like next to the pond on this camping table.
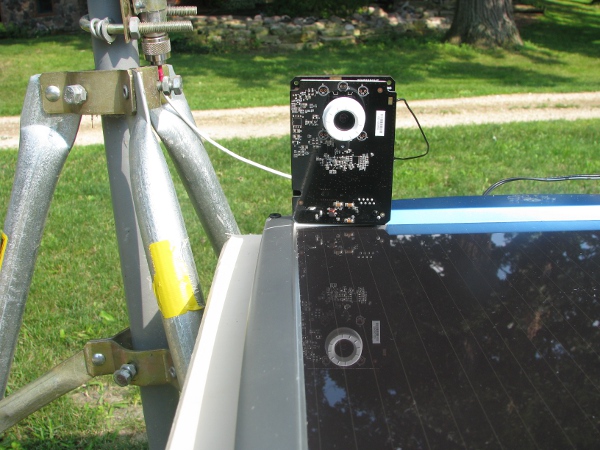
I connect everything up and I see lights on the front of the camera. That is totally a good thing at least it is doing something. Here is a picture of the camera from the front, it isn’t easy to make out, but the lights are ON!!!
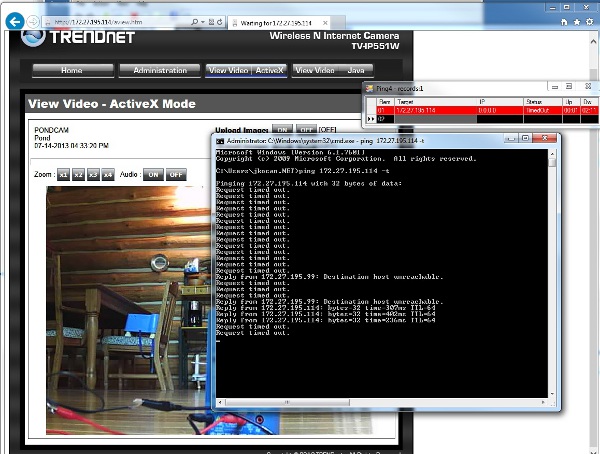
I run upstairs to my office (which is really far away). The camera is positioned to look right over the pond so I should be able to see it from my desk. And if I can see it from my desk that means it doesn’t matter where I am, if I have Internet connectivity I can see it no matter where I am on the planet). I get to my desk and login to my PC. I pull up the camera in a browser and…. Nothing…. I try to ping the camera… Nothing…. I can’t see it. It isn’t working at all. Then I notice something. It does come up and respond but only for a second and then drops. In this picture you can see the old image from the camera in the background (no POND!!! Grrrr!!!!). And in the black screen you can see me “pinging” the device, it does connect, but then dies. Where you see “reply from” that is good and the camera is available, where you see “request timed out” that is bad, the camera is dead on the network.
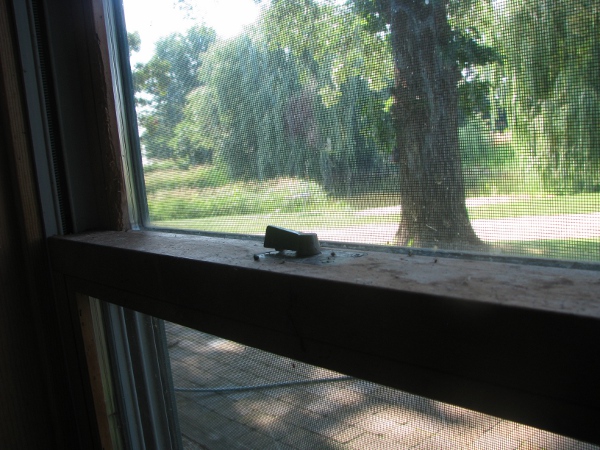
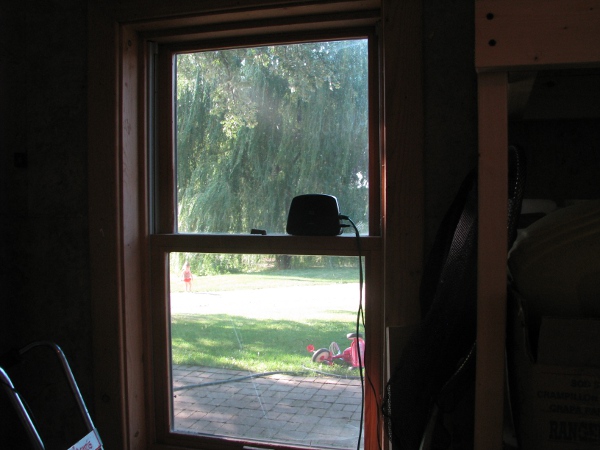
This is really disappointing. Now I am frazzled. I have to figure out where the problem is. It is one of two things; distance from the access point, or not enough power from those solar panels. I decide to eliminate the easiest one in a way that will just disrupt everything wireless in my house. I am going to move the access point. Right now it is on one side of the house. I don’t want to mess around I am going to put it on this window here, in the garage and the closest point to the pond.
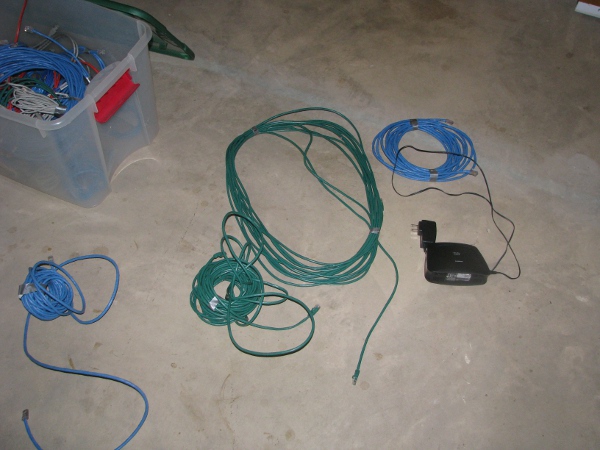
Now I should mention, another nice thing about being an IT guy is that, not only do I have wireless antennas and batteries and a bunch of stuff that makes projects like this possible, but I also have really long network cables. Which is exactly what I need now. A couple of these will do.
Now I am rushing because I know I am close and I am getting sloppy and just too excited. I want to see that picture of the pond, but I can’t. In my minds eye I see looking at through the camera and seeing my precious pond. I have to see RIGHT NOW if this is really going to work at all. It will be a total letdown if it doesn’t and the project just dies. So I connect up the first ethernet cable, the longest one I have. 50ft. It gets me to the door that leads from the basement to the garage. Here is where it is, the window you see through the door is where I originally wanted to put it.
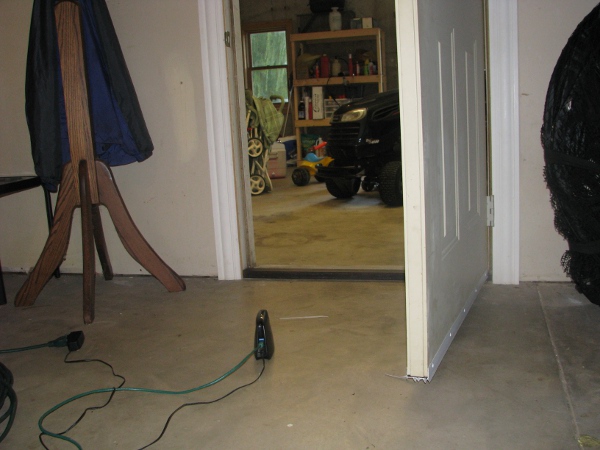
With the wireless access point here it still didn’t work. I thought it did, but it never was stable. So I connected a switch in middle (yes I could have used a coupler, but couldn’t find it) and moved the access point where it should be.
Now at this point, my whole wireless network in my house is a mess. My workshop is a mess. I have got cables running though the basement out into the garage, there is a camping table with a bunch of crap on it out in my yard. My home is on the market and we had a showing from 11AM until 2PM today and it was spotless. Between me and my kids, pretty much everything looks totally lived in only a few hours later, but I DON’T CARE, I am going to get this project moved to the next step one way or another.
With the access point in it’s correct spot I really should get a signal, but I go upstairs to my office and it is the same, nothing. I know I should at least have some sort of connectivity and I notice when I moved everything outside there was all sorts of stuff not right. The tiny connector on the camera for the antenna had been bent (whoops… I can’t blame that on my kids because they didn’t touch it), so I had to fix that. The power cable going into the camera wasn’t right so I had to fix that. When I finally got the camera to start running again, I ran upstairs to check it and I got this.
That is right, no picture. My kids were playing on the beach. I could hear them through the microphone, but totally couldn’t see anything. At this point I have no idea what is going on here. Did I break the camera? Does it need more power to get the camera working, is it too bright outside? I try turning off the sound in the software to see if it works. Nope.. Doesn’t help at all. Then I remember… I still have all sorts of 12 volt batteries, some of which still have a charge in them. It is super easy to bring one of those out to our camping table and connect it (way easier than moving my wirelesss access point, which I am totally irritated about having to move). So I do this:
As usual I am stuck doing what I didn’t want to do. I have to connect a battery for power. I have a battery connected to my stupid camera and I have moved my access point (two things I totally didn’t want to do) I am very irritated that it had to play out this way, but I don’t care at this point. I see lights on the camera, I run up to my office to see the video of my pond. And guess what? Sound… But no picture. Grrrr!
My sister Tess came over for dinner tonight, so I had to stop. I also had a customer problem that I had to get take care of. It is really late 11:48PM on a Sunday and I have to start an email migration for a customer tomorrow. Here is a summary of where we are right now:
1) POWER!!! – We still aren’t sure if we have any adequate power.
2) The camera may be broken, I have to bring it back into the house and retest it in a normal environment that I knew worked (remember I chopped up the power supply to make the cable to for the connection to the regulator, so I have to fix that). If the camera is really broken, I am not sure what I am going to do. I supposed I can call “TRENDnet” and see if they will send me another, but I will be sure to tell them that I “took it apart and cut cables, and was messing with it without a case on it by a body of water” heck that could be fun, I may just do a post on that conversation.
3) I still have to waterproof it and get it under water. I have some ideas, but no idea if they will actually work.
For now here are my final thoughts for this post:
– Hitting the road block of not seeing the camera from my computer at all was a huge problem moving forward. That is why I did all of that testing in the first post. I need to see that camera from the network to do anything meaningful. I have to speed up that troubleshooting process.
– To speed things up I need to get a computer out by the pond so I don’t have to keep running upstairs and waste time figuring out what the problem is (Plus it is far and there are a lot of stairs and it makes me tired, that isn’t fun). I need something that is right next to the camera and can see it through the wireless connection to make sure all things are fine while I am looking at it.
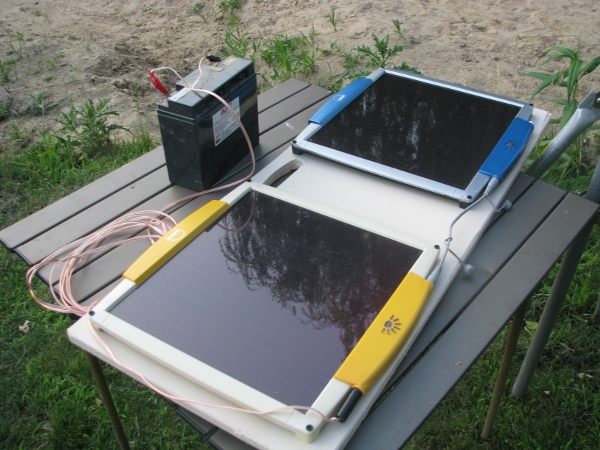
– I have a feeling I am going to have to learn how solar cells charge batteries. I don’t know if I need to put a regulator on them to make sure they charge at 12 volts only. Remember the solar cells power at 22 volts. I remember learning that if you charge a 12 volt battery at 15 volts, it charges faster, but I am not sure what would happen to a battery if you leave it for a few days connected to a solar panel that pumps 22 volts at 400 milliamps in direct sunlight. One thing is for sure, we will all learn how that works because this is how I left the solar cells, they are connected directly to a 12 volt battery charging it. I will take a picture if it melts (I really doubt it would melt though and expect the battery to be fully charged in a few days).
To continue reading see Post 3.

It is a lot to read but interesting.
All you do is read pops, this should be your favorite thing.
Yeah… It seems kind of long. But I figure someone may learn something from it.
The fact that you did all this blows my mind, and Mom is a bad ass.
Who has solar panels in their basement? Just power the camera with a small nuclear reactor. Sounds like you can build one of those too from the great depths of your basement. You’re like Iron Man! lol
If you’re still working on this project once the school years starts, I might ask your permission to present this blog to my science teachers so students can have a look. You’re touching on a variety of subject areas that are sure to interest them.
Keep up the good work!
That would be so cool if students actually read it and got something out of it. I will keep that in mind as I continue my efforts to complete it. It is good pressure to think someone may get some good use out of my antics.
I am riveted.