
OK… It is late on a Friday night and I do have to work tomorrow (The Friday I started this post was a week ago). I haven’t posted anything in several days as I got all in the weeds with a lot of stuff this week that just needed to be handled (I call that stuff “real work”). It is 11:47PM… BUT,… and this is a very important thing…I don’t have to be anywhere until noon tomorrow and my wife and kids have to wake up early because they have something going on that they have to get to… Sooooooo I can sleep in. As I calculate it, I have two hours tonight…. I better be sleeping in two hours… I may regret working on pondcam tomorrow if I don’t.
I have to get my head straight so I can prioritize what I am going to do. From what I remember here is where we are:
1) Pondcam (the camera) is still working. The light is goofy, but all other components are fine.
2) We have pondcam’s dock that is in the process of being built, but it needs lots of water bottles. I have been saving them, but it may be a while before I get enough to finish the dock.
3) We have serious water issues. It was incredible that water got into the camera housing and the camera still worked, but le’ts be real… That was really bad news. Instead of writing this blog post I should be turning on and off the light on pondcam while it is in the dark water outside and seeing if I can get a glimpse of a fish or something.
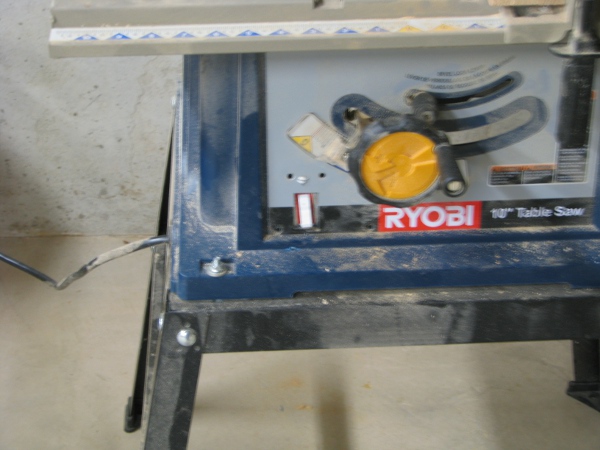
The day I wrote my last post (I dunno was that a year ago? It feels like one as so much happened since then) I was talking to my father and he mentioned that he was able to get a clean cut of plexiglass with a table saw. I do have one of those! But it looks like this right now.
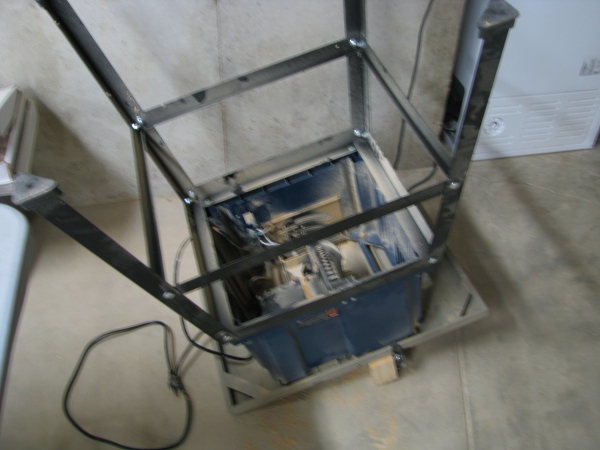
I know what you are thinking, “I can kind of make out the table… And there may be a saw at the bottom… But why is it upside down?”. Well… That is because I was all about to document my dads way of cutting plexiglass and I realized my table saw was broken. It is upside down because of this.
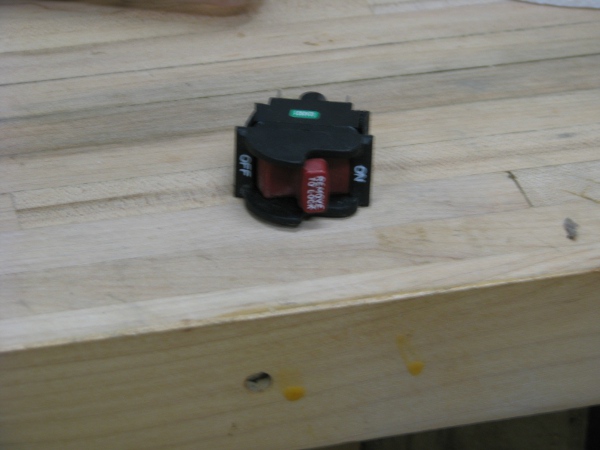
Yes.. That is the switch to the table saw and it is broken. How do I know it is broken? I didn’t actually have to do anything to figure that out. Why? Because my wife’s brother came over. My brother-in-law is just like me (And maybe you too) if you are working on something he just cant help himself, he has to take over. I was explaining to him that I wanted to figure out how to cut plexiglass in a very clean way, like they would do it in a factory. He humored me and was glad to watch, but when we turned the table saw on and it didn’t work, he took over. I pretty much just did what he said, we flipped the table saw over…. messed with power outlets, etc. etc.. He was underneath, messing around with stuff, before long he said, “dead switch”. Perfect! I thought, just don’t throw away the switch because I want to take a picture of it later. So that is what I have, a dead switch on my table saw.
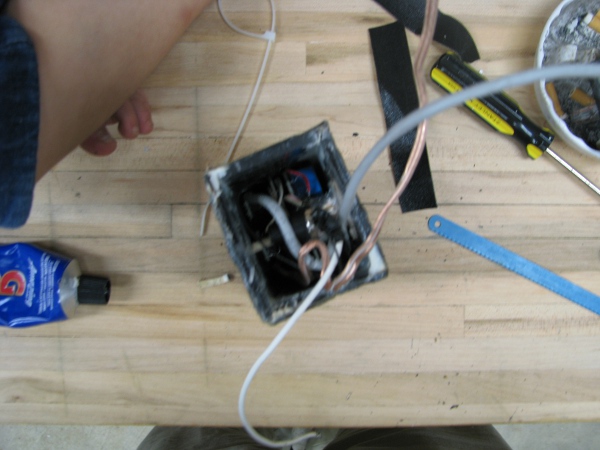
All I need is a simple switch to turn on the saw. I kind of want it to be safe, but to be honest the thing is so loud and I have watched a few table saw accident videos on youtube, I always unplug the darn thing when I am not using it. I look through my electrical bin and find this.
The only problem I have now is fitting it here.
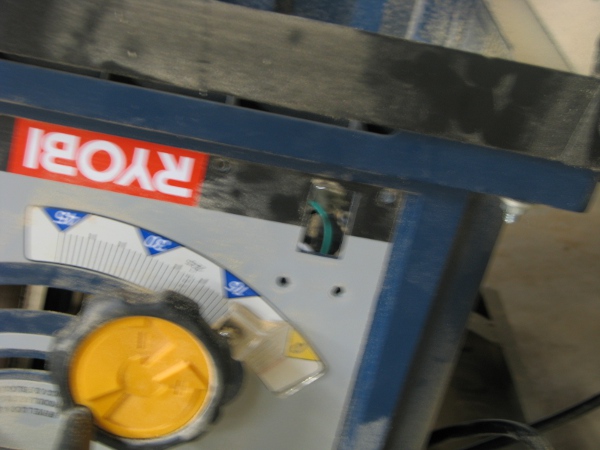
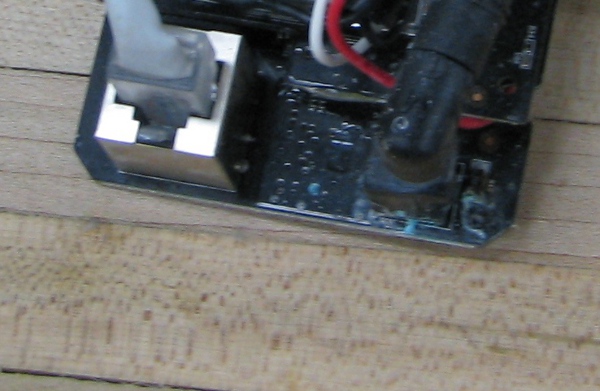
OK… It took some messing around, but this is what I ended up with.
I plugged it in and turned it on and it worked. I know I am a crappy dad and a crappy husband… But I don’t think I woke anyone up when I tested it at 12:30AM. It is late, I need to focus on something quieter.
I tried to do other things, but what I really want to do is cut plexiglass to figure out how to do it. I give up for the night. It is 1:31AM… I am bored because I can’t use my table saw because it is way too late…. I should just sleep.
——-
OK… After getting some rest I figure I really need to break open the pondcam. I know I drilled those holes into it and was thinking about patching it, but I don’t think that is the way to go. Here is what it looks like as I open the top. My two daughters wanted to help so they are sitting on the table… If you are wondering what is under my elbow in this picture, it is someone’s toes.
Oh… That is so ugly, but I love this camera. I have to do something for it to make it better . I pull the camera out and place it on the table, right away I notice some oxidation.
This is what happens when electronics get wet… Very bad. Here is what the case looks like all broken apart.
Pondcam makes me so happy that I want to do better by it. I am building it a nice pretty dock for it to rest from, I am doing my best to save all the empty water bottles so it will float comfortably on the water. I need to do more for pondcam.
Let’s do something I know how to do. The water made pondcam’s light a little gimpy… Let’s fix that, but how? Well, I have one of these!
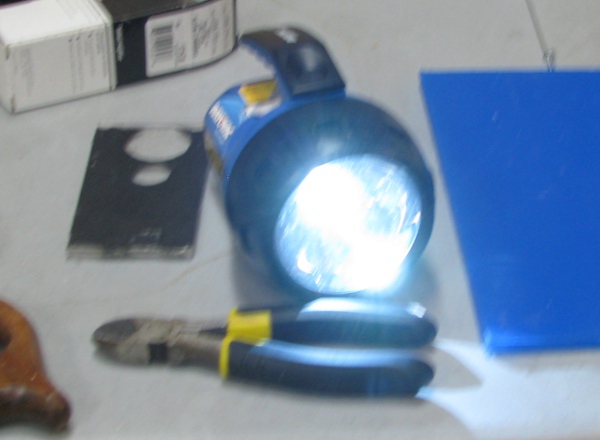
Now that really is my daughters flashlight. The other one I butchered for pondcam wasn’t her’s (I was lucky). I bought two of these, one for each daughter because I was expecting the power to go out this past spring and I wanted to make sure they had flashlights to make the power outage fun, instead of being just scared while my wife and I walked around the house trying to figure out what to do with no lights, no TV, no Internet. Well… the power didn’t go out this past spring, so my kids forgot all about them… lucky for pondcam.
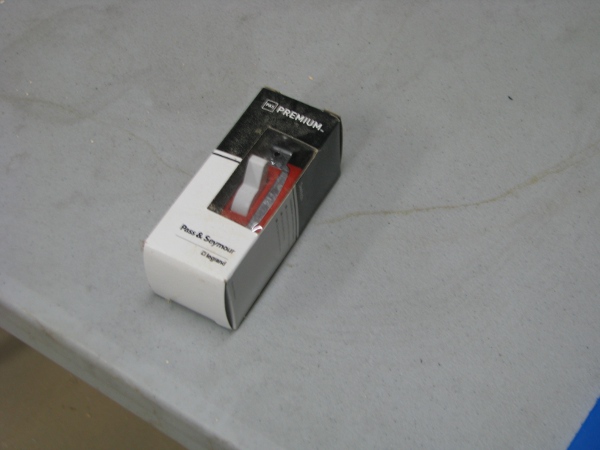
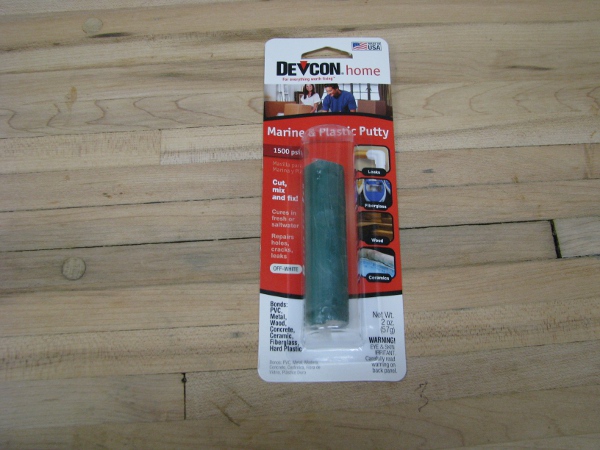
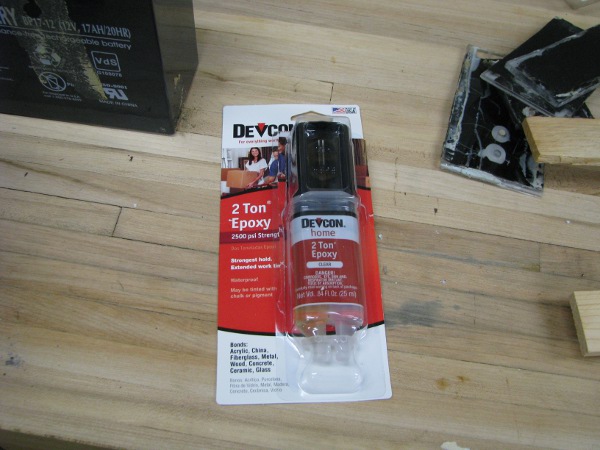
I don’t do anything with the flashlight right away. I don’t like ruining something that works perfectly well for something that may just fail altogether and fill up one of my mystery bins with parts from projects that don’t work, so I distract myself for a few minutes. I really need to figure out what to do with the case and waterproofing. Something went terribly wrong with our case and pondcam got all wet. I need to learn more about waterproofing. I want to try that other epoxy I bought. The other epoxy is like a clay. You mix it together by hand. If you don’t recall, here is a picture from an earlier post to remind you and me that I documented buying it for this project.
I open it up and slice off a small piece with a razor and knead it together and roll it into a line. I am going to join these two pieces together to see if that will hold. Here is what I want to do.
I am going to use that little clay looking strip to bond the edge of one of these gross old pieces of plexiglass to the other. And see what happens.
…
I won’t keep you hanging on this lame idea, I check the next day and it is totally useless. The wrong way to waterproof a plexiglass box, but at least I know that and didn’t waste any real time on it.
…
I get the nerve and finally pull apart the new flashlight. It is wider than the other flashlight, so I notice I have to trim it down or make the case a good amount wider. I also notice, instead of three LEDs there is just one big one. You can see it sitting in middle of the electrical tape in the picture below.

I take a hacksaw blade and cut away at the edges of the light housing to bring it down below 3″ in width to fit in a new case that will be 3″ wide (I will worry about making that case later as I don’t know how to cut plexiglass yet).
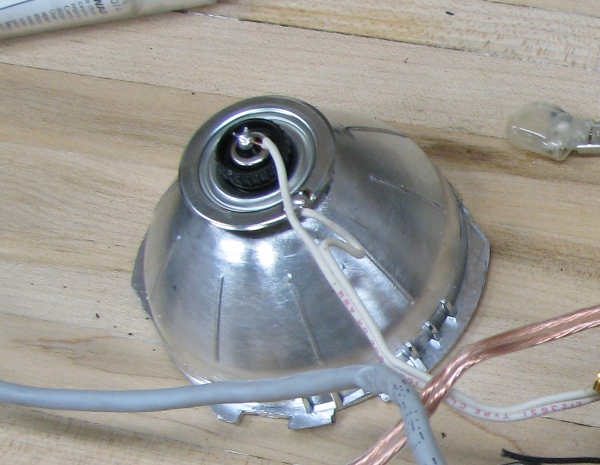
After trimming the case down and having pondcam all out of its home I started to think about something else. I am worried about our connections for the antenna. I pull a “N” connector off of a custom cable I made so many years ago and fix it to the edge of pondcam. Then I take a new mini wireless connector and attach it to the connector on the board.
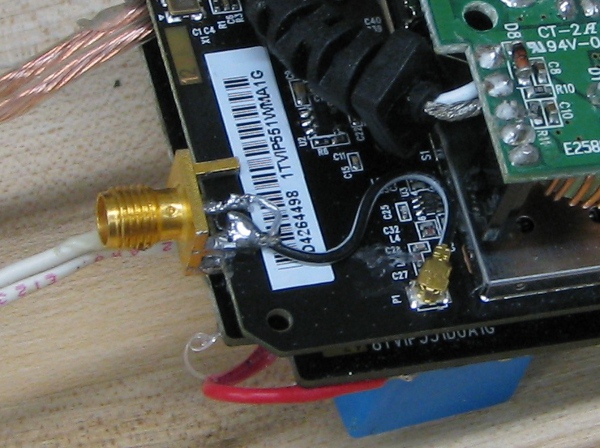
This will give me an easy way to attach and detach the antenna without worrying about that little connector getting broken. Hopefully the cleaner connection will give us less signal loss. If what I understand now about wireless is true we are only losing 1/2 db from that connection, but it could be less or more, but as far as I am concerned that is totally acceptable as we have lots of ways to boost signal in this house (Boy, I hope I don’t have to get into that).
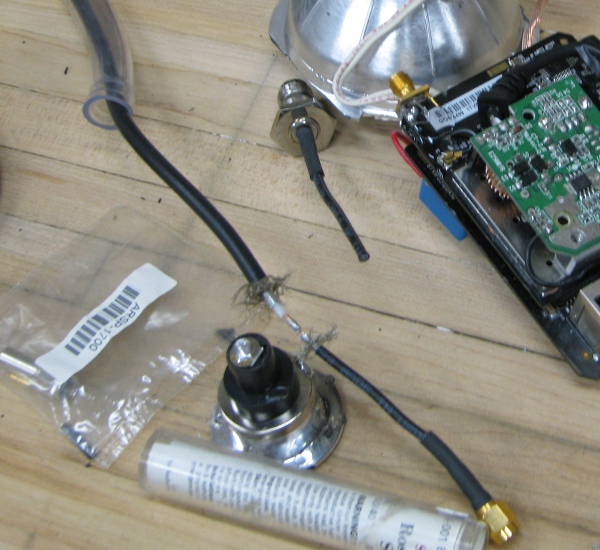
Now you may be thinking, “that is all fine and good but what are you going to connect to that?”. Well… I have to make a connection for it… Here is my plan to keep it as low loss as possible. I strip a connector that will fit that and connect it to a cable that is very similar to the thinner cable that goes up to the last pondcam antenna cable we used. Here is a picture to give you an idea.
I stripped the shielding wires back and soldered the inner wire. Then I putt a little glue over that connection and then a little electrical tape, then some aluminum foil, then some more electrical tape and now I have this.
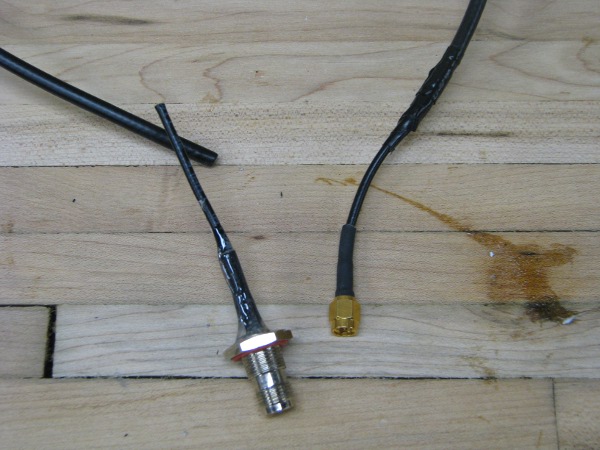
The connector to the left isn’t connected yet, but I show it so you have an idea of what I have to do later. After I push the cable through the new plastic hose, I will then attach it to that connector. Also, if you look carefully you will notice a coating of goop glue over the fragile parts on the silver colored connector. I want to avoid all of the wireless connectivity problems we may have had because of that broken connector. Remember this picture? Ouch.
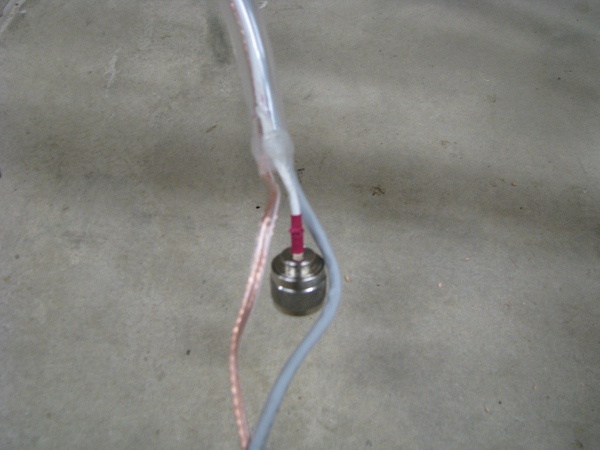
That sucker fell off when I brought it inside. I doubt it was even working when Paul and I were doing all of that testing. That was a totall setback and wasted a lot of my time and Paul’s time… I am careful with connections now because I want to make sure no one wastes time on stuff that isn’t teaching us something.
Note: I learned from a satellite dish installer that 90% of all service calls are because of bad connections. Good to know.
I pretty much had done everything I can to avoid messing with the table saw. I really needed time to think about how I was going to handle it safely. I fixed the table saw days ago and have just been doing other stuff because I don’t want to ruin the little plexiglass that I have left.
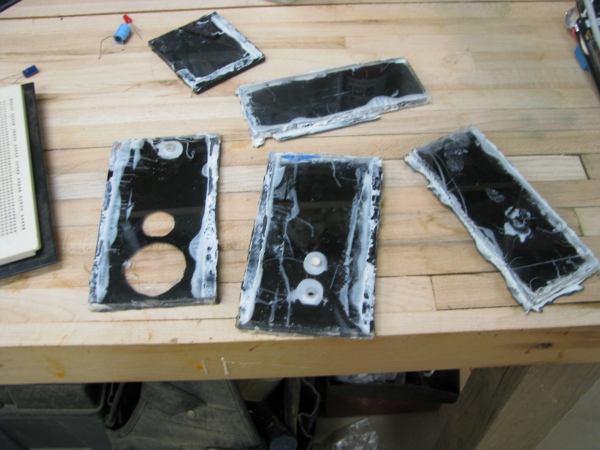
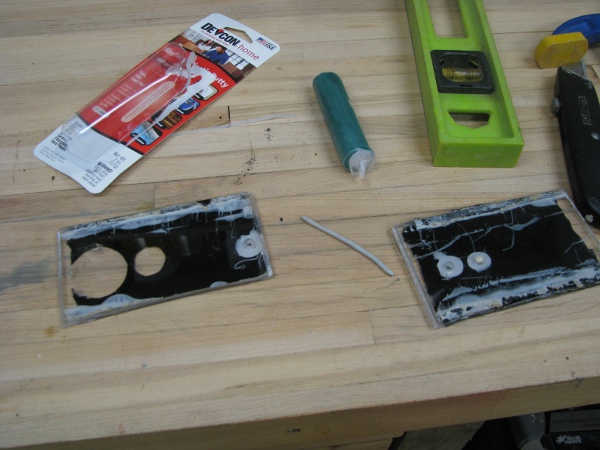
I want to make sure everyone is clear on what the problem is. Here is my picture from a previous post.
I can make it out now, but when I took the picture I wasn’t really thinking of it. Those pieces of plexiglass do not have smooth edges. If you look carefully, they aren’t even square. I cut them with a jigsaw. I really thought this would be OK weeks ago. I just figured I would just pick up the slack with extra glue. Let me use a term that I use with my six year old, “that was dumb dumb”, I should have known better. Pondcam got all wet because of my misunderstanding of how “easy” it would be to waterproof something.
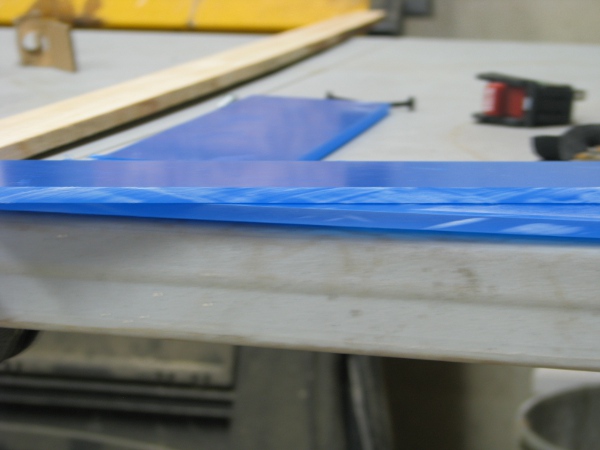
Let’s take a close up view of the crappiest part in the picture above. Tell me if you see something wrong with having this part fit into a box that will protect a sensitive piece of electronic equipment.
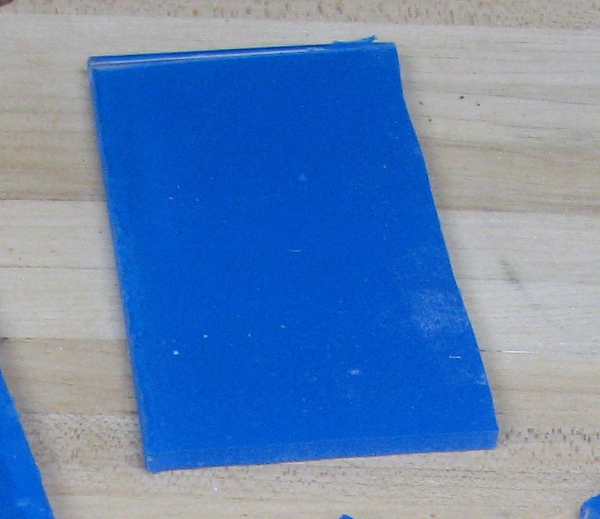
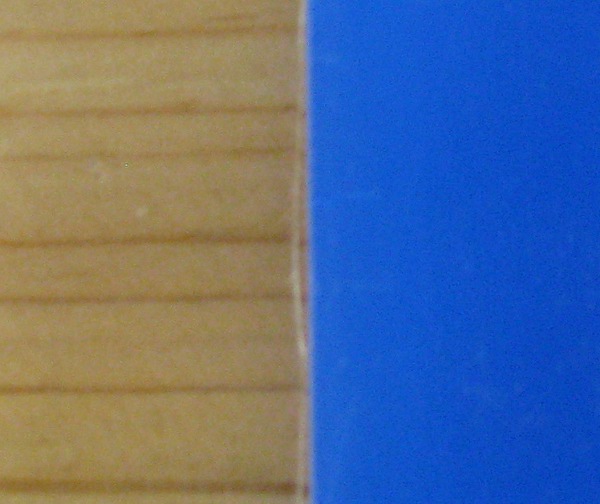
Oh… That is no good at all. I liked that a lot a few weeks ago, but now… Oh… I can see that is all wrong. That isn’t good enough for pondcam. I need to do better. Here is another picture to give you an idea of how bad a jigsaw was for cutting plexiglass. This is a picture of a jigsaw cut next to a clean factory straight cut. The clear side is the jigsaw the blue side with the cover still on it is the factory cut.
Pretty much every joint on the old pondcam case had weirdo gaps like that and all over the place. That is what I have to fix.
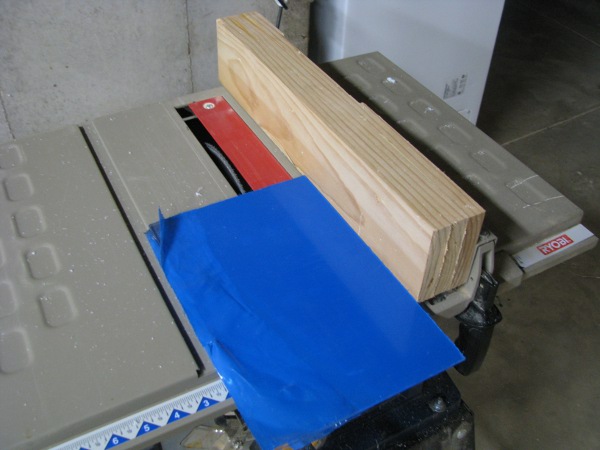
So I finally bite the bullet and I carefully measure 3″ with my table saw and make my first cut.
After it is done, the edges are straight, but they totally have some melty crap on them and are rough. I do the first thing I think of and start sanding the edge with 100 grit sandpaper. I notice a big difference and can see I am getting somewhere right away. If you look at the picture below you can see that the top wasn’t sanded and was straight off the saw, but the bottom looks much better.
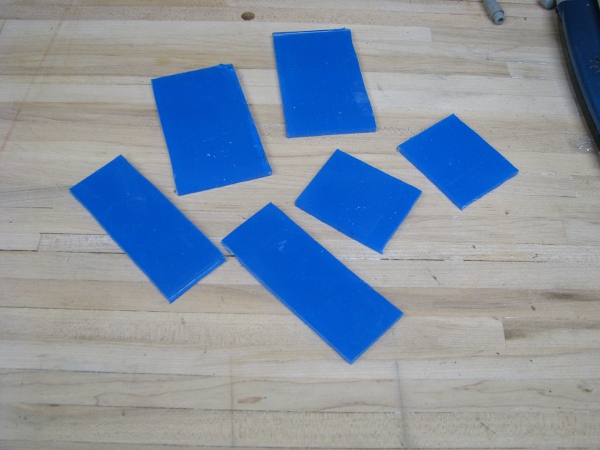
While I am messing around with this I want to get something else going. I did have to go to the hardware store to get more plexiglass. I bought every last bit they had (no big pieces), the guy made me a deal, he said, “Two bucks”. I said, “No! one fifty!”, actually I didn’t’ say one fifty, I said, “OK”.
While I was there I really wanted to improve on all things waterproofing. I put a bunch of different types of glue in my cart (When I read the ingredeients they have the same stuff as goop glue and the same warnings, but I didn’t read them until after I got home, so I didn’t know I was buying stuff I already had, some of them had better spouts than the goop globber, so I was pretty happy). In the next isle I came across this.
Oh yeah… that is right… 2 Ton Epoxy… I looked at all of the “marine” epoxies in the same isle, but I didnt’ care, they all weren’t worth anything to pondcam. I wanted this stuff. It would cure clear, it should be perfect. I can’t let it touch any of our precious plexiglass for pondcam’s case so I have to test it first. Here is a picture.
So I grabbed a gross piece of old pondcam’s case and sanded it off, then placed it on top of another piece of old pondcam case.
A couple of days later it was strong. Really strong. I broke it when playing with it (I was planning to put one of our batteries on it for a picture, then it broke, I didn’t get the picture, but I did get the idea…. It is pretty strong and a much better epoxy than then “marine” epoxy that I bought becauase of the label (I know… Irony… I bought this one because it said “2 ton”… sue me then).
………
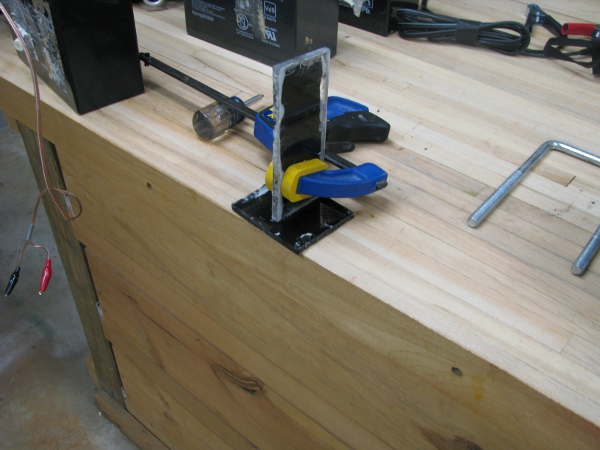
All things are going fine with pondcam and then something very interesting happens while I am working on it. I take this picture.
Now I know what you are thinking. You are thinking, “Why did you take a picture of that?”. Well it is because I actually need my multimeter on site for the first time in 23 years. I got a call from a customer and he is really ticked off. I have a conversation with him and I realize pondcam has to deal without a multimeter for a bit as I need it for my real job. Poor pondcam.

Recent Comments